System Configuration and Setup 2-17
4.
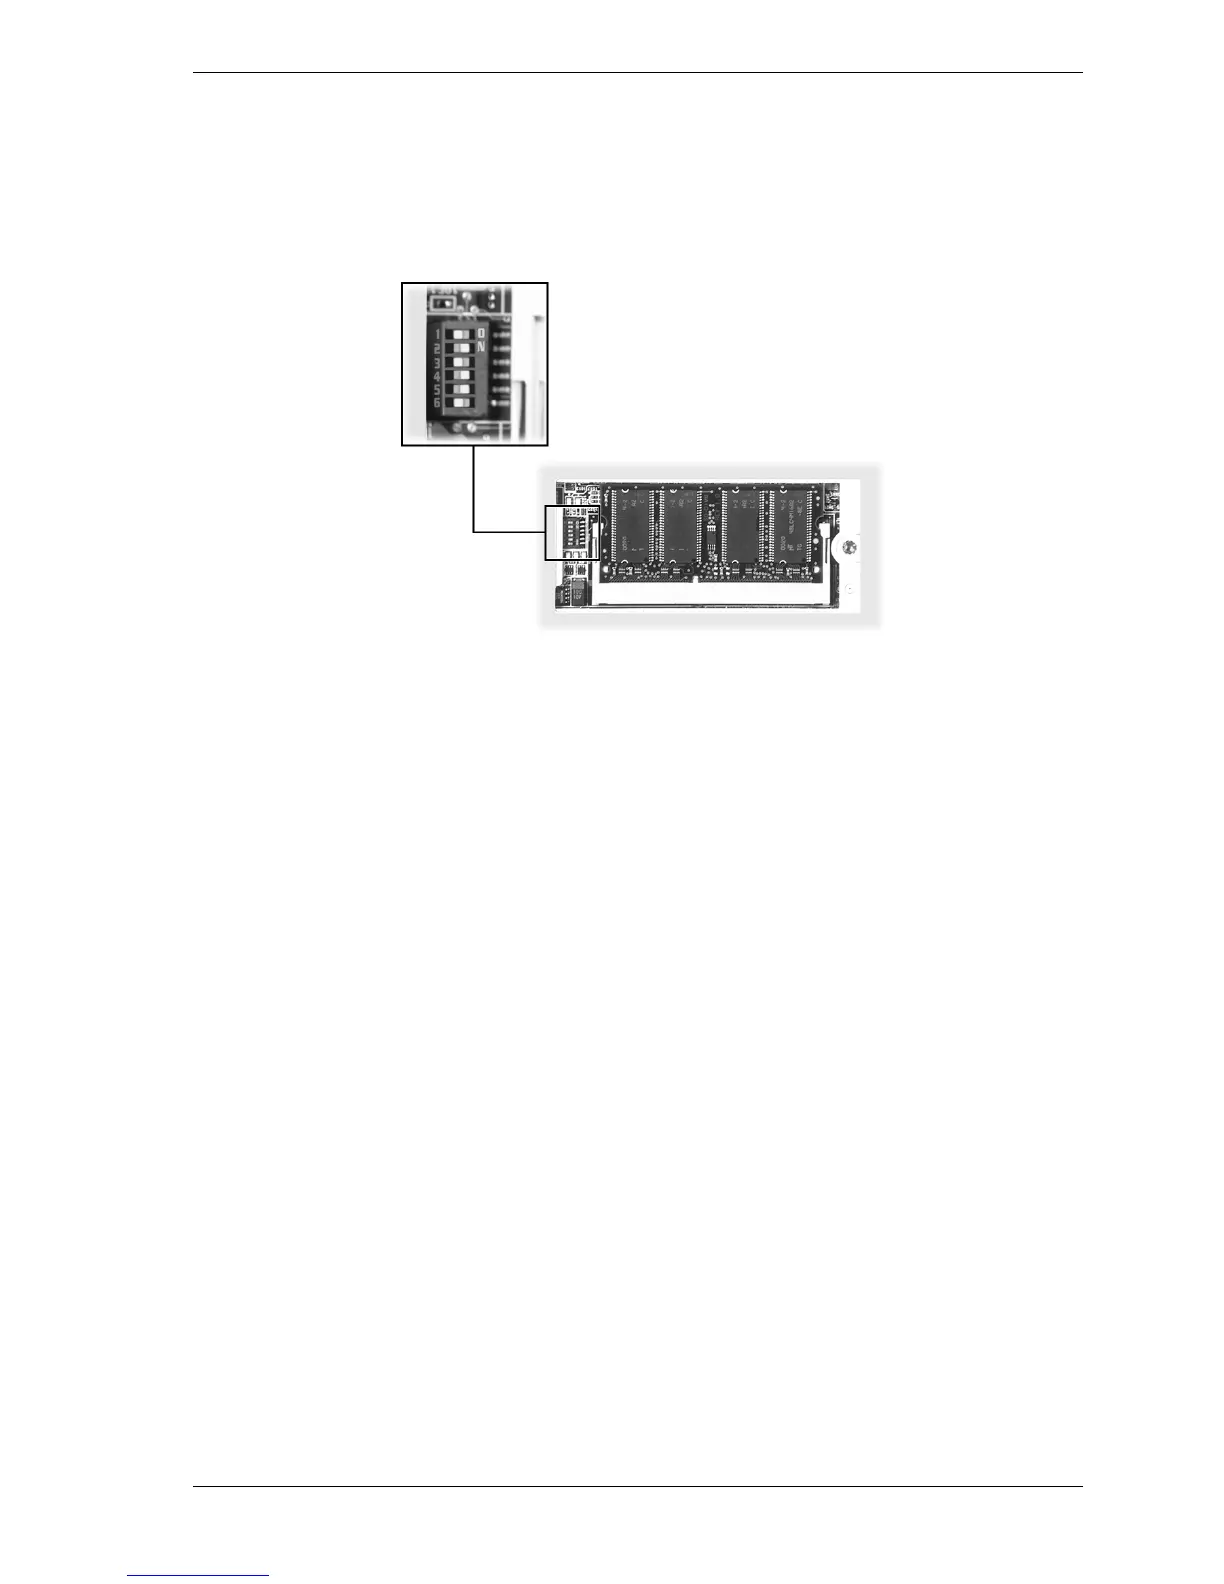
Check and set the DIP switch as necessary (see the following figure for switch location).
! Use a ball point pen to slide the switch to the desired setting.
! If setting for BIOS Flash, set switch 5 to its OFF position.
Default switch settings
5.
Replace the memory bay cover and screw.
6.
Turn over the notebook.
7.
Continue to “Performing the BIOS Update.”
Performing the BIOS Update
Use these steps to perform the BIOS update.
1.
Before you begin, do the following.
! Connect the notebook to AC power and power on the notebook.
! Configure the Boot Device Setup to boot from a diskette.
! Remove any bootable CDs from the CD-ROM drive, if connected.
! Document all customized BIOS settings.
2.
Power on the notebook with the BIOS Update diskette in the drive. The computer boots and
automatically loads the utility. A message similar to the following appears.
The NEC BIOS Update Utility should not be used to modify the BIOS in a Versa system
which is docked. If your Versa is docked, please exit the BIOS Update Utility, power down,
and undock your Versa before running the utility. Plug in your AC cable before restarting the
flash utility.
3. Press
Enter
to continue.
The utility checks the currently installed BIOS version and the diskette’s BIOS version. The
Main Menu appears.
4.
Use the arrow keys to highlight the “Display BIOS Version” option on the Main Menu. Use
this option to check the currently installed BIOS version and the version of the new
replacement BIOS. Press any key to return to the Main Menu.