Disassembly and Reassembly 3-5
Hard Drive
Remove the internal hard drive as follows.
1.
Save any open files, exit Windows, turn off notebook power, unplug the power cable, and
disconnect any peripherals.
2.
Close the LCD panel, turn over the notebook, remove the secondary battery, and locate the
hard drive bay cover.
Hard drives on earlier notebooks might not be accessible from the bottom. If so, remove the
top cover assembly to access the hard drive from inside the notebook. See “Top Cover
Assembly” later in this section for removal procedures.
3.
Remove the two screws securing the cover. Slide the cover out of the notebook.
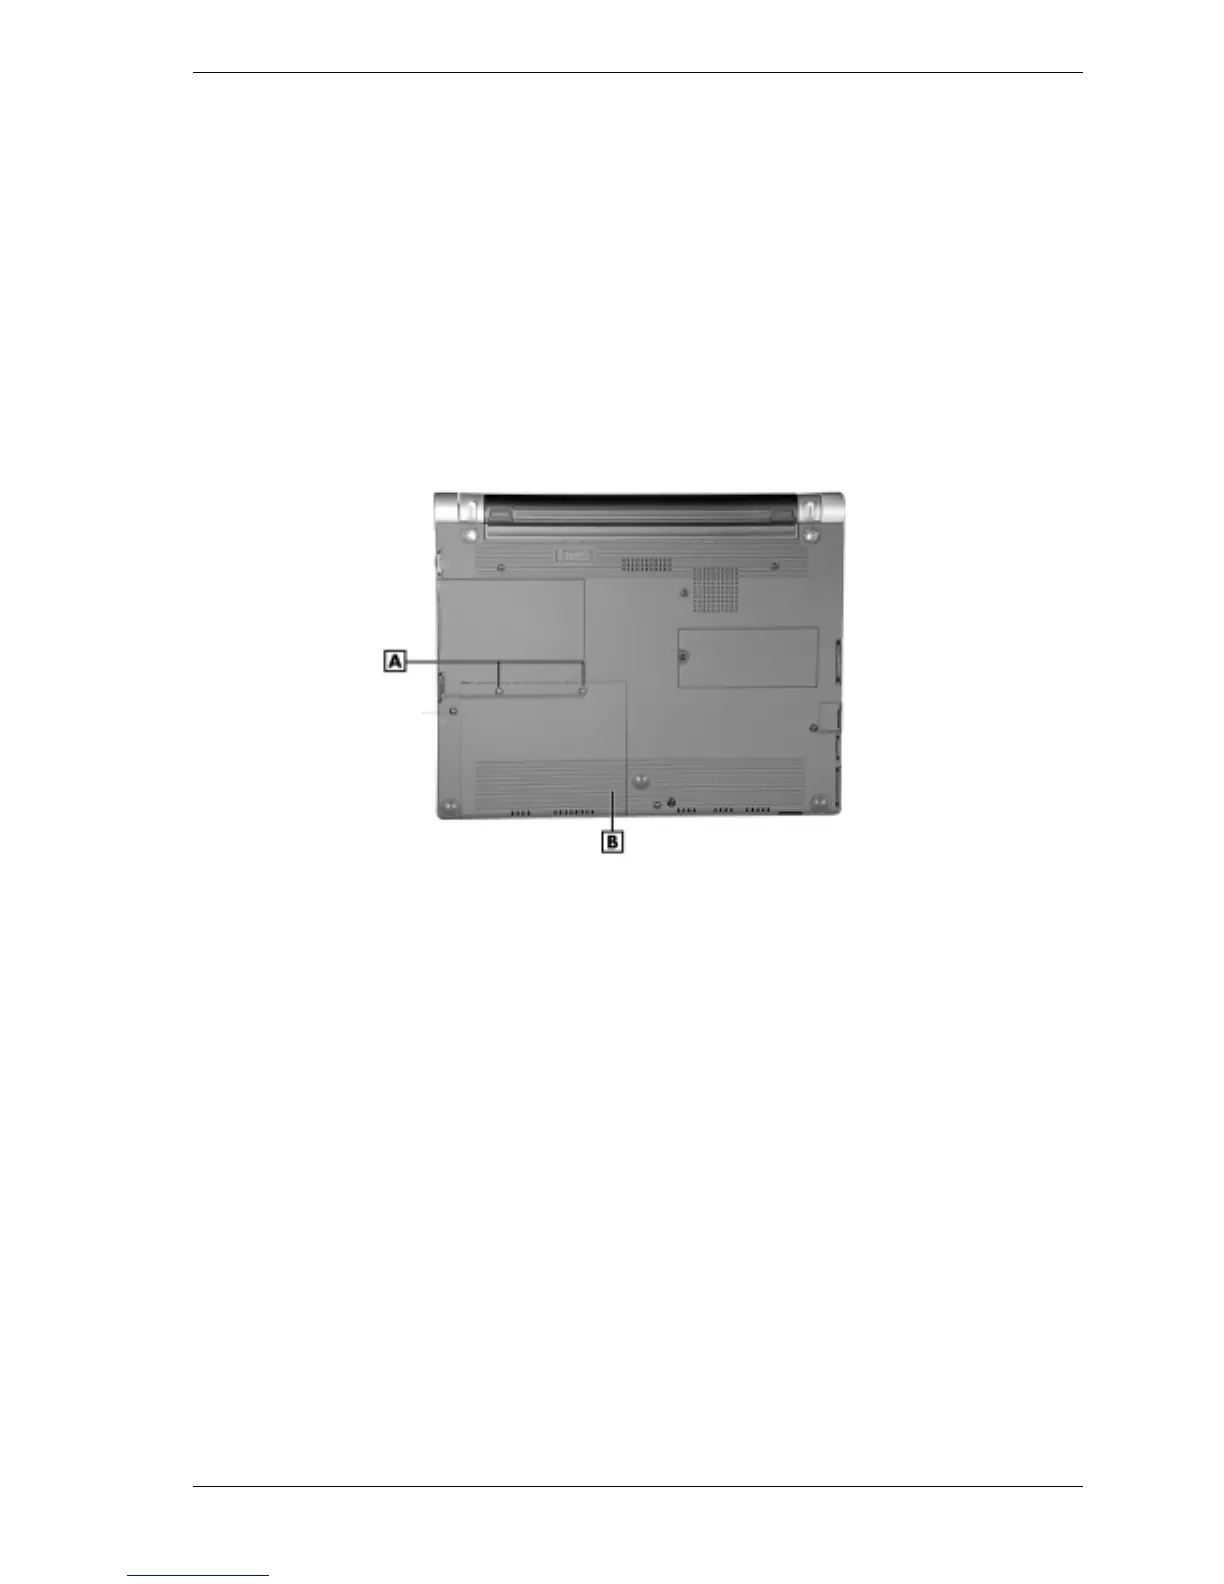
Removing the hard drive bay cover
A – Hard Drive Bay Cover Screws (2) B – Hard Drive Bay Cover
4.
Carefully unplug the hard drive cable from connector P6 on the main board.
5.
Grasp the pull tab on the hard drive and carefully pull up until the hard drive is released
from the bay.
6.
Remove the hard drive from the bay and set aside on a static-free surface. Handle the hard
drive by its edges to avoid squeezing the top and bottom of the drive.