3-6 Disassembly and Reassembly
Keyboard
Remove the keyboard assembly as follows.
1.
Save any open files, exit Windows, turn off notebook power, unplug the power cable, and
disconnect any peripheral devices.
2.
Close the LCD panel, turn the notebook over, and remove the secondary battery.
3.
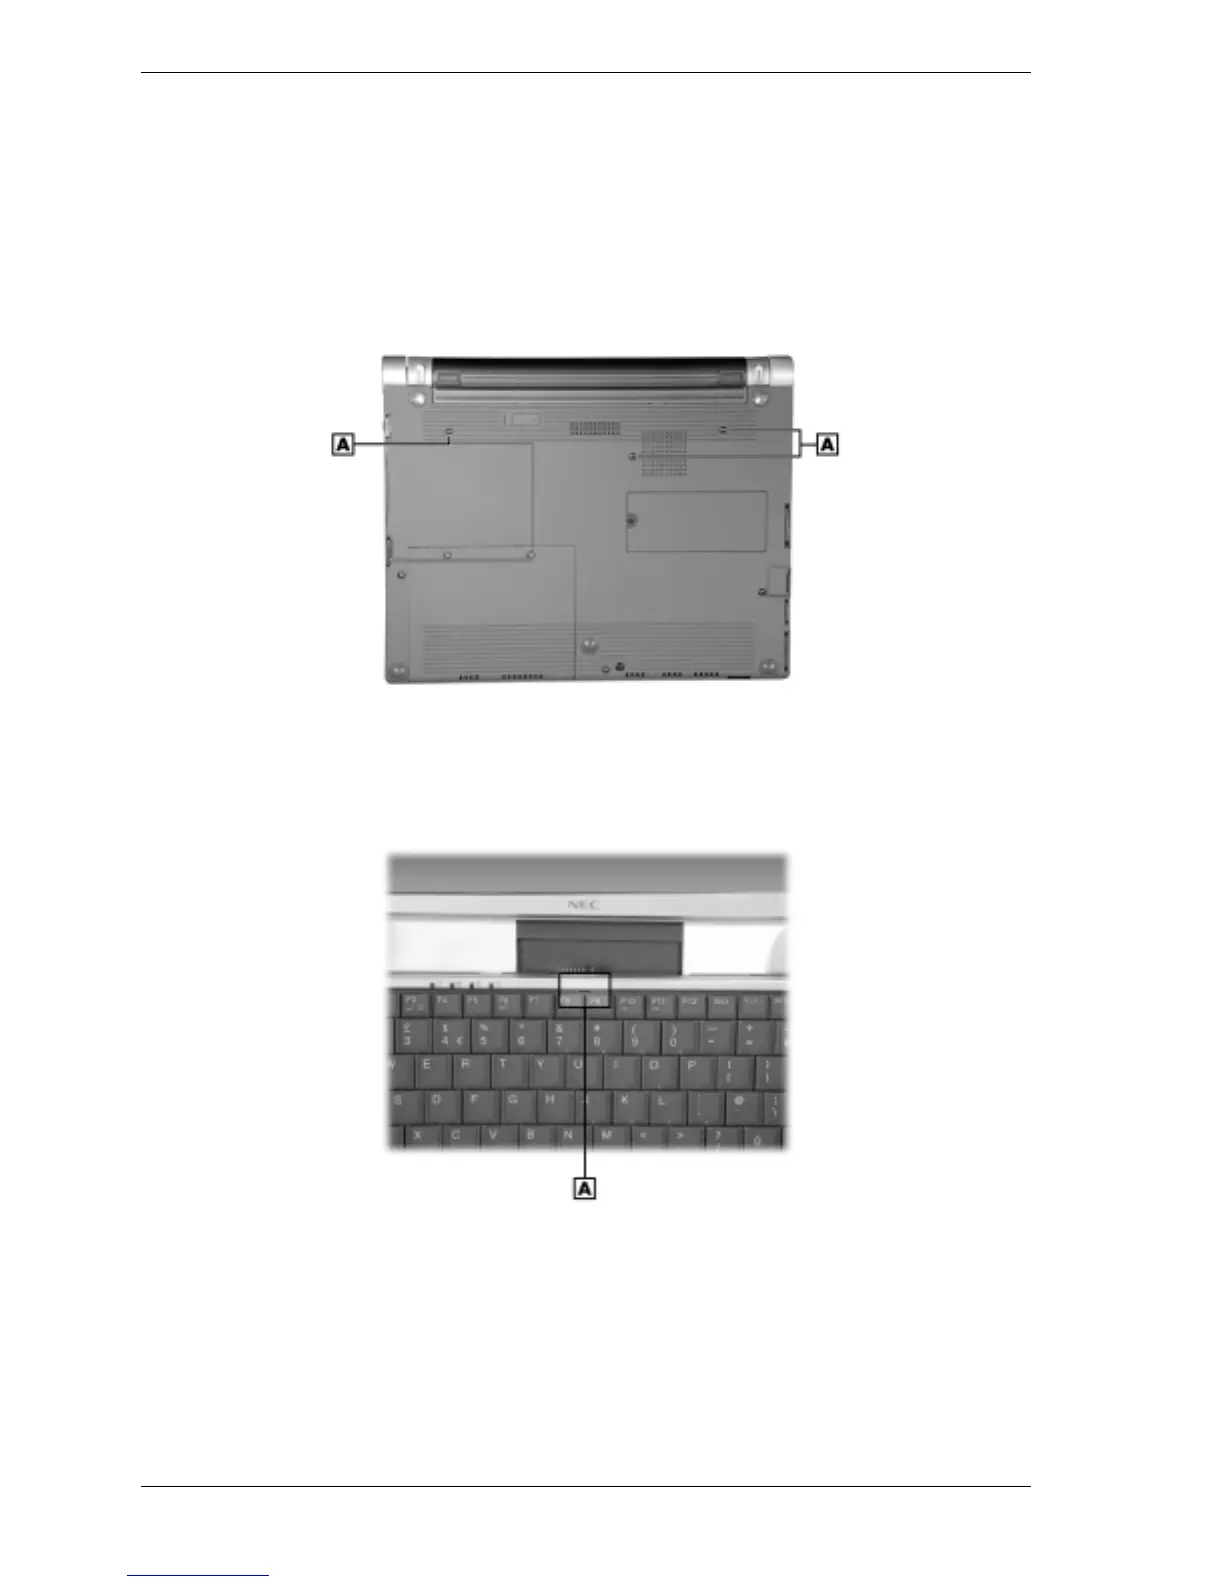
Remove the three screws holding the keyboard in place.
Removing the keyboard screws
A – Keyboard Screws (3)
4.
Turn the notebook over, open the LCD panel, and locate the slot on the keyboard above and
between the F8 and F9 keys.
Removing the keyboard
A – Keyboard Slot
5.
Insert the blade of a small flat-blade screwdriver into the slot and pull up on the keyboard
enough to gain access to the keyboard cable.
6.
Use care in this step to avoid damage to the keyboard cable clamp. Release the keyboard
cable from main board connector P8 by gently grasping the cable clamp at the left and right
corners (nearest the cable insertion point) and pulling up on the corners (the clamp pivots up
at an angle). Slide the cable out of the connector and set the keyboard aside. Press the clamp
down on the connector to avoid breaking the clamp while disassembling.