Nedap SmartFlow / Installation manual
Version 01.001 / 2021 / EN
29
Dairy Farming
4. At first installation the Zero Point Test must be run for all SmartFlow milkmeters. After the initial Zero Point
test all or only a selection of SmartFlow milk meters can be tested:
a. All SmartFlow milk meters: Click on the Start all Zero Point Tests button.
b. One or multiple SmartFlow milk meters: Click on the Start Zero Point Test button of the milking
point(s).
The message Zero Point Test in progress .. is displayed for all milking points that are under test.
The progress of the 5 runs of the Zero Point test is shown between brackets (x/5).
5. If the test needs to be stopped while running, click on the Cancel button.
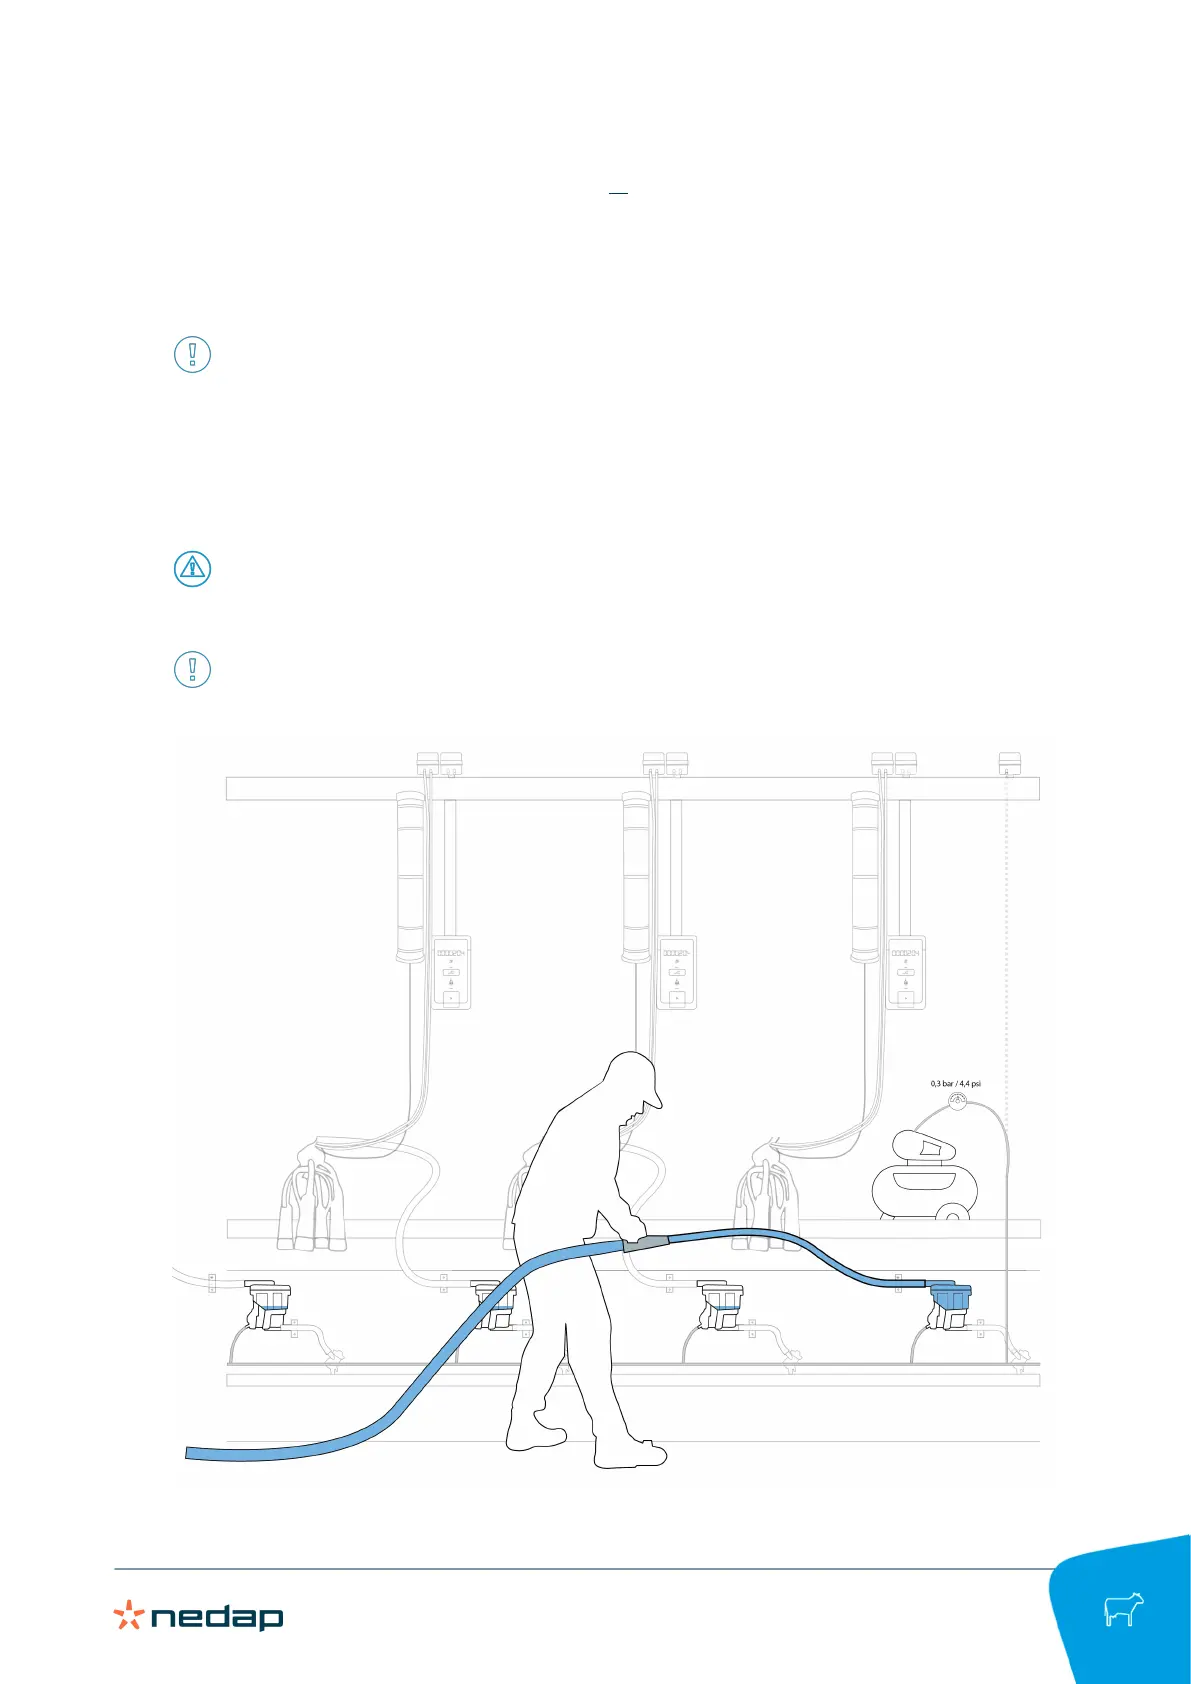
Execute the Zero Point test in the milking parlor:
1. Decouple the milk inlet tube from the milk claw.
2. Install an air compressor on the vacuum inlet (max. 300 mbar).
Warning
Do not exceed this pressure to avoid damage to your installation!
3. Pour drinking water in the milk inlet tube (minimum flow of 5 L/min and for at least 5 seconds)
The temperature of the drinking water must be ca. 10 °C (50 °F)
Figure5:Pouring water in the milk inlet tube