Page 8
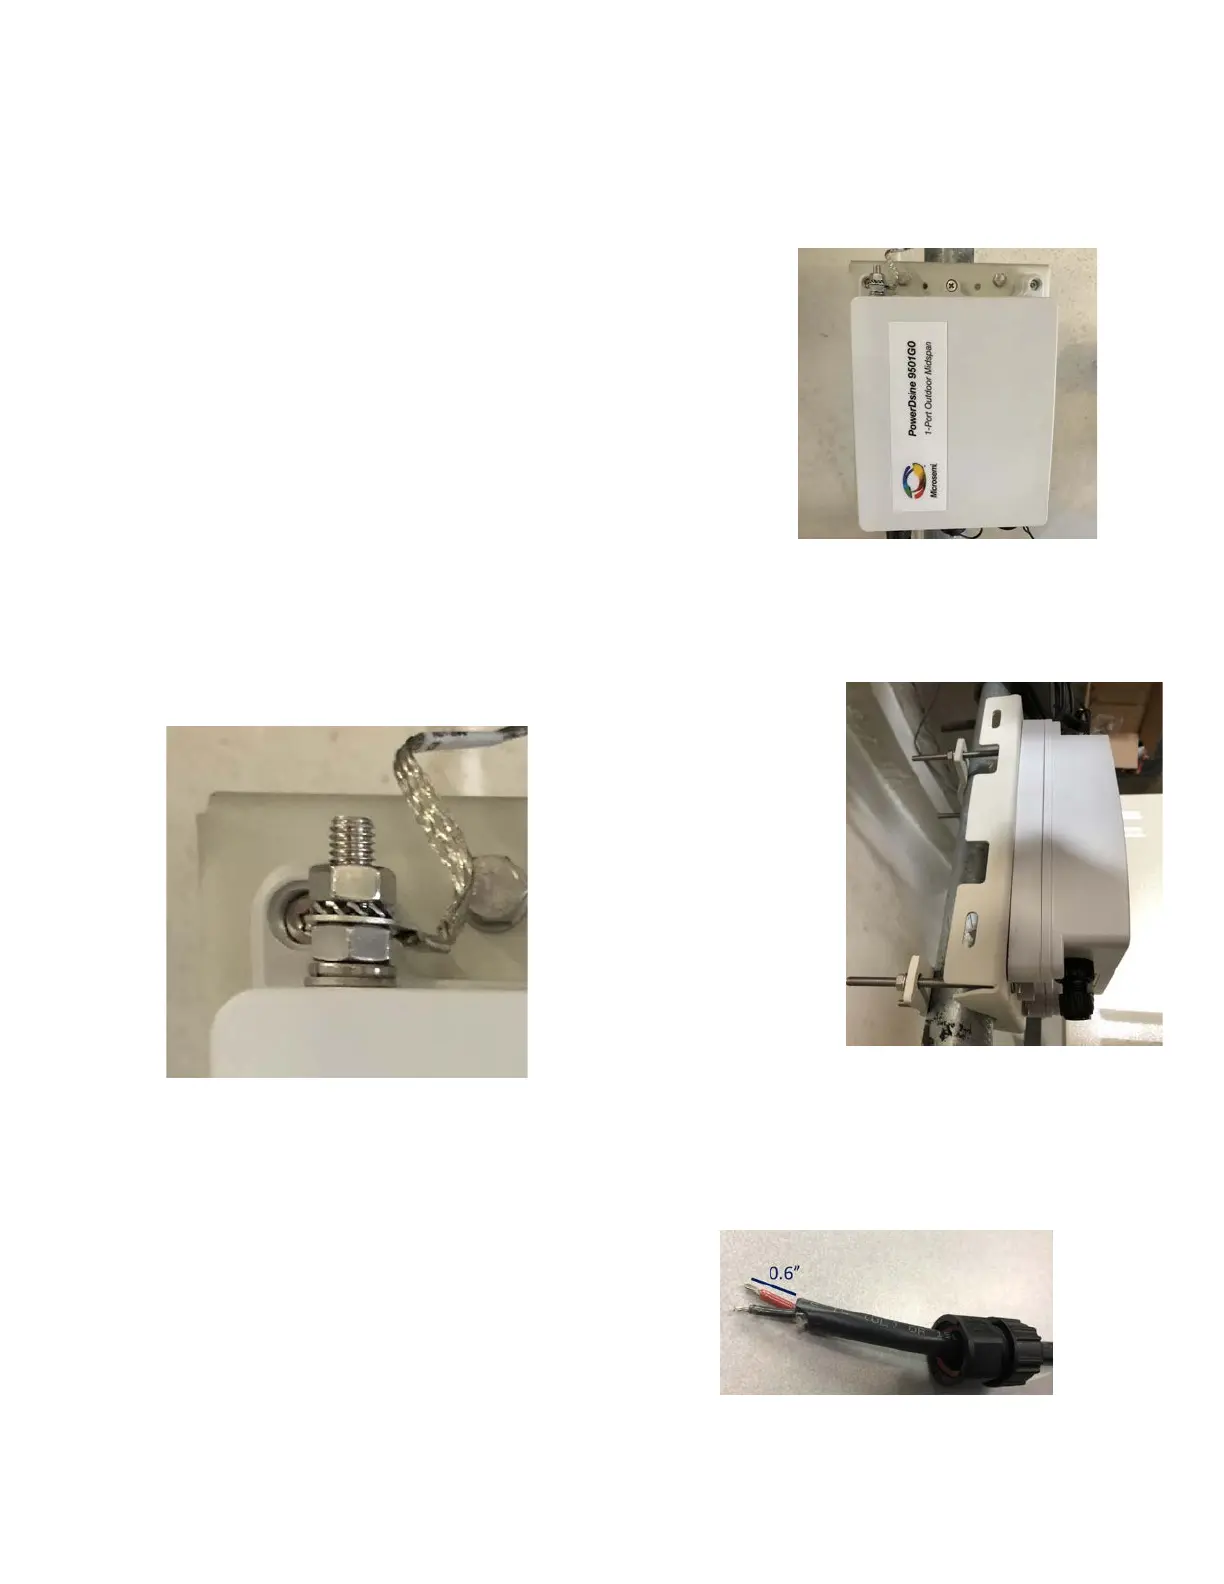
Installing the PoE Injector
Required Items
• PoE injector with grounding cable and
Ethernet cable covers
• Ethernet cable with 2x RJ45 connectors
• 2x adjustable wrench
• Drill (for wall or strut mounting)
• Zip ties
• Mounting hardware
• Site-supplied DC power cord
Installation Instructions
The connections are shown in the following figure.
See Microsemi PD-9501GzO user guide for detailed
instructions on mounting, grounding and cabling.
1. Connect the ground wire to the chassis earth
ground bolt and tighten top nut while holding
bottom nut in place.
2. Mount the PoE injector to a pole or wall at a
distance near the UPS allowing for proper
maintenance loops of DC cable.
a. For wall mounting, use 3 screws to
secure the PoE injector to the wall.
b. If pole mounting, first secure the PoE
injector to the base of the mount.
i. For poles size 1” (25.4mm) to
3” (76.2mm) use the pole
mount kit.
ii. For pole mounting 3”
(76.2mm) to 8” (203.2mm),
use the stainless-steel clamp.
3. Strip the DC outer jacket of the DC power
cord approximately 0.6” (15 mm).
 Loading...