- 23 -
External PressureExternal Pressure
External PressureExternal Pressure
External Pressure
Regulator (Optional)Regulator (Optional)
Regulator (Optional)Regulator (Optional)
Regulator (Optional)
For applications requiring a maximum pressure less than 55 psi, an
External Pressure Reducer (EPR) is available. An EPR allows an
adjustable operating pressure of 10 to 50 psi. If the pressure of the fluid
leaving the unit exceeds the valve setting the relief valve will bypass the
fluid back into the unit to relieve the pressure. The pressure of the system
is determined by the back pressure of the connected equipment and the
flow rate of the recirculating fluid to your application.
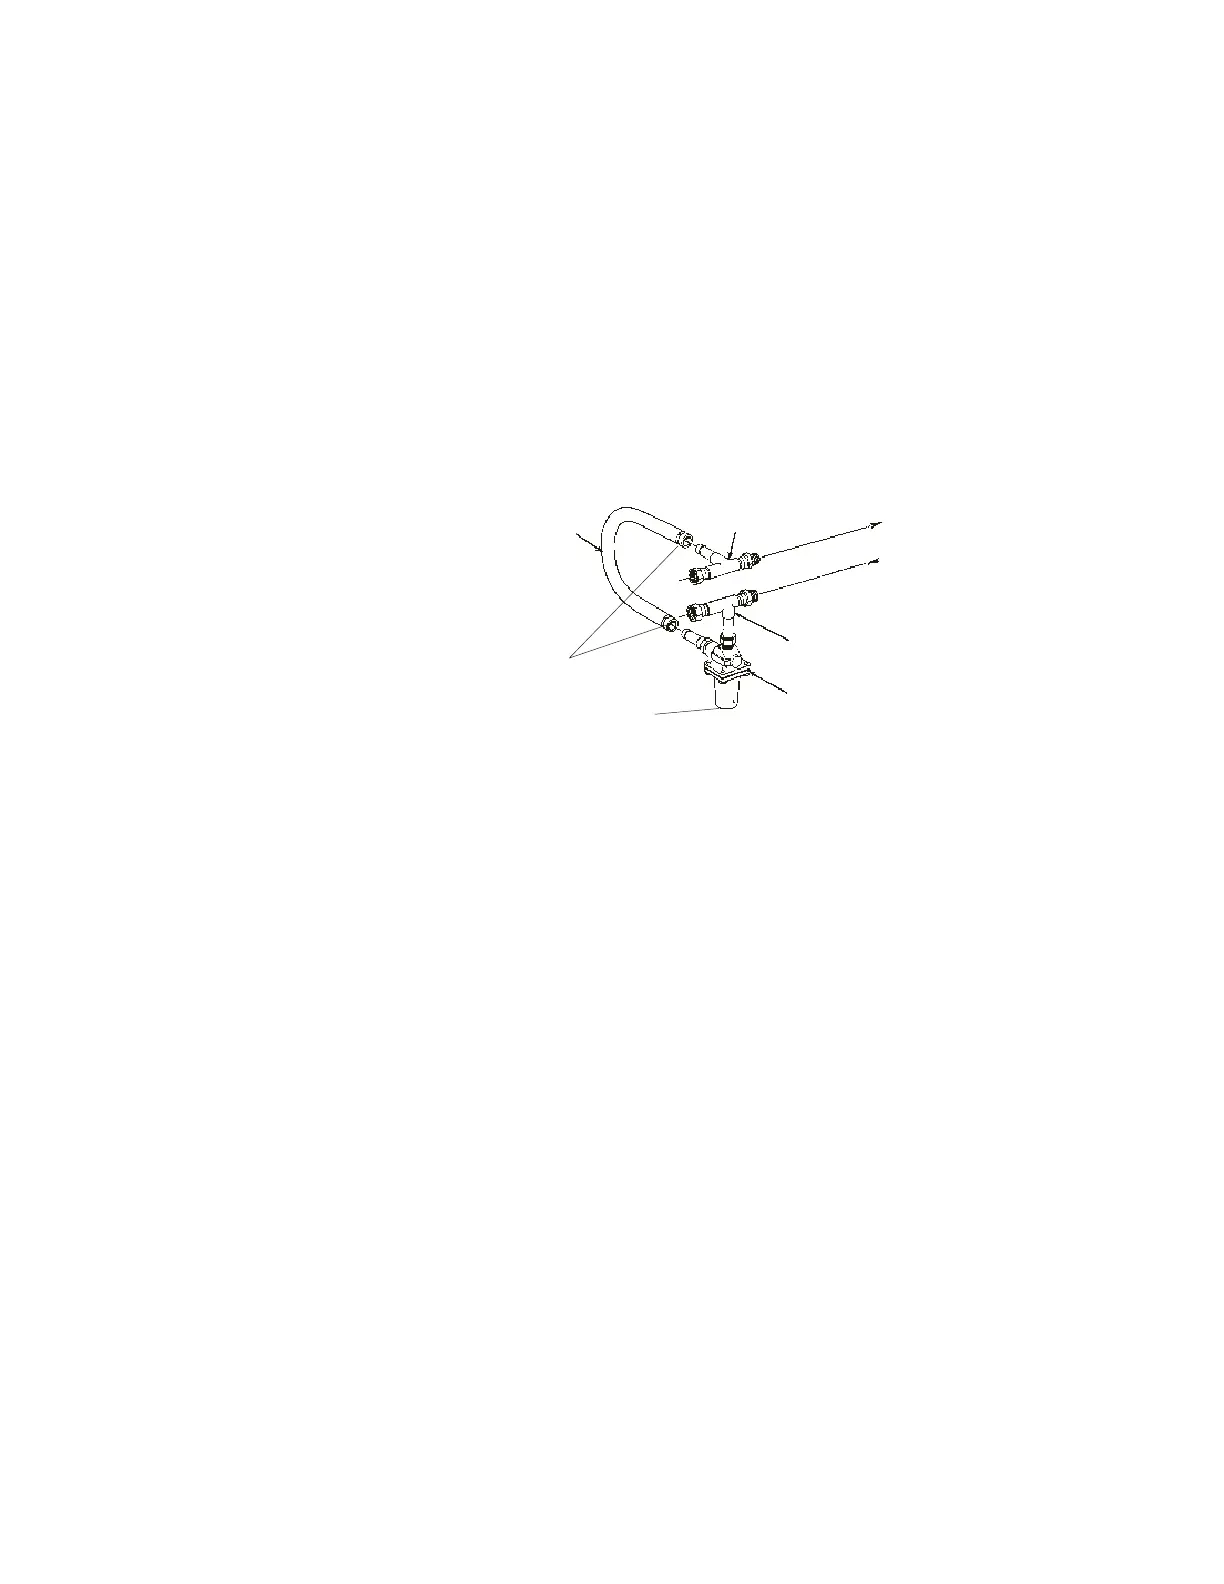
Connect the EPR assembly as shown below. Tighten the hose clamps tight
enough to prevent leakage. Do not over-tighten or the clamps will “bite” into
the flexible tubbing and can cause excessive wear.
Inlet Tee Assembly
Connect the outlet tee assembly to the inlet of your application. Connect the
inlet tee assembly to the outlet of your application.
AdjustmentAdjustment
AdjustmentAdjustment
Adjustment
When adjusting the relief valve some leaking may occur, place a container
under the valve during adjustment.
Remove the protective cap and locate a threaded fitting with a slot for a large
screwdriver. Hold the threaded fitting in place and loosen the lock nut on the
valve body until it is almost flush with the threaded fitting. Unscrew the
threaded fitting three to four turns. (If the threaded fitting unscrews
completely from the valve housing, screw it back in two to three turns.)
To simulate blockage, close (or pinch off) the hose between the EPR outlet
tee assembly and your application. Monitor the operating pressure of the HX
unit. Turn the threaded fitting until the desired relief pressure is set (the EPR
valve cannot be set lower than the total back pressure of your instrument, or
flow will not be received).
Tighten the locknut to secure the position of the threaded fitting. Open the
hose between the EPR outlet tee assembly and your application.
Hose Clamps
Outlet Tee Assembly
Pressure Relief Valve
Protective Cap
Flexible Hose
Return
Supply