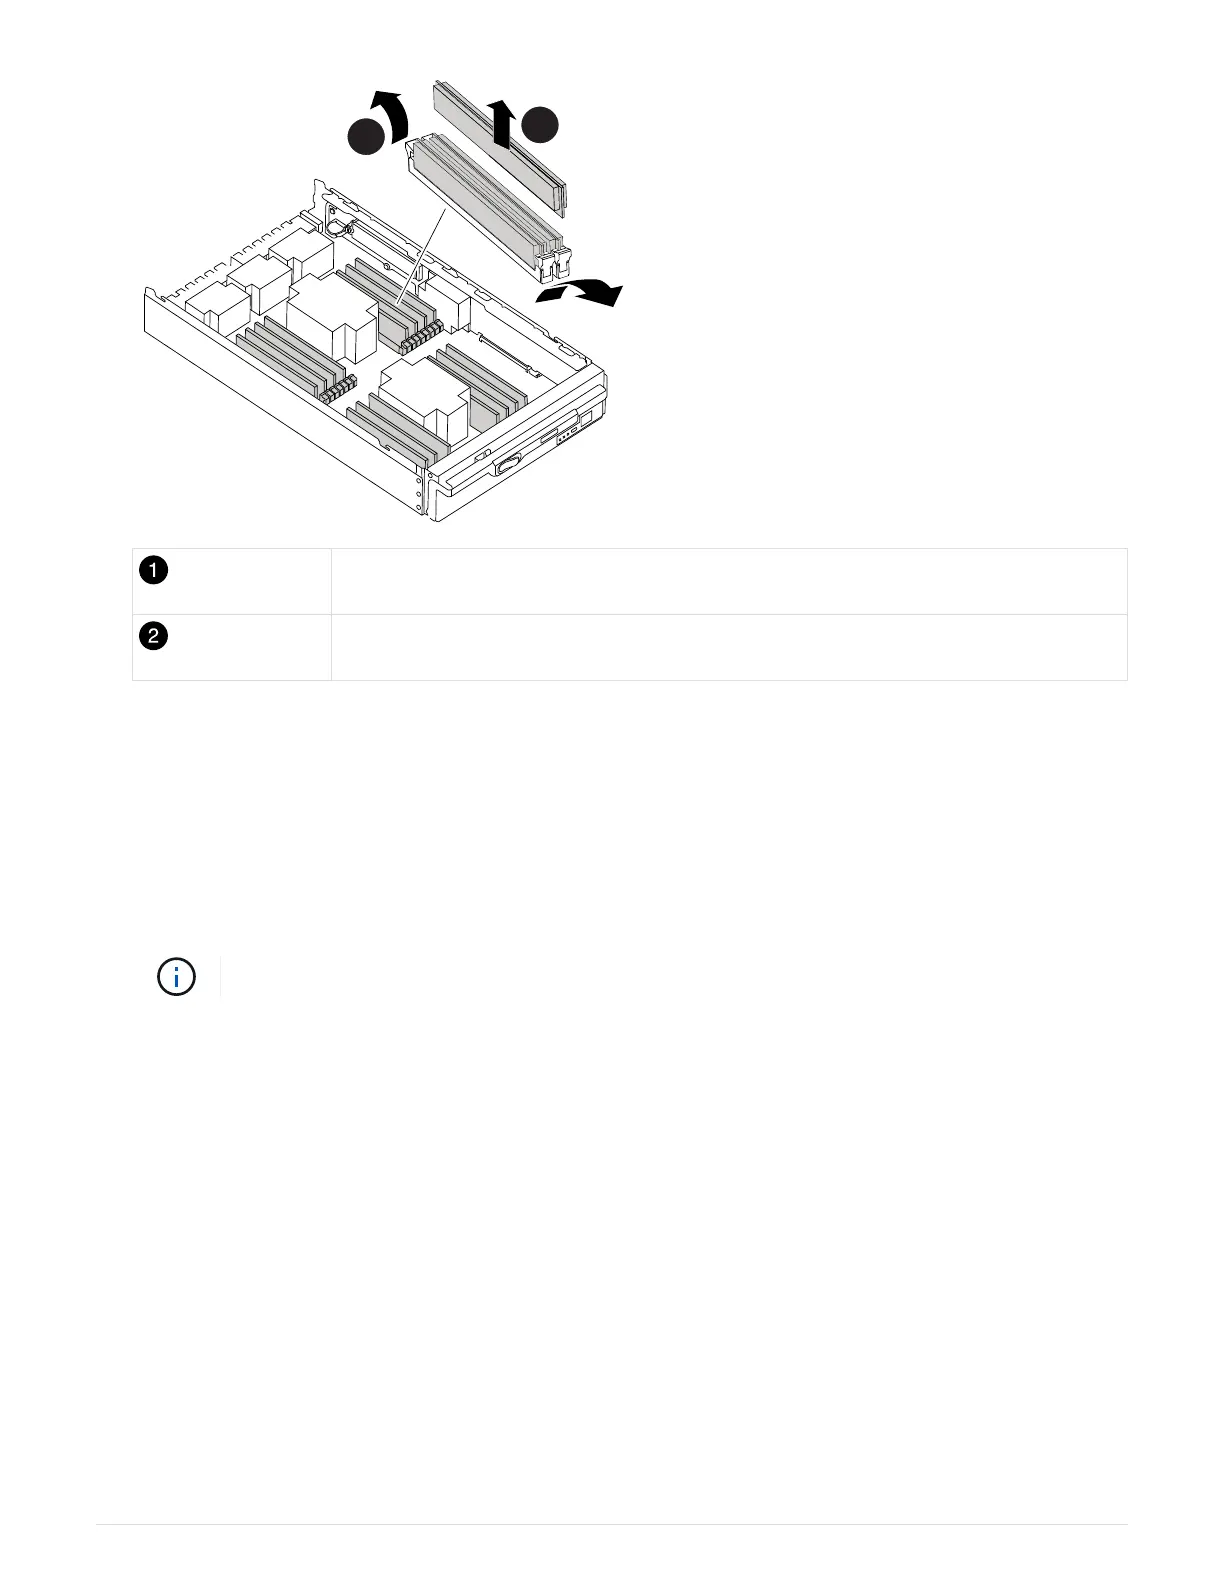
DIMM ejector tabs
DIMM
4. Remove the replacement DIMM from the antistatic shipping bag, hold the DIMM by the corners, and align it
to the slot.
The notch among the pins on the DIMM should line up with the tab in the socket.
5. Make sure that the DIMM ejector tabs on the connector are in the open position, and then insert the DIMM
squarely into the slot.
The DIMM fits tightly in the slot, but should go in easily. If not, realign the DIMM with the slot and reinsert it.
Visually inspect the DIMM to verify that it is evenly aligned and fully inserted into the slot.
6. Push carefully, but firmly, on the top edge of the DIMM until the ejector tabs snap into place over the
notches at the ends of the DIMM.
7. Close the controller module cover.
Step 4: Install the controller
After you install the components into the controller module, you must install the controller module back into the
system chassis and boot the operating system.
For HA pairs with two controller modules in the same chassis, the sequence in which you install the controller
module is especially important because it attempts to reboot as soon as you completely seat it in the chassis.
1. If you are not already grounded, properly ground yourself.
2. If you have not already done so, replace the cover on the controller module.
757


 To Next Page