Adding a schedule
To add a new schedule:
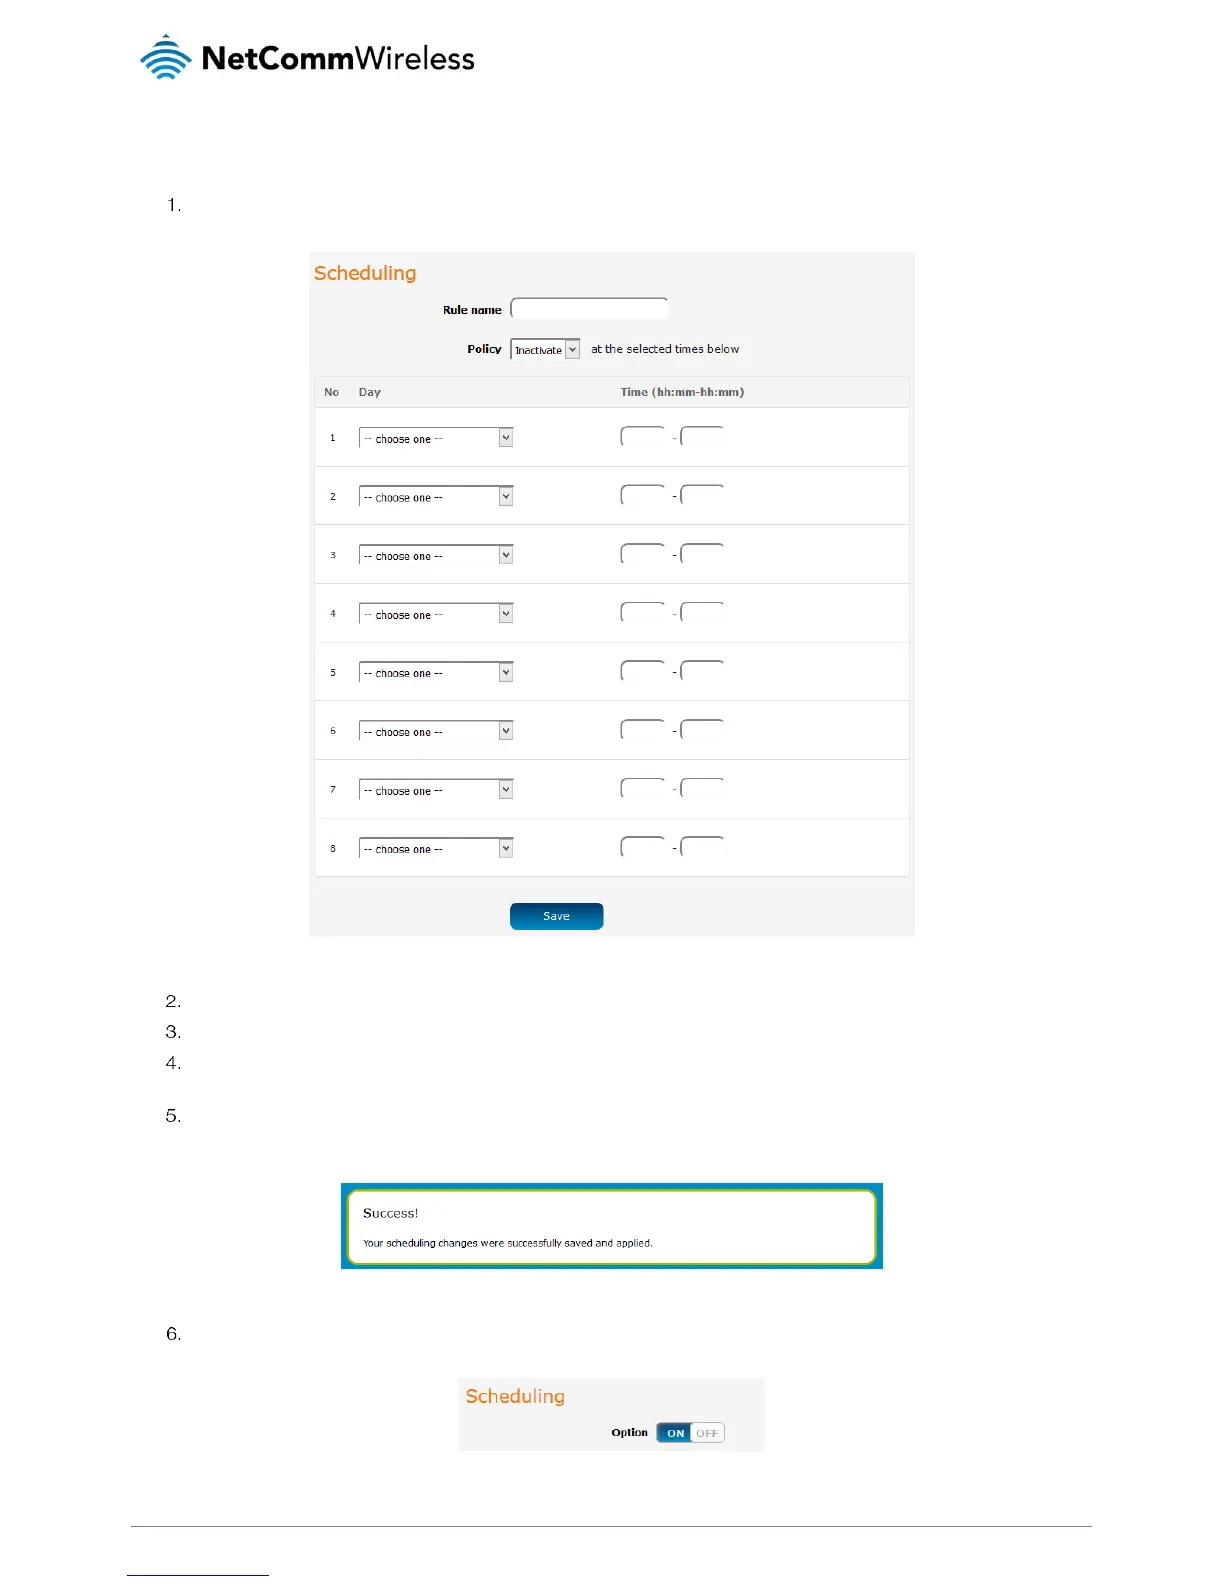
Click the +Add button for one of the schedule slots. The rule configuration screen is displayed.
Figure 45 - Scheduling rule configuration
In the Rule name field, enter a name for this rule.
Use the Policy drop down list to select whether the below schedule will be active or inactive at the times specified.
Use the Day drop down lists to select the days for the schedule, then enter the beginning and end times (in 24 hour
format) in the Time fields. Repeat this in each slot for as many days and times that you need.
Click the Save button when you have finished adding days and times. The router displays the main scheduling page and a
success message.
Figure 46 - Scheduling changes successfully saved and applied
To use the schedules in the list, ensure that the Scheduling Option toggle key is set to the ON position.
Figure 47 - Scheduling Option toggle key enabled