8-Port Gigabit (PoE+) Ethernet Smart Managed Pro Switch with (2 SFP or 2 Copper Ports and)
Cloud Management
Configure Switching User Manual202
2. Launch a web browser.
3. In the address field of your web browser
, enter the IP address of the switch.
If you do not know the IP address of the switch, see
Access the switch on-network and
connected to the Internet on page 19 or Access the switch off-network on page 30.
The login page displays.
If the NETGEAR Business page displays, see
Register and access the switch with your
NETGEAR account on page 34.
4. Enter one of the following passwords:
• After registration, enter the local device password.
By default, the local device password is password.
• If you previously managed the switch through the Insight app or Cloud portal, enter
the Insight network password for the last Insight network location.
For information about the credentials, see
Credentials for the local browser interface on
page 32.
5. Click the Login button.
The System Information page displays.
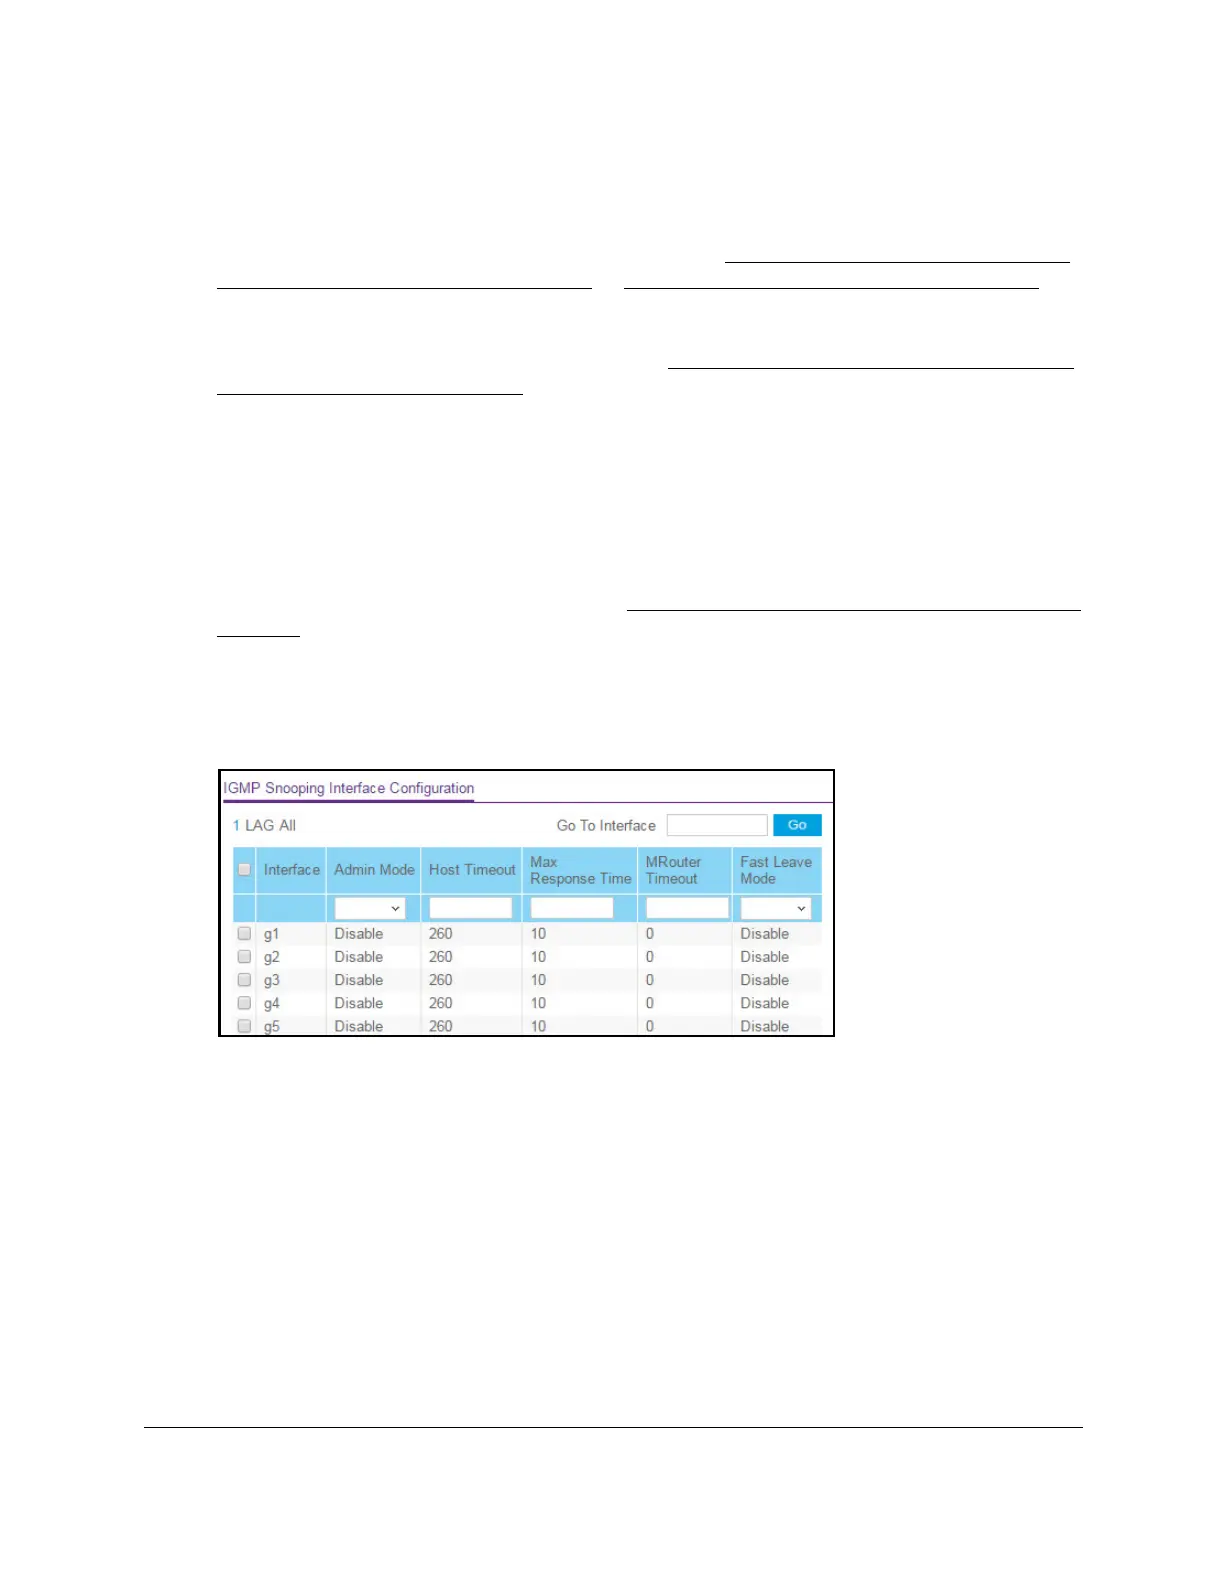
6. Select Switching> Multicast > IGMP Snooping > Interface Configuration.
7. Select whether to display physical interfaces, LAGs, or both by clicking one of the following
links above the table heading:
•1 (the unit ID of the switch). Only physical interfaces are displayed.
This is the default
setting.
• LAG. Only LAGs are displayed.
• All. Both physical interfaces and LAGs are displayed.
8. Select one or more interfaces by taking one of the following actions:
• T
o configure a single interface, select the check box associated with the port, or type
the port number in the Go To Interface field and click the Go button.
• T
o configure multiple interfaces with the same settings, select the check box
associated with each interface.
 Loading...