NETGEAR Wireless Router Setup Manual
Connecting the Router to the Internet 3-3
August 2004
Note: Place the wireless router in a location which conforms to the “Observe
Performance, Placement, and Range Guidelines” on page 4-1. The stand provided with the
wireless router provides a convenient, space-saving way of installing the wireless router.
Avoid stacking it on other electronic equipment.
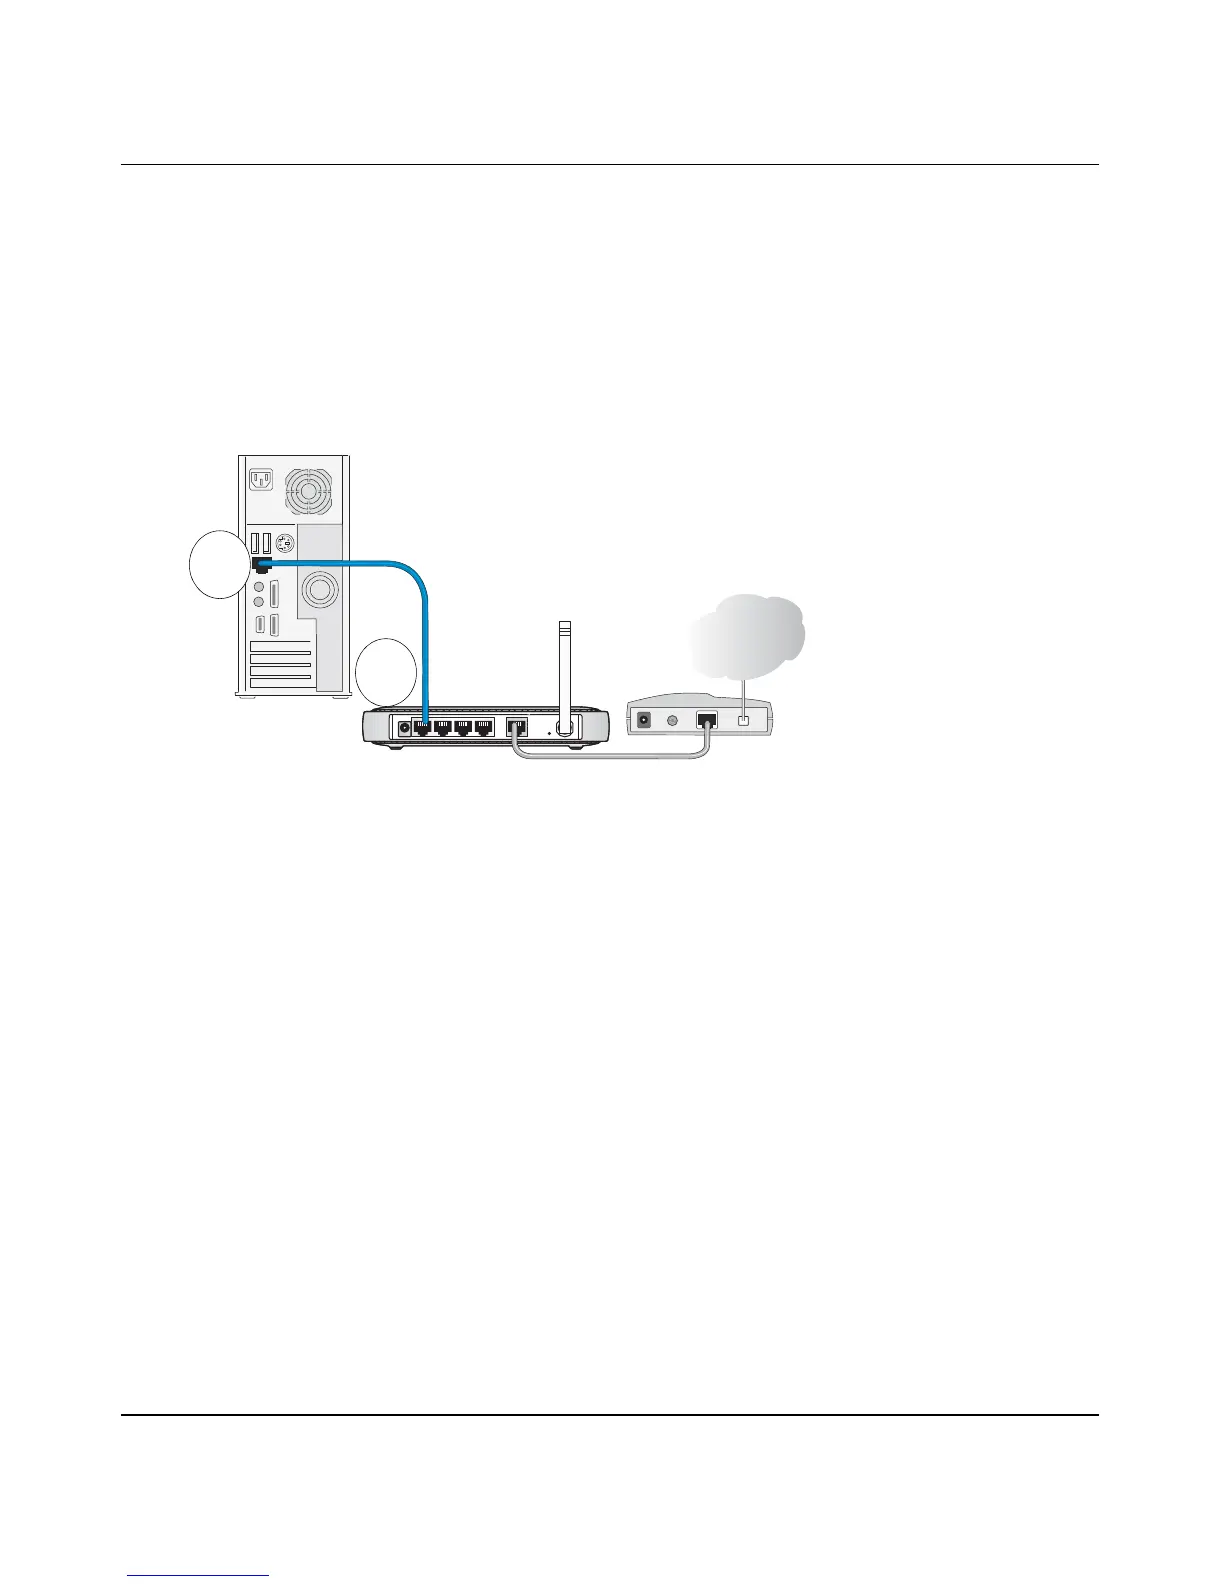
f. Securely insert the blue cable that came with your wireless router (the blue NETGEAR
cable in the diagram below) into a LAN port on the router such as LAN port 4 (point C in
the diagram), and the other end into the Ethernet port of your computer (point D in the
diagram).
Figure 3-3: Connect the computer to the wireless router
Your network cables are connected and you are ready to restart your network.
2. RESTART YOUR NETWORK IN THE CORRECT SEQUENCE
Warning: Failure to restart your network in the correct sequence could prevent you from
connecting to the Internet.
a. First, plug in then turn on the broadband modem. Wait about 2 minutes.
b. Now, plug in the wireless router power adapter into a power outlet, and plug the other end
of the cord into your wireless router. Wait 1 minute.
c. Last, turn on your computer.
Note: For DSL customers, if software logs you in to the Internet, do not run that software. You
may need to go to the Internet Explorer Tools menu, Internet Options, Connections tab page
where you can select “Never dial a connection.”
/$13RUWV
%OXH1(7*($5
&DEOH
,QWHUQHW
PRGHP
URXWHU
FRPSXWHU
C
D