35
START-UP AND OPERATION
4
4.8. LED lamp replacement
2
3
1
A
Unplug the power plug before
changing the LED lamp!
In general, the LED lamp is very du-
rable. If it is damaged, please contact
the customer service to get a replace-
ment LED.
Have suitable tools ready for the
change!
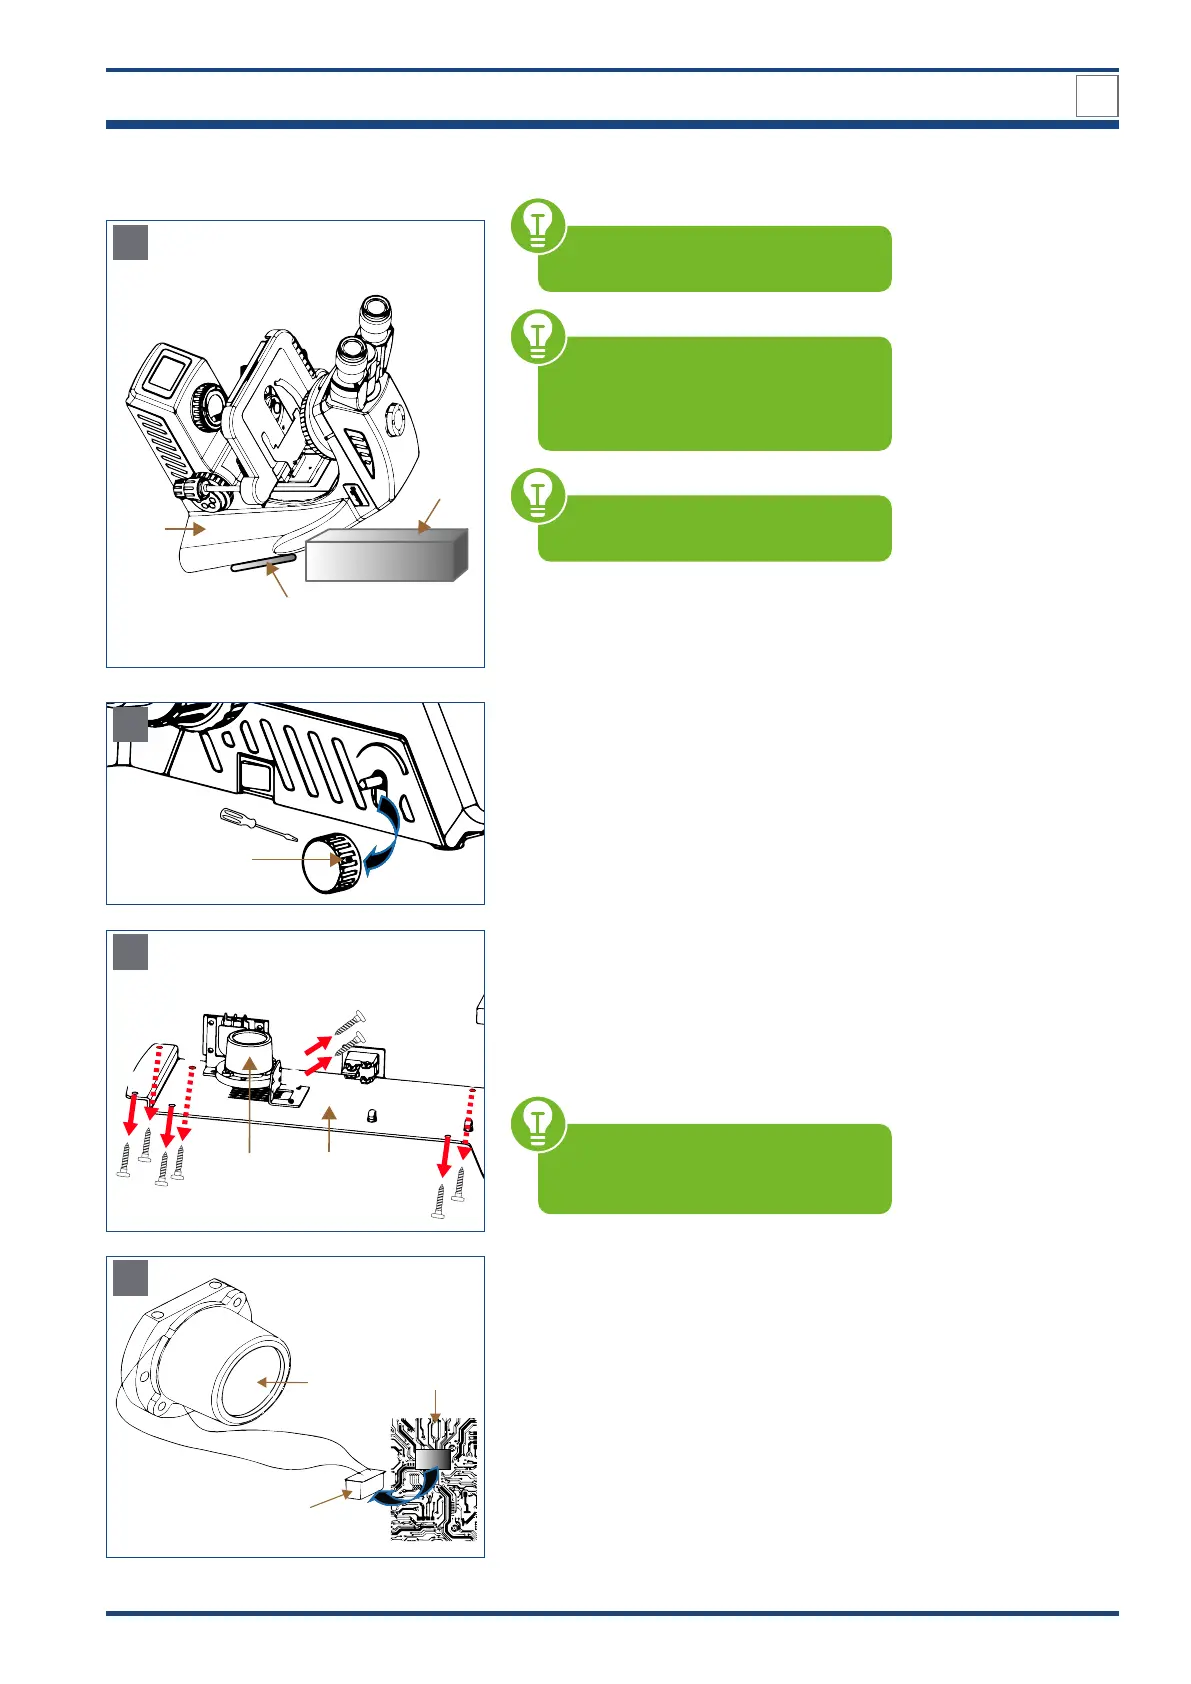
Place the microscope on the microscope
body (1). Support the body with a firm base
(2) so that the holding device for power cord
(3) is not damaged.
4
B
Loosen the locking screw of the brightness
control knob (4) to remove the knob from the
microscope.
6 5
C
Loosen the six outer screws to of the
base plate (5) and then carefully remove the
base plate from the microscope.
The LED lamp (6) is fixed with two addition-
al locking screws and . Unscrew these
screws.
Take care to remove the base plate
slowly so that the wiring inside the mi-
croscope is not pulled apart.
7
6
8
D
Illustration 024: A-D:LED lamp replacement.
The connector (7) is linked to the LED lamp
(6) and to the PCB board (8). Pull the con-
nector carefully out of the PCB board. Mount
a new LED lamp plus connector. Then tighten
screws / and insert the connector com-
pletely into the PCB board. Carefully place
the base plate back on the microscope and
tighten all six outer screws to . Put the
brightness control knob on and tighten the
locking screw. Connect the microscope and
put it back into operation.