Choose to enable a green screen filter during night-time use.
The default setting “940nm+850nm” indicates that the Swift 2
will use 940nm on the lower power settings (IR1-3) and 850nm
on the higher (IR4-5).
Choose “940nm only” or “850nm only” to use the selected
wavelength on IR levels 1-5.
Select “No IR” to disable the IR and avoid accidental
activation.
See section 6 for more about the trade-offs between the
different wavelengths.
To minimize distractions in VIDEO mode, you can autohide all
the icons from the screen after no button has been touched for
3 seconds.
Delete all files currently on the micro SD card.
Set the device to power off after a period of non-use. If
enabled, the options are 30min or 60min.
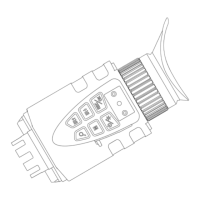
The date is in a YYYY / MM / DD format.
Use ↑ and ↓ to flick between YYYY, MM or DD. Press ZOOM/OK
to edit. The selected number will appear in red.
Use ↑ and ↓ to adjust number. Once the date is correct, press
ZOOM/OK again to save.
At any time, press REC/MENU to return to the list of settings.
The time is in an HH / MM / SS format.
Use ↑ and ↓ to flick between HH, MM or SS. Press ZOOM/OK to
edit and the number will appear in red.
Use ↑ and ↓ to adjust the number. Once the time is correct,
press ZOOM/OK again to save.
At any time, press REC/MENU to return to the list of settings.
The device will arrive with the correct setting for your
geographical area.
Choose whether a date and time stamp will be visible on your
recorded videos.
Pick the frame rate of the AVI video recordings produced. A
higher frame rate may improve video quality but will increase
the video size.
Restores all settings to factory defaults.
Shows the current firmware version.