Do you have a question about the Nikon Coolpix 7900 and is the answer not in the manual?
Instructions on charging the EN-EL5 battery using the MH-61 charger.
How to securely attach the camera strap to the camera body eyelet.
Steps for opening the battery chamber and inserting the EN-EL5 battery correctly.
Guide on how to power on the digital camera using the power switch.
Steps to select the camera's display language and set the date/time.
Instructions on checking monitor indicators and pressing the shutter button to capture images.
Steps to review captured images on the camera's monitor and turn the camera off.
Lists required Windows and Macintosh operating system versions for PictureProject.
Detailed steps for installing PictureProject software on Windows operating systems.
Detailed steps for installing PictureProject software on Macintosh operating systems.
Advice on using a charged battery or AC adapter for safe picture transfer.
Guide on connecting the camera to a computer using the USB cable.
Describes the AutoPlay dialog behavior when connecting the camera on Windows XP.
Crucial warnings about not disconnecting cables or turning off devices during transfer.
Explanation of the main controls and functions within the PictureProject software window.
Steps for safely removing the camera from the computer system across different OS.
| Megapixel | 7.1 MP |
|---|---|
| Camera type | Compact camera |
| Sensor type | - |
| Image stabilizer | No |
| Image sensor size | - \ |
| Digital zoom | 4 x |
| Optical zoom | 3 x |
| Focal length range | 7.8 - 23.4 mm |
| Lens structure (elements/groups) | 7/6 |
| Built-in flash | Yes |
| Aperture range (F-F) | 2.8 - 4.9 |
| Camera shutter speed | - s |
| Compatible operating systems | Windows |
| Focal length (35mm film equivalent) | 38 - 114 mm |
| Flash modes | Auto, Flash off, Red-eye reduction, Slow synchronization |
| Flash range (tele) | 0.3 - 3.5 m |
| Flash range (wide) | 0.3 - 4.5 m |
| Internal memory | - MB |
| Compatible memory cards | SD |
| Motion JPEG frame rate | 30 fps |
| Maximum video resolution | 640 x 480 pixels |
| Field of view | 100 % |
| Display diagonal | 2 \ |
| Display resolution (numeric) | 115000 pixels |
| Scene modes | Backlight, Beach, Close-up (macro), Dawn, Dusk, Fireworks, Museum, Night landscape, Night portrait, Party (indoor), Portrait, Snow, Sports, Sunset, Underwater, Landscape (scenery) |
| Photo effects | Black&White |
| White balance | Auto |
| Camera playback | movie, single image |
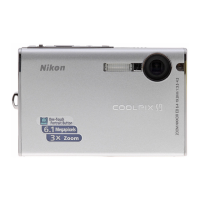
| Product color | Silver |
| Battery type | EN-EL5 |
| Depth | 60 mm |
|---|---|
| Width | 88 mm |
| Height | 36.5 mm |
| Weight | 150 g |