D
Daniel ClaytonSep 3, 2025
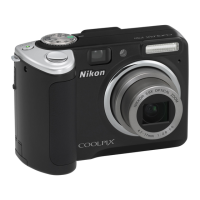
Why print date is not available on my Nikon CoolPix P500?
- GGlenn SullivanSep 3, 2025
Time zone and date has not been set.
Why print date is not available on my Nikon CoolPix P500?
Time zone and date has not been set.
Why won't the display switch to the monitor (or viewfinder) when I press the x button on my Nikon CoolPix P500 Digital Camera?
You cannot switch the display in the following situations: while recording or playing back movies, while recording or playing back voice memos, during interval timer shooting, while connected to a printer, or while displaying image deletion screens. Also, you cannot switch the display while displaying a certain error message.
Why is the date not appearing on pictures even when Print date is enabled on my Nikon CoolPix P500 Digital Camera?
The date is not appearing on pictures because a shooting mode that does not support Print date is selected. The date cannot be imprinted onto a movie, or on still images saved during movie recording.
Why is the monitor turned off, and the power-on lamp flickering on my Nikon CoolPix P500?
The monitor is turned off, and the power-on lamp is flickering because the battery temperature is high. Turn off the camera and allow the battery to cool down before resuming use.
How to fix Nikon CoolPix P500 Digital Camera monitor if it's hard to read?
If your Nikon Digital Camera monitor is hard to read, this could be due to several reasons. If the ambient lighting is too bright, try using the viewfinder or moving to a darker location. You can also adjust the monitor brightness in the settings. If the monitor is dirty, clean it carefully.
Why are the monitor and viewfinder blank on my Nikon Digital Camera?
If the monitor and viewfinder on your Nikon Digital Camera are blank, make sure the camera is on and the battery is not exhausted. If the camera is in standby mode, press the power switch, shutter-release button, or the c button, or rotate the mode dial. Note that the monitor and viewfinder cannot be used simultaneously; press the x button to switch between displays. Also, check if the camera is connected to a computer via USB or to a TV via A/V or HDMI cable, or if interval timer shooting is in progress.
How to display information on the monitor of Nikon CoolPix P500?
If your Nikon Digital Camera displays no information on the monitor, press the s button until shooting data or photo information is displayed.
Why display does not switch to monitor on Nikon CoolPix P500 Digital Camera?
If the display on your Nikon Digital Camera does not switch to the monitor or viewfinder when you press the x button, it might be due to several reasons. You cannot switch the display while recording or playing back movies or voice memos, during interval timer shooting, while connected to a printer, or while displaying image deletion screens. Additionally, you cannot switch the display while showing a certain error message.
| optical zoom | 36x |
|---|---|
| wide angle | 22.5 mm |
| telephoto range | 810 mm |
| screen size | 3 inches |
|---|---|
| screen resolution | 921, 000 dots |
| vari-angle monitor | Yes |
| battery type | Rechargeable Li-ion Battery EN-EL5 |
|---|---|
| battery life | 220 shots |
| charging adapter | EH-69P |
| sensor type | CMOS |
|---|---|
| effective pixels | 12.1 megapixels |
| ISO sensitivity | ISO 160-3200 |
| dimensions | 115.5 x 83.7 x 102.5 mm |
|---|---|
| weight | 494 g |
Manual provides an overview of the camera's features and how to use it.
Crucial safety precautions to prevent damage or injury when using the camera.
Emphasizes using Nikon-certified accessories to prevent damage and voiding warranty.
Identifies and describes the main external components of the camera body.
Explains the indicators displayed on the camera's monitor during shooting and playback.
Explains how to use the command dial for menu selection and setting adjustments.
Details operations using the multi selector for navigation and selection.
Explains the function of key buttons like shutter-release, monitor, and display.
Step-by-step guide for inserting the rechargeable battery and charging it.
Initial setup for camera language, time zone, and date settings upon first use.
Instructions for handling memory cards, including insertion and removal.
Guide to powering on the camera and selecting the automatic shooting mode.
Instructions on how to frame shots using the monitor/viewfinder and focus.
Steps for focusing on a subject and capturing a photograph.
How to review captured images and delete unwanted ones.
Explains how to use the mode dial to select various shooting modes.
Covers manual control over shutter speed and aperture in P, S, A, and M modes.
Explains various continuous shooting modes like single, continuous, and burst.
Details various settings available in the shooting menu for image quality, WB, ISO, etc.
Describes how to navigate and manage images in full-frame playback mode.
Explains viewing multiple images in thumbnail or category format.
Details functions available in the playback menu like retouch, print order, protect.
Introduces the built-in picture editing tools available on the camera.
Enhances contrast, saturation, and brightness of pictures.
Applies skin smoothing and various digital filter effects.
Guide to recording high-definition movies with sound.
Instructions for playing back and trimming recorded movies.
Steps for connecting the camera to a television for playback.
Guide to transferring images and software installation.
Lists and briefly describes all options available in the camera's setup menu.
Adjusts monitor brightness, framing grid, and histograms.
Configures camera clock and time zone settings.
General guidelines for using and storing the device to ensure continued enjoyment.
Provides important information on handling, charging, and storing the camera battery.
Lists compatible accessories and approved memory card types for the camera.
Explains how file and folder names are assigned to images and movies.
Addresses common problems related to battery, power, and blank displays.
Solutions for issues encountered during shooting and playback.
Details key technical specifications like sensor, lens, zoom, and AF.
Covers image resolution, ISO sensitivity ranges, and exposure control methods.
Provides information on shutter speed, aperture, self-timer, interfaces, and languages.