II. Microscopy
21
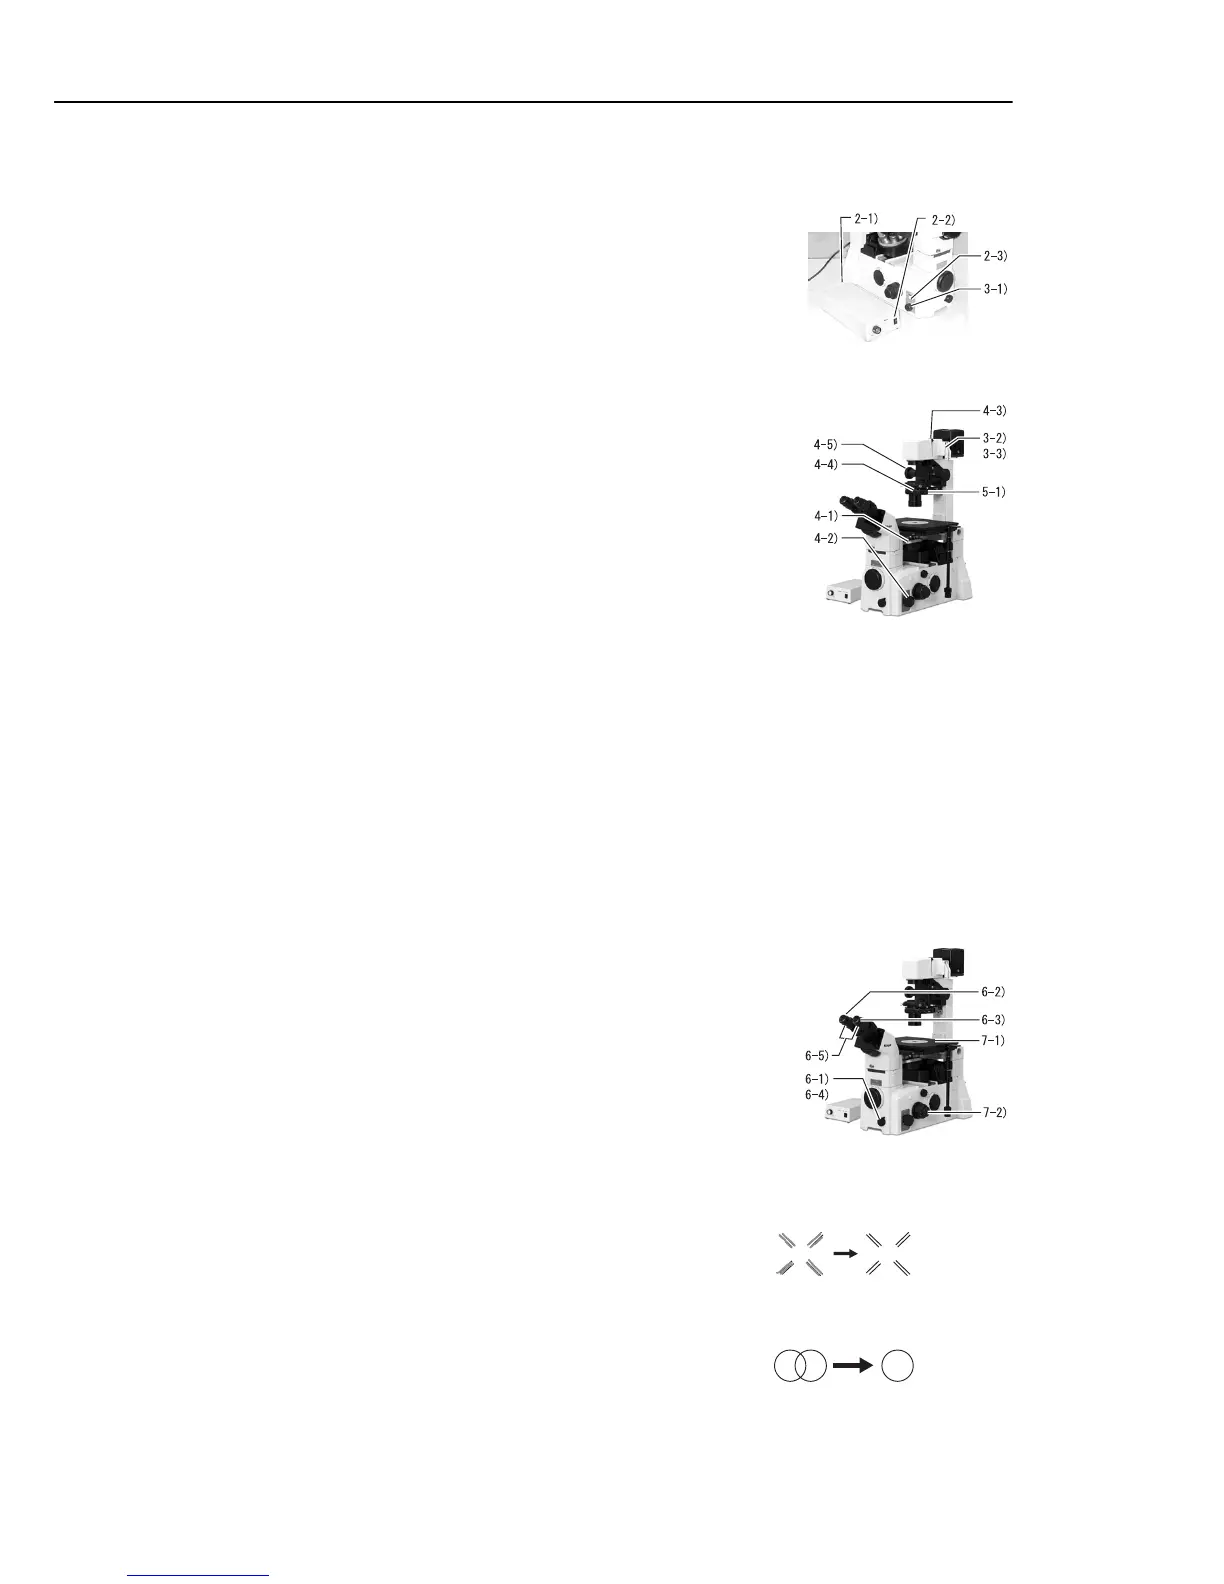
2. Turn on the dia-illumination.
1) Set the “EXTERNAL switch” on the rear side of the power
supply to ON.
2) Turn on the “power switch” of the power supply. (Flip the
switch to .)
3) Press the “dia-illumination ON/OFF switch
on the dia-illuminator into the optical
path.
4. Adjust the optical path.
1) Move the < 10X > objective into the optical path.
2) Set the “optical path switchover dial
on the right side of the
microscope to position < 1 >. (-> Direct 100% light to the
observation port.)
3) Raise the “field diaphragm lever” on the dia-illuminator
completely to open the field diaphragm fully.
4) Turn the “aperture diaphragm lever
to the right limit to open the “aperture diaphragm” fully.
5) Turn the condenser focus knob to lower the condenser
mount to the lowest position.
Supplementary information
When the system condenser is mounted with the “ELWD
condenser lens”, position the condenser mount at the
location about 1 cm below the uppermost position.
When using the “ELWD-S condenser”, position the
condenser mount at the location about 2 cm below the
uppermost position.
5. Set the microscope for bright-field microscopy.
1) Set the “condenser turret” to position < A >.
6. Adjust the diopter and interpupillary distance.
1) Turn the “photo-mask dial” on the front side of the
microscope counterclockwise to move the photo-mask into
the optical path.
2) Look into the left eyepiece with your left eye. Turn the
“diopter adjustment ring” of the left eyepiece to bring the
double crosshairs of the photo-mask into focus.
3) Look into the right eyepiece with your right eye. Turn the
“diopter adjustment ring” of the right eyepiece to bring the
double crosshairs of the photo-mask into focus.
Turn the diopter adjustment ring
so that the double crosshairs come into focus.
Adjust the interpupillary distance
to consolidate the view fields of both eyepieces.
 Loading...


