IV. Assembly
55
Required tools: 2mm hexagonal screwdriver x2 (supplied)
4mm hexagonal wrench x1 (supplied)
Installation location: Refer to the “Notes on handling the microscope” on the top of this manual and select an
appropriate location.
1
2
3
4
5
6
7
8
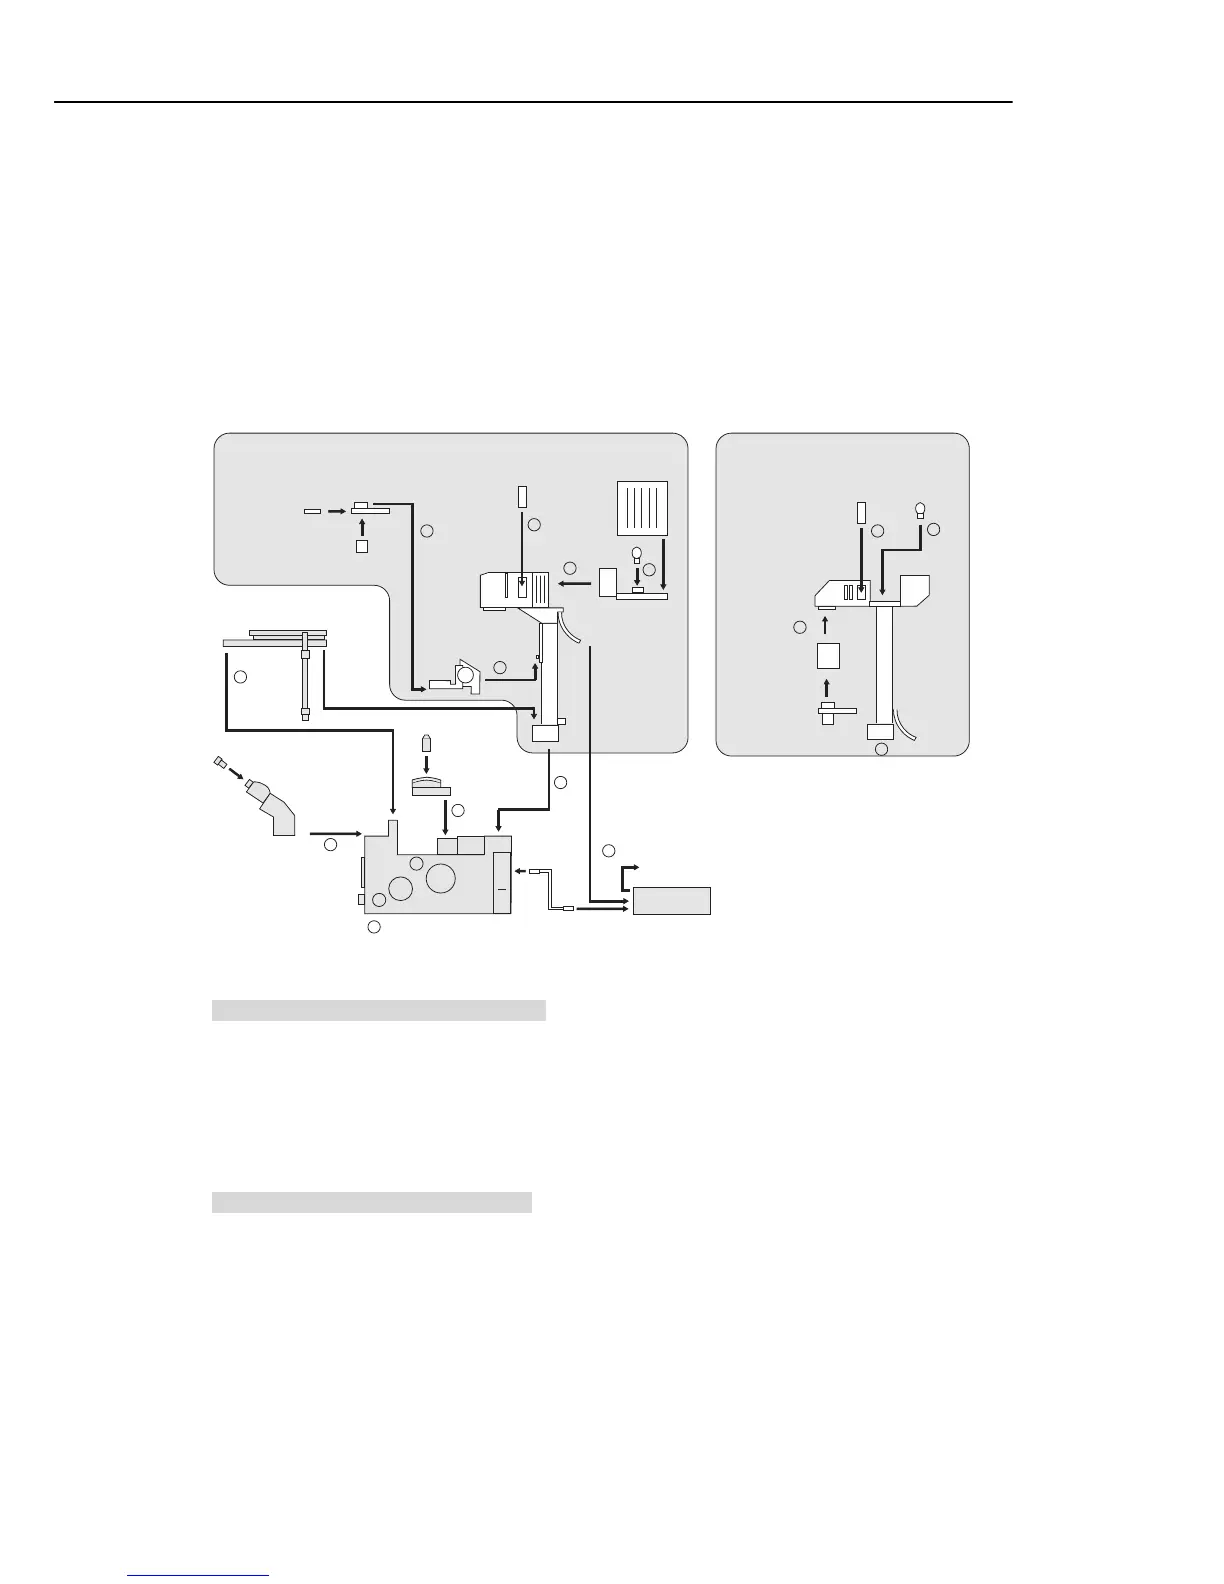
Condenser
turret
Lamphouse
Dia-
illuminator
Stage
Eyepiece
tube
Power supply
To wall outlet
Revolving
nosepiece
Objective
Eyepiece
Main body (base)
Condenser
module
Condenser
lens
Condenser
holder
Combination of "T-DH dia-illuminator 100W"
and "system condenser"
Filter
slider
Lamp
Condenser
Dia-
illuminator
Filter
slider
Condenser
holder
Lamp
4 -1
4 -2
9
4
5
8
7
Combination of "T-DS dia-illuminator 30W"
and "ELWD-S condenser"
Checking the power supply voltage
Make sure that the input voltage indicated on your power supply corresponds with the voltage of the
commercial power supply in your area. If the two values do not match, do not use the power supply, and
contact your nearest Nikon representative immediately. Use of a power supply with a different input
voltage indication can result in electric shock, fire, malfunction, and/or other accidents.
1. Setting the main body (base)
Take out the microscope base from the box and settle it on a stable desk.
The base is heavy. Hold it securely by the dent at the lower front and the carrying handle at the rear.
 Loading...


