41
V
CHECKING AND ADJUSTMENT
3. Optical Plummet
(Aligning the optical axis of the plummet with the instrument’s vertical
axis.)
1) Checking
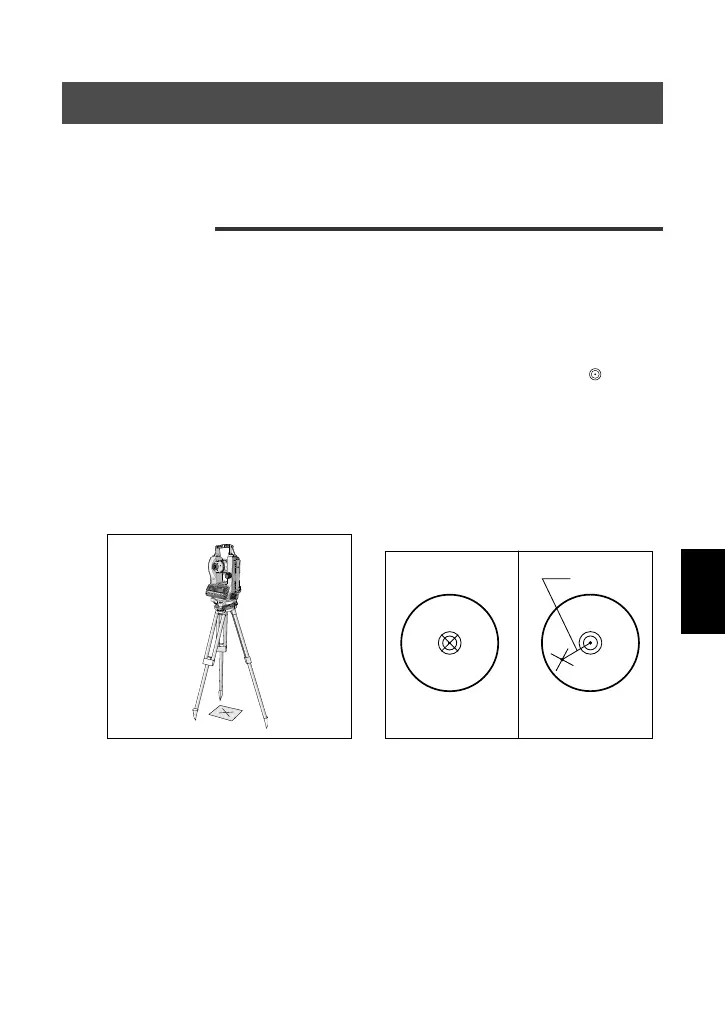
(1) Place the instrument on the tripod (no leveling necessary).
(2) Place a thick sheet of paper marked with an “×” on the ground directly
underneath the instrument.
(3) Looking through the optical plummet, adjust the leveling screws to
move the image of the “×” mark to the center of the reticle’s
marking. (Refer to the Fig. [ 1 ] below.)
(4) Rotate the upper plate 180°.
(5) If the “×” mark remains centered in the reticle, no adjustment will be
necessary. If any displacement is detected (Refer to the Fig. [ 2 ]
below.), proceed to the following adjustment procedure.