33NILES AUDIO CORPORATION – 1-800-BUY-HIFI – 305-238-4373
SYSTEM INSTALLATION
KEYPAD INSTALLATION
NUMERIC-6P
The Numeric-6P comes in a kit that includes the keypad in white. A faceplate is not included. Included are color change kits in light almond
and bone. The color change kit must be installed prior to installation in the wall.
1. Gently compress the two retaining tabs at the top of the Decora insert, then lift the top. Remove the bottom of the Decora insert in the
same manner. The colored key caps will come off with the Decora insert.
2. To reinstall, snap the new Decora insert in place, making certain that the buttons are seated over the elastomer sub-buttons.
3. Test the button action and adjust as necessary for consistent operation.
CONNECT THE CAT-5 CABLE TO THE KEYPAD
Each keypad directly connects to the ZR-6 MultiZone Receiver by a “home run” of CAT-5 cable with RJ-45 connectors utilizing the T-568A
wiring convention (
FIGURE 14). The CAT-5 cable connects to the “System” jack on the back of the keypad. The Numeric-6P includes a cable
to connect to the Solo-6IR Keypad.
INSTALL THE KEYPADS INTO JUNCTION BOXES
The Solo-6IR and Solo-6MD Master Keypads mount into a standard single-gang in-wall junction box. If the Numeric-6P Accessory Keypad is
to be added to the Solo-6IR, a two-gang junction box and a two-gang Decora wallplate are necessary.
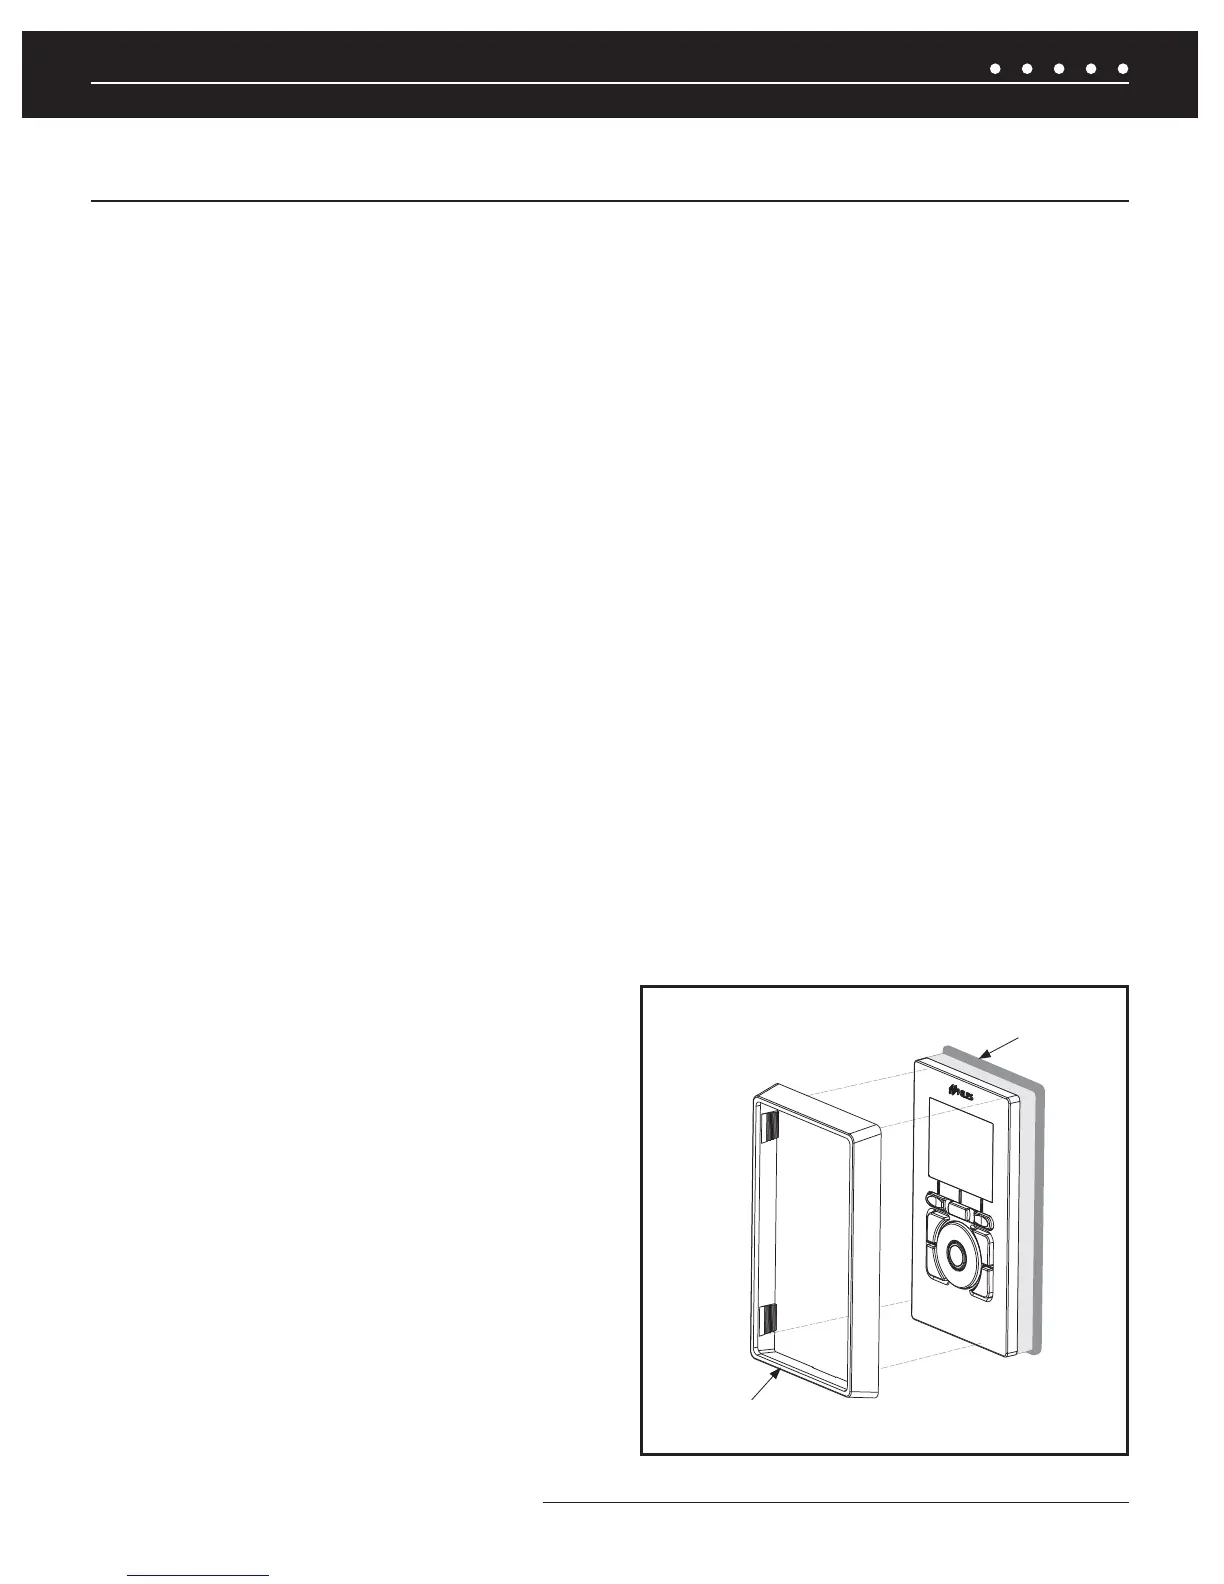
INSTALLING KEYPADS IN WET AREAS
The Solo-6IR and Solo-6MD keypad feature a true weather-resistant design, opening up the possibilities for installation in moist areas such as
bathrooms, saunas, or in covered outdoor areas like patios. However, in these applications special care must be taken to properly seal the front
of the keypad so moisture does not permeate the back of the keypad, which is not weather resistant. If the keypad is sealed properly, you can
expect consistent and long-lived operation in environments where normal keypads are simply not designed to function. To install the keypad in
a moist area, follow the normal installation procedure, but add these two very important steps:
1. Apply a bead of silicone to seal the faceplate to the wall. Be certain all gaps are fi lled and the seal is consistent.
2. Install the front bezel (Solo-6MD only) to cover the bead of silicone.
Install bezel to cover
silicone bead
silicone bead

 Loading...