SCRUB SYSTEM 43Service Manual – Advenger, 2800ST, 3800ST, BR 755, BR 855
Scrub Brush Motor Removal - DISC
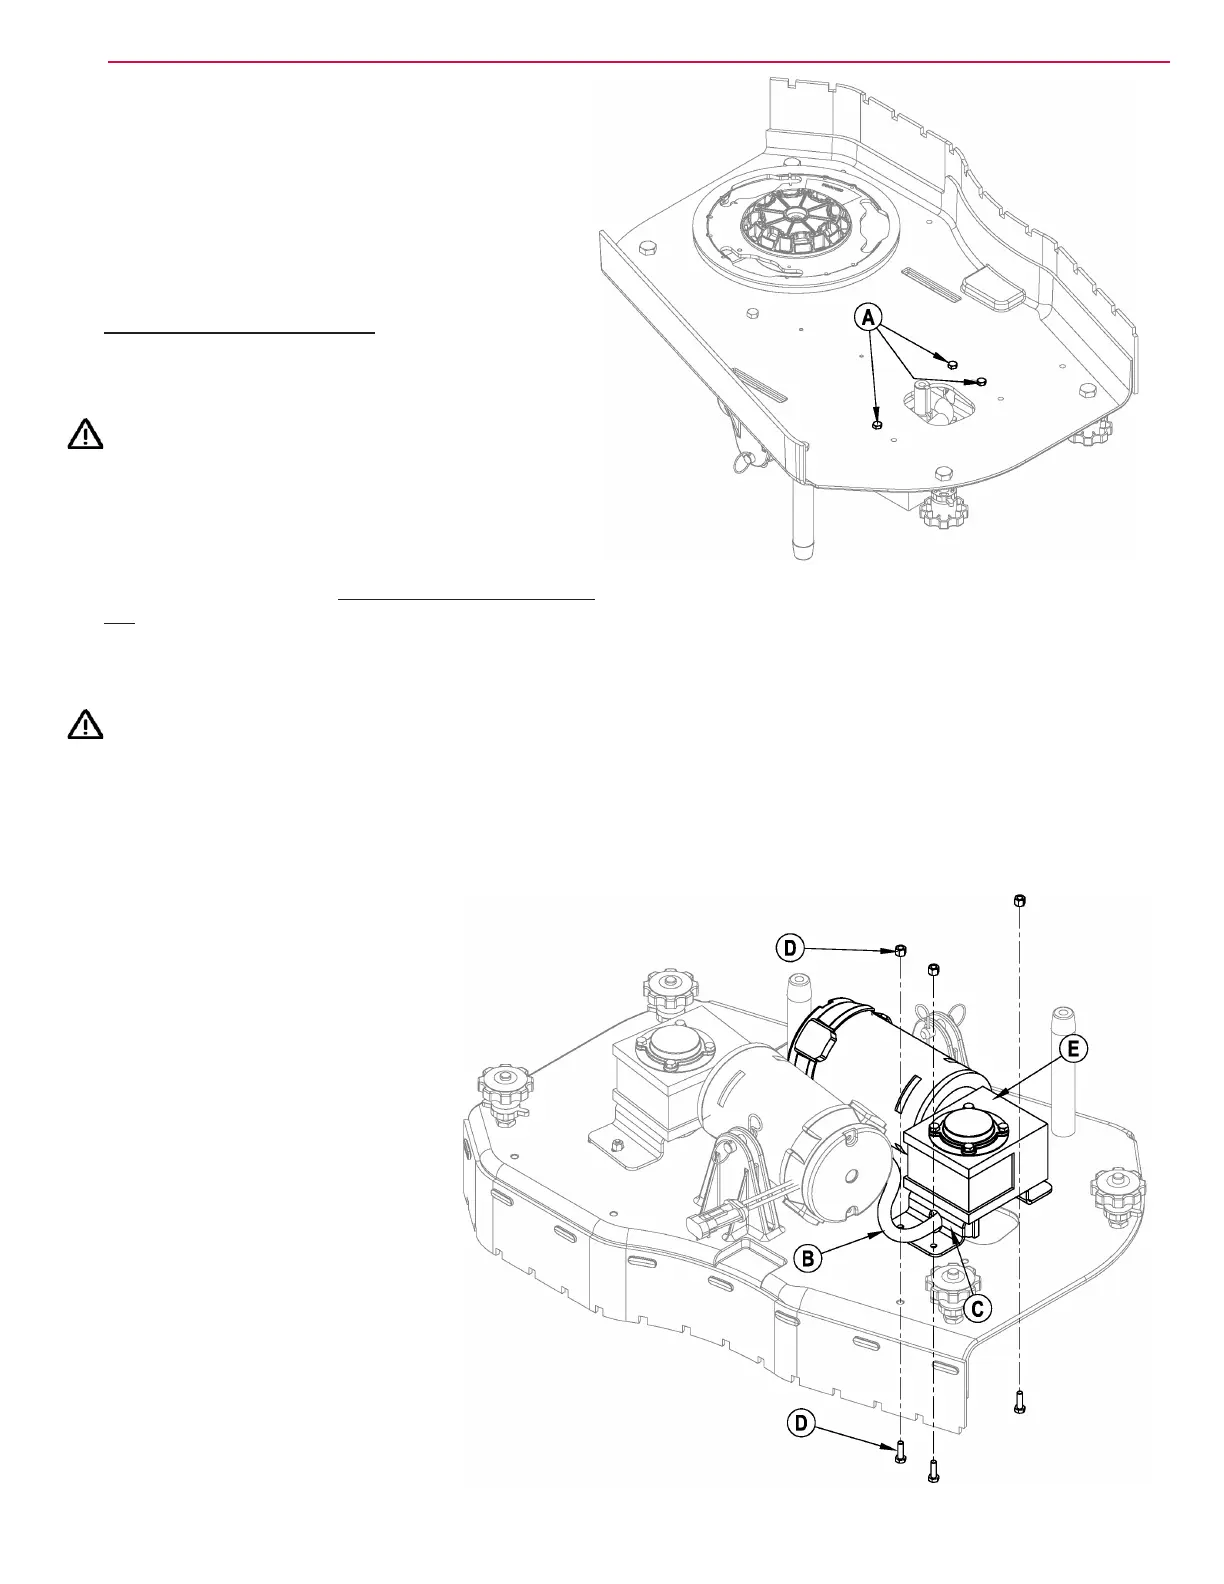
5 See Figure 22. Mark the bolt locations (A) before removing them
because one deck is used for all deck sizes and there are multiple
congurations.
6 See Figure 23. Extract the solution hose (B) from the motor
bracket (C).
7 Remove the bolts and nuts (D) and remove the motor assembly (E)
from the deck.
8 Disassemble the existing scrub brush motor from the bracket.
9 Apply Loctite #242 to the motor bolts before fastening the new
motor to the bracket.
10 Feed the hose back into the bracket making sure that the hose is
pointed towards the shaft.
CAUTION!
If the hose is not positioned correctly, the scrub brush will be
damaged (melted) due to lack of water.
11 Reattach the motor/bracket assembly to the deck making sure to
use the correct holes. (If position is not correct, brushes will either
interfere with each other or with the deck sides.)
12 Lubricate the Motor Gimbal and apply anti-seize to the socket head
bolt before reassembly.
13 Press the Brush Plate rmly onto the motor shaft. If it is not pressed
in completely, the deck will not be level, causing one motor to
prematurely burn out. (see Caution).
CAUTION!
ST - the control board monitors total current drawn by both motors
combined. It cannot differentiate if one is bound and pulling high
current, or if one is forced into the oor while the other is barely
making contact. To verify proper operation of each motor, monitor
them individually with a current clamp while the machine is
scrubbing.
14 Firmly tighten the socket head screw without
over-torquing as damage to Motor Gimbal may
occur.
FIGURE 22
FIGURE 23

 Loading...