J6 transmitter copyright © 2012 BMI
3
MIX: ashes while programming, when the mixer is not active / MIX is display when the mixer is active.
The 4 bars on the screen, are the trim indicators and show the position of the trims.
On the channel indictor, you can see which channels are activated
1: aileron channel
2: elevator channel
3: throttle channel
4: ruder channel
5: gyroscope/landing gear
6: pitch channel/ aps
Switching on the transmitter
Place every switch in the normal position. (this means place to the back , away from the pilot) and switch on the transmitter. The LCD screen
displays the actual parameters. There are 3 kinds of parameters that you can set:
General parameters, advanced parameters and special parameters. You can nd an overview below. In general you -Press the A-button in order
to go to the general menu.
- press the A & B button simultaneously in order to go to the advanced menu.
Airplanes & Gliders Helicopters
A:Control of radio controlled airplanes (separate receiver required)
Functions Page
General parameters
Servo reverse P4
Dual Rate P4
Wing mixer (Delta, V-Tail, Flaps/ailerons) P4
Throttle curve P5
Gear Speed P5
Trims P6
Advances parameters Model Type selection P6
Range Test P9
Wireless copy P9
Functions Page
Servo reverse P6
Dual Rate P7
CCPM Mixer P7
General parameters General Mixers P7
Throttle curve P9
Gyro sensitivity P9
Throttle Hold P9
Trims P9
Advanced parameters
Model type selection P6
Swashplate type P6
Range Test P9
Wireless copy P9
Special Functions
Functions Page
3D Switch safety P9
Throttle hold Switch safety P9
Reset P10
Communication protocol P10
Stick calibration P10
Factory settings P10
Trainer function P10
Model Type setup Page 5
Description Steps to follow Instructions
This function offers two
possibilities:
Airplanes or Helicopters
1. Turn on the transmitter
2. Simultaneously press the A-button and B-button for one second. On the LCD
screen the “MODE” -icon and the “Modeltype” Icon” (helicopter or airplane) will
start ashing.
3. Turn the D-Knob until the “”Mode””-icon and the
“”model type””-icon (helicopter or airplane) ash together on the LCD screen”
4. Next press the C-button or the A-button. The Modeltype icon keeps ashing.
5. Select the desired model type (helicopter or aeroplane), by turning the D-Knob.
6. Press the C-button to conrm your choice and its corresponding parameters
7. Press the B-button to go back in the menu.
The model type option includes two options:
Airplane or helicopter.
An alteration of the model type will modify all parameters of
the current model to the default factory settings. So be careful
when using this function. If you are not sure, do NOT press
the C-button, in order to avoid replacing the settings by default
values. After changing the model type, it is recommended to
restart the transmitter, in order to make sure that your changes
have been saved.
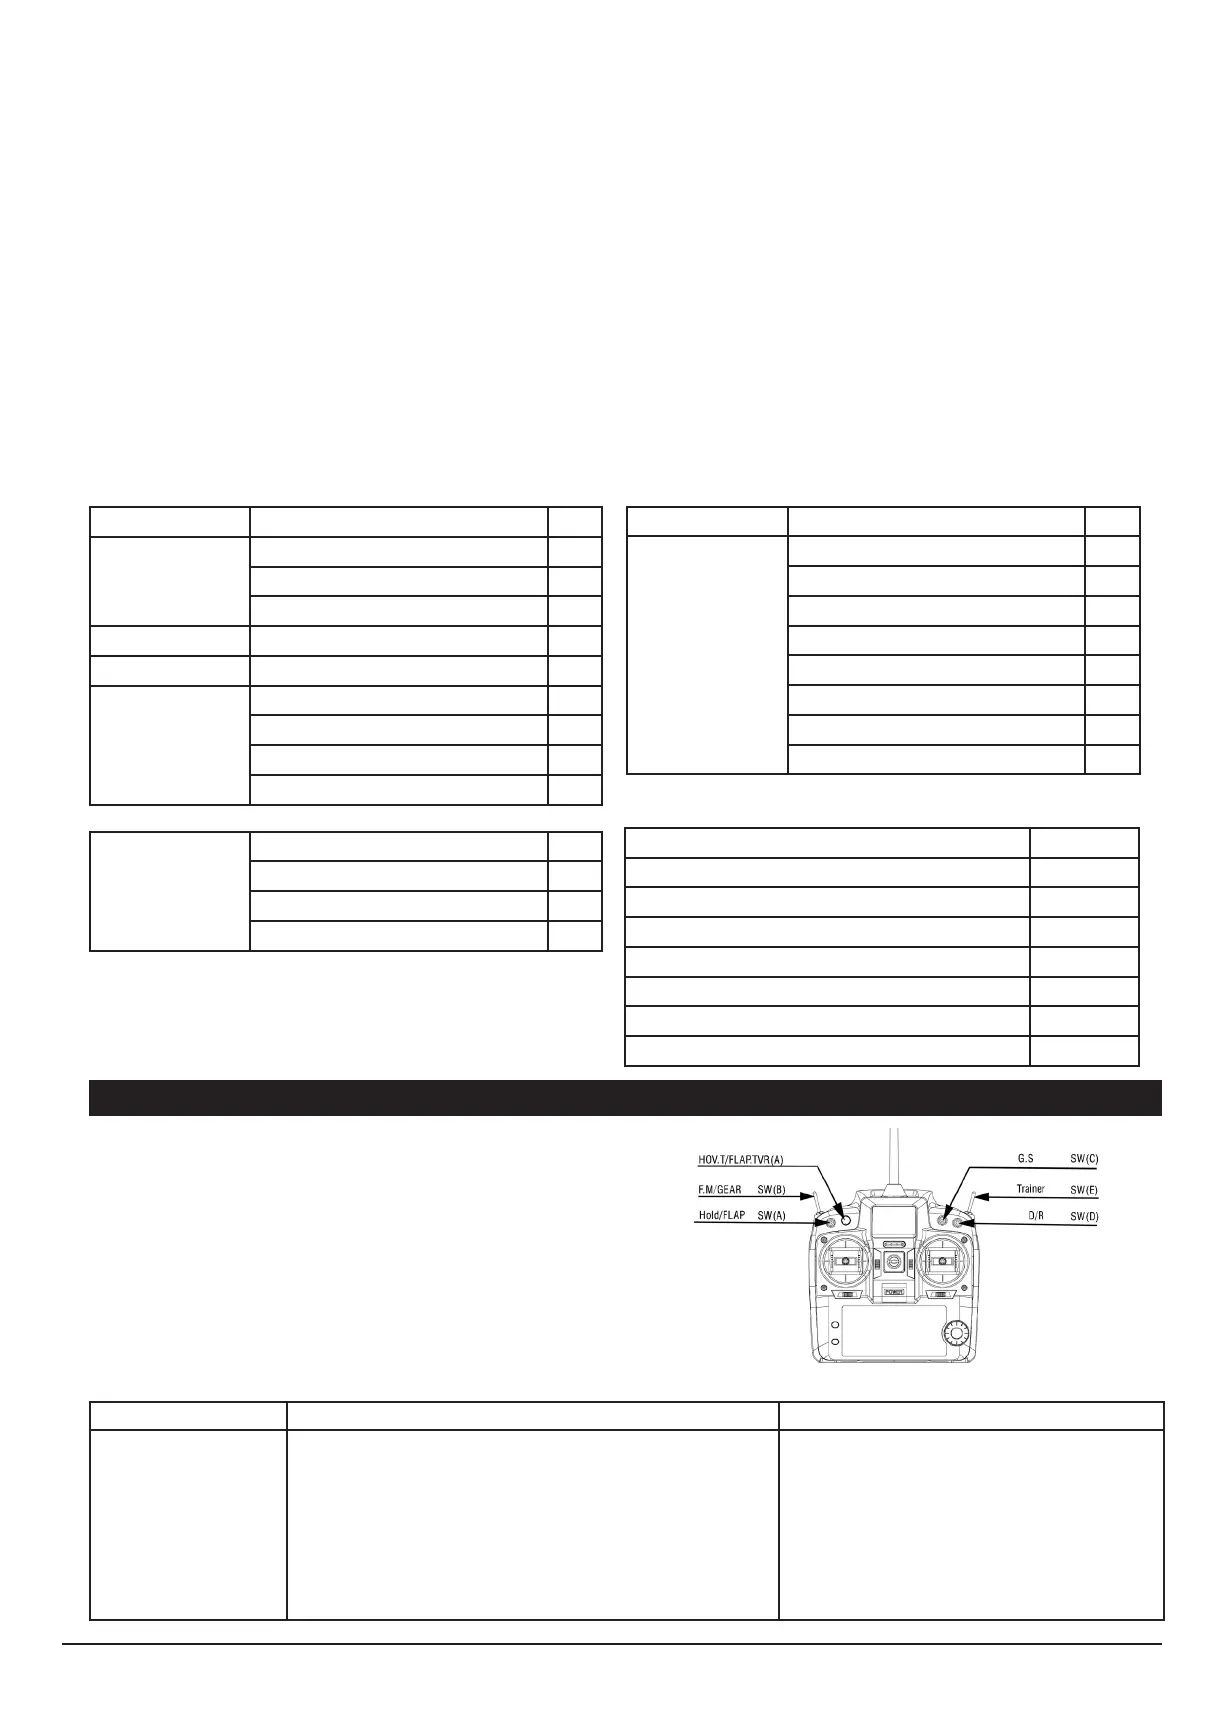
There are several possibilities to use this transmitter in combination
with model airplanes, gliders,…
Modeltype, channel reverse, dual rate, wing mixers, curves, trims,…..
can all be setup. Below you’ll nd an overview of all switches