4
copyright © 2012 BMI J6 transmitter
Avion
1
Aileron channel
for Delta wing
Aileron channel
2
Aileron channel
for V-tail
Aileron channel
3
Aileron channel
for aps/ailerons
Aileron channel
Wing mixers Wing mixers, example 1, 2 ou 3
Servo reverse function
Description Steps to follow Instructions
Make sure the channel is setup
in the right position, according
to the installation position of
the servo
1. Turn on the transmitter
2. Press the A-button for 1 second and the “NOR REV” symbol and “123456” symbol will start ashing.
3.Press the A-button or the C-button to conrm.
4. Select the channel you wish to reverse, using the D-knob
5. Conrm your selection, by pressing the C-button.
6. Turn knob D in order to choose “NOR” or “REV”
7. Press the C-button to save the changes and enter into the next channel.
8. Press the B-button to return in the menu.
The LCD screen displays the current ‘NOR/REV’
settings of every channel. It is necessary to
conrm every modication with the C-but-
ton. Please pay attention that every time you
change REV/NOR settings, these changes have
immediate effect on the model. Especially when
reversing the throttle channel. We recommend
you to remove rotor blades when reversing the
throttle channel.
Dual Rate Function
Description Steps to follow Instructions
When choosing high rate or
low rate mode for the “”AIL””,
“”ELE”” or “”THR”” channels,
you can set two values for the
control stick’s both directions
(left/right and up/down)
separately.
1. Turn on the transmitter
2. Press the A-button for 1 second and the “NOR REV” symbol and “123456” symbol will start ashing.
3. turn the D-knob until the “D/R indicator” and n “123456” ash on the screen.
4. Press the A-button or the C-button to conrm.
5. Select the channel you wish to modify, using the D-knob.
6. Press the A-button or the C-button in order to conrm your choice.
7. Turn the D-knob to set the rudder value. use the D/R switch to choose high rate mode or low rate
mode. Move the corresponding channel stick to select the rudder value for the left/right or up/down
sides. (Press the A-button to restore factory settings)
7. Press the C-button to save the changes and enter into the next search.
8. Press the B-button to return in the menu.
“When a specic channel has been selected,
the current D/R value will be displayed on the
screen. In the D/R menu, each channel has 4
parameters that can be set, by using the D/R
switch and the corresponding stick.
Values can be restores to factory settings by
pressing the A-button.
D/R values vary between -125% and +125%
Remark: a negative value indicates that the
control directions is opposite to the swing direc-
tion of the stick.”
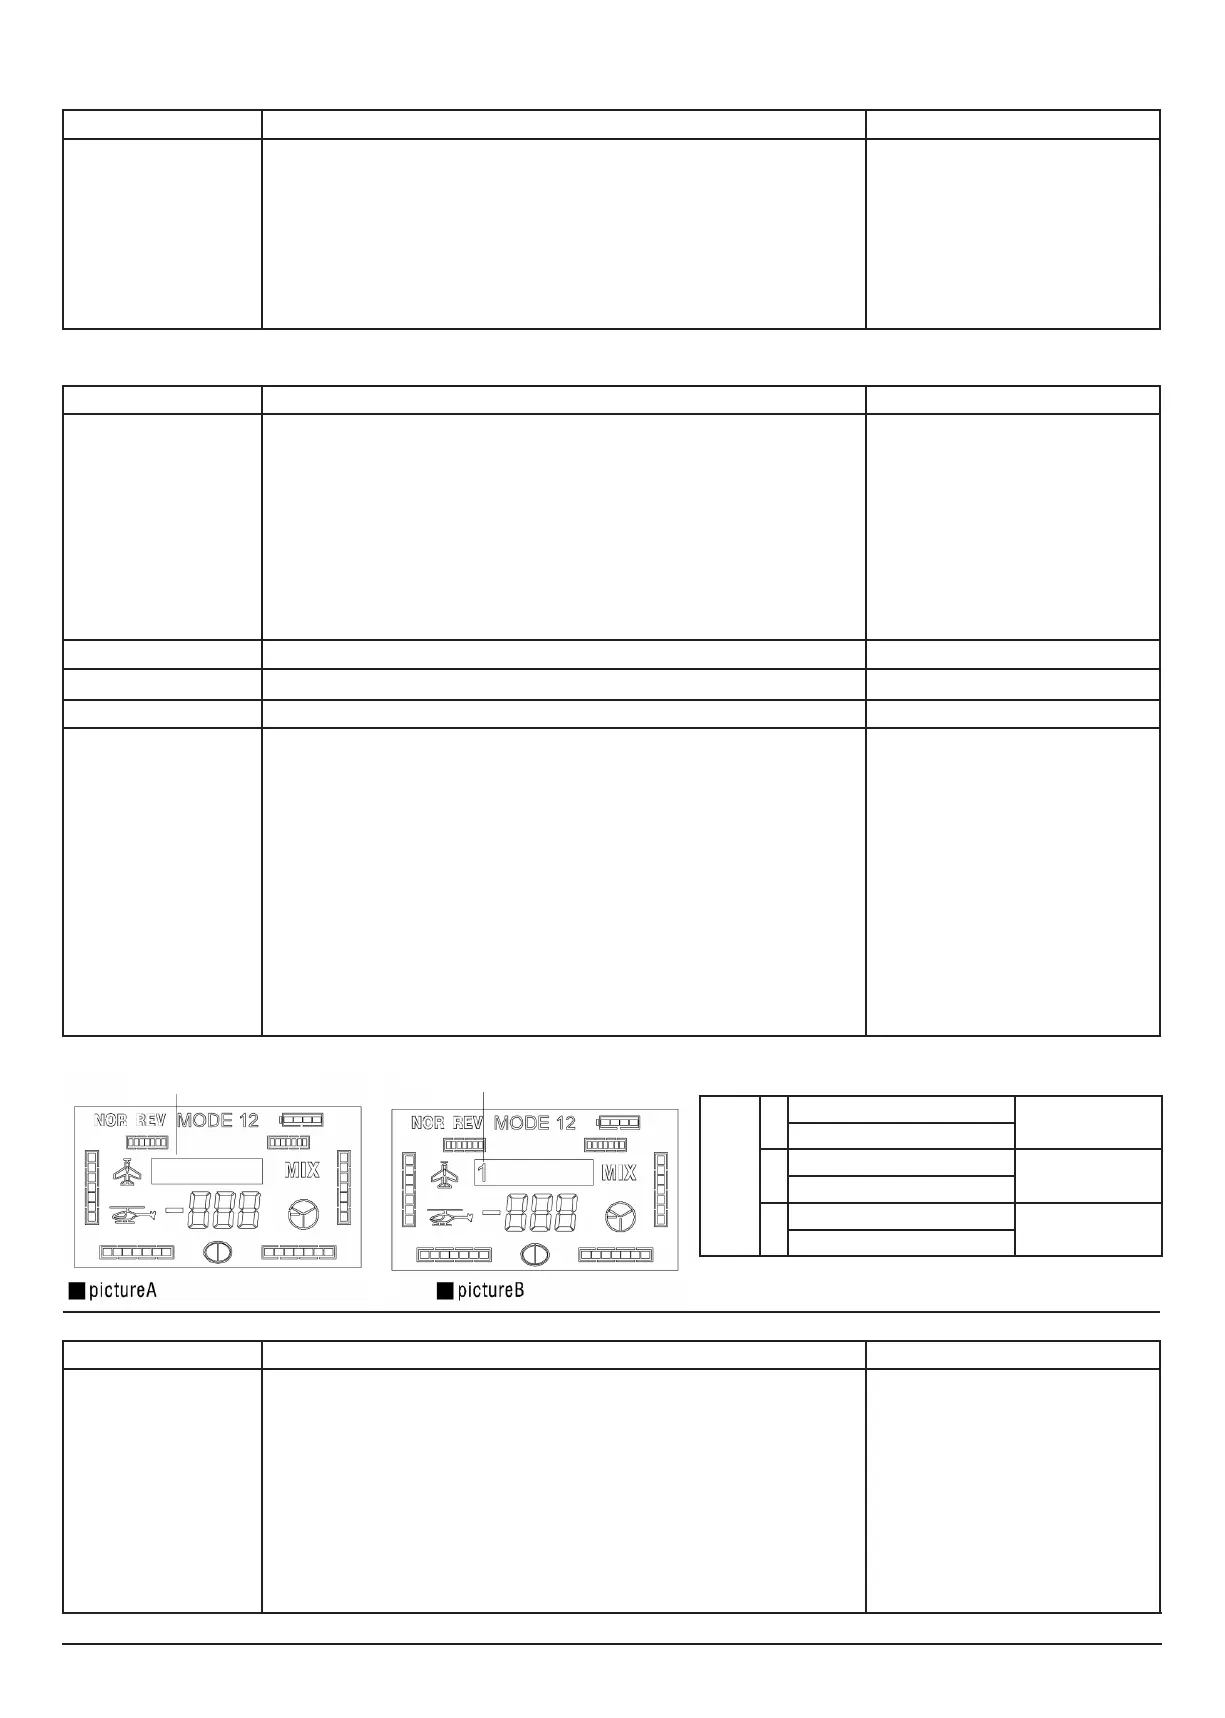
Wing mixers
Description Steps to follow Instructions
This function provides 3 kinds
of basic wing mixer parameters
and asymmetric value setup of
the sticks.
1. Turn on the transmitter
2. Press the A-button for 1 second and the “NOR REV” symbol and “123456” symbol will start ashing.
3. turn the D-knob until the “MIX “ symbol and the “123456” symbol ash on the screen.
4. Press the A-button or C-button, and the “123456” symbol disappears (unless these parameters have
been set before)
5.Select the preferred wing type, by turning the D-knob
6. Press the A-button or C-button and “MIX” and the wing conguration will ash
7. Turn the D-knob in order to select main channel or
sub channel.”
8. Press the A-button or the C-button in order to conrm your choice.
9. Turn the D-Knob to set the ‘wing mix’ value, use the corresponding control stick to change the
parameters.
(press the A-button to restore the factory settings) “
10. Press the C-button to save the changes and enter into the next search.
11. Press the B-button after nishing setup.
- If no gure is shown, no wing mixer is set
- “”1”” represents a delta wing type mixer
- “”2”” represents a v-tail mixer
- “”3”” represents a ap/aileron mixer.
Use the control sick of each channel, to change
the parameter of left/right or up/down in the
wing mixer setup.
Press the A-button to restore the factory set-
tings. Press C to cancel the setting value of the
wing mixer.
Curves
Description Steps to follow Instructions
“This function allows you to
change the curve setup which
can improve the operational
feeling of the control sticks.
You can set a negative or posi-
tive curve index for aileron, rud-
der and elevator. The throttle
channel has a 5 points curve.
You’ll nd an explanation about
curve indices further below.
1. Turn on the transmitter
2. Press the A-button for 1 second and the “NOR REV” symbol and “123456” symbol will start ashing.
3. turn the D-knob until only the “123456” symbol ashes.
4. Press the A-button or C-button. The active channel is displayed
5. Use knob D to select a channel
6. press the A-button or C-button. The active channel and two digits on the throttle indicator will start
ashing, followed by a “E”
7. Turn the D-knob to set the curve. Press the A-button in order to restore the factory settings)
8. Press the C-button to save the changes and enter into the next option.
9. Press the B-button to return in the menu.
“When you have selected the channel, the
displays shows the current curve index, followed
by “”E””
A positive curve index means that the stick
movement has a much throw around the middle
point and few throw at both ends.
The effect is opposite when the curve index is
negative.