8
copyright © 2012 BMI J6 transmitter
5 point throttle curve & Pitch Curve
Description Steps to follow Instructions
Setup of the 5 points throttle
curve
1. Turn on the transmitter
2. Press the A-button for 1 second and the “NOR REV” symbol and “123456” symbol will start ashing.
3. turn the D-knob until only the “123456” symbol ashes.
4. Press the A-button or C-button. The active channel is displayed
5. Turn the D-knob until “”dot”” appears on the screen (this is the case for the
throttle and the pitch channel)”
6. Press the A-button or the C-button. The number of the corresponding dot (dot n°1 to dot n°5) will ash
7. Turn knob D in order to select the desired dot.
8. Press the A-button or C-button in order to set a value for this point.
9. Use knob D to set the value.
(press the A-button to restore factory settings)
10. Press the C-button to save the change
11. Press the B-button to go back in the menu.
The throttle curve is a ve dot curve that can be
set from the minimum throttle stick position
(dot 1) to the maximum throttle stick position
(dot 5). dots 2,3,4 are in between. Dot 3 cor-
responds the middle position of the throttle stick.
values vary between 0% and 100%
Examples
Description Steps to follow Instructions
Example:
Setting the elevator curve index
to +25%”
1. Turn on the transmitter
2. Press the A-button for 1 second and the “NOR REV” symbol and “123456” symbol will start ashing.
3. turn the D-knob until only the “123456” symbol ashes.
4. Press the A-button or C-button. channel 1 will now ash
5. Turn the D-knob until channel 2 appears on the screen
6. Press the A or C-button. The rst two digits on the throttle indicator will ash, follow by “E”
7. Turn knob D until “+25” is displayed as value.
8. Press the C-button to save the change
9. Press the B-button to go back in the menu.
When a channel has been chosen, the throttle
indicator displays the current curve index, fol-
lowed by an “”E””
A positive value(+) means that the sensitivity
around the middle point of the control stick is
bigger and smaller at the ends. A negative (-)
curve index has an opposite effect.
Description Steps to follow Instructions
“Example:
Setting a 5 point PITCH curve
with these 3D values:
dot 1: 30%
dot 2: 35%
dot 3: 40%
dot 4: 45%
dot 5: 52%
remark : the setup of the throt-
tle curve is described on the
pages 11~12”
1. Turn on the transmitter
2. Press the A-button for 1 second and the “NOR REV” symbol and “123456” symbol will start ashing.
3. turn the D-knob until only the “123456” symbol ashes.
4. Press the A-button or C-button. channel 1 will now ash
5. Turn the D-knob until channel 6 appears on the screen Down on the screen “”dot”” is displayed. µ”
6. Press the A-button or the C-button. “1” (dot n°1) will ash
7. Press the A-button or C-button. “1” (dot 1) keeps ashing. 3 digits on the throttle indicator will ash as well.
8. Turn the D-knob until the value for dot 1 is 030
9. Conrm by pressing the C-button. “2” (dot 2) will start ashing.
10. Press the A-button or C-button. “2” (dot 2) keeps ashing. On the throttle indicator, 3 digits ash as well.
11. Turn the D-knob until the value for dot 2 is 035
12. Press the C-button to conrm. “3” (dot 3) will start ashing.
13. Press the A-button or C-button. “3” (dot 3) keeps ashing. On the throttle indicator, 3 digits ash as well.
14. Turn the D-knob until the value for dot 3 is 040
15. Press the C-button to conrm. “4” (dot 4) will start ashing.
16. Press the A-button or C-button. “4” (dot 4) keeps ashing. On the throttle indicator, 3 digits ash as well.
17. Turn the D-knob until the value for dot 4 is 045
18. Press the C-button to conrm. “5” (dot 5) will start ashing.
19. Press the A-button or C-button. “5” (dot 5) keeps ashing. 3 digits on the throttle indicator will ash as
well.
20. Set the value of dot 5 to 052 with knob D
21. Press the C-button to conrm
22. Press the B-button twice in order to go back in the menu.
When moving the cursor to the channel 3 or 6, it
will automatically display “”dot”” on the LCD.
This means that the Throttle and Pitch curves
are 5 dot operation curves, and thus can be set
on 5 different dots.
Please remark that after setup, no “”E”” will
appear on the throttle indicator.
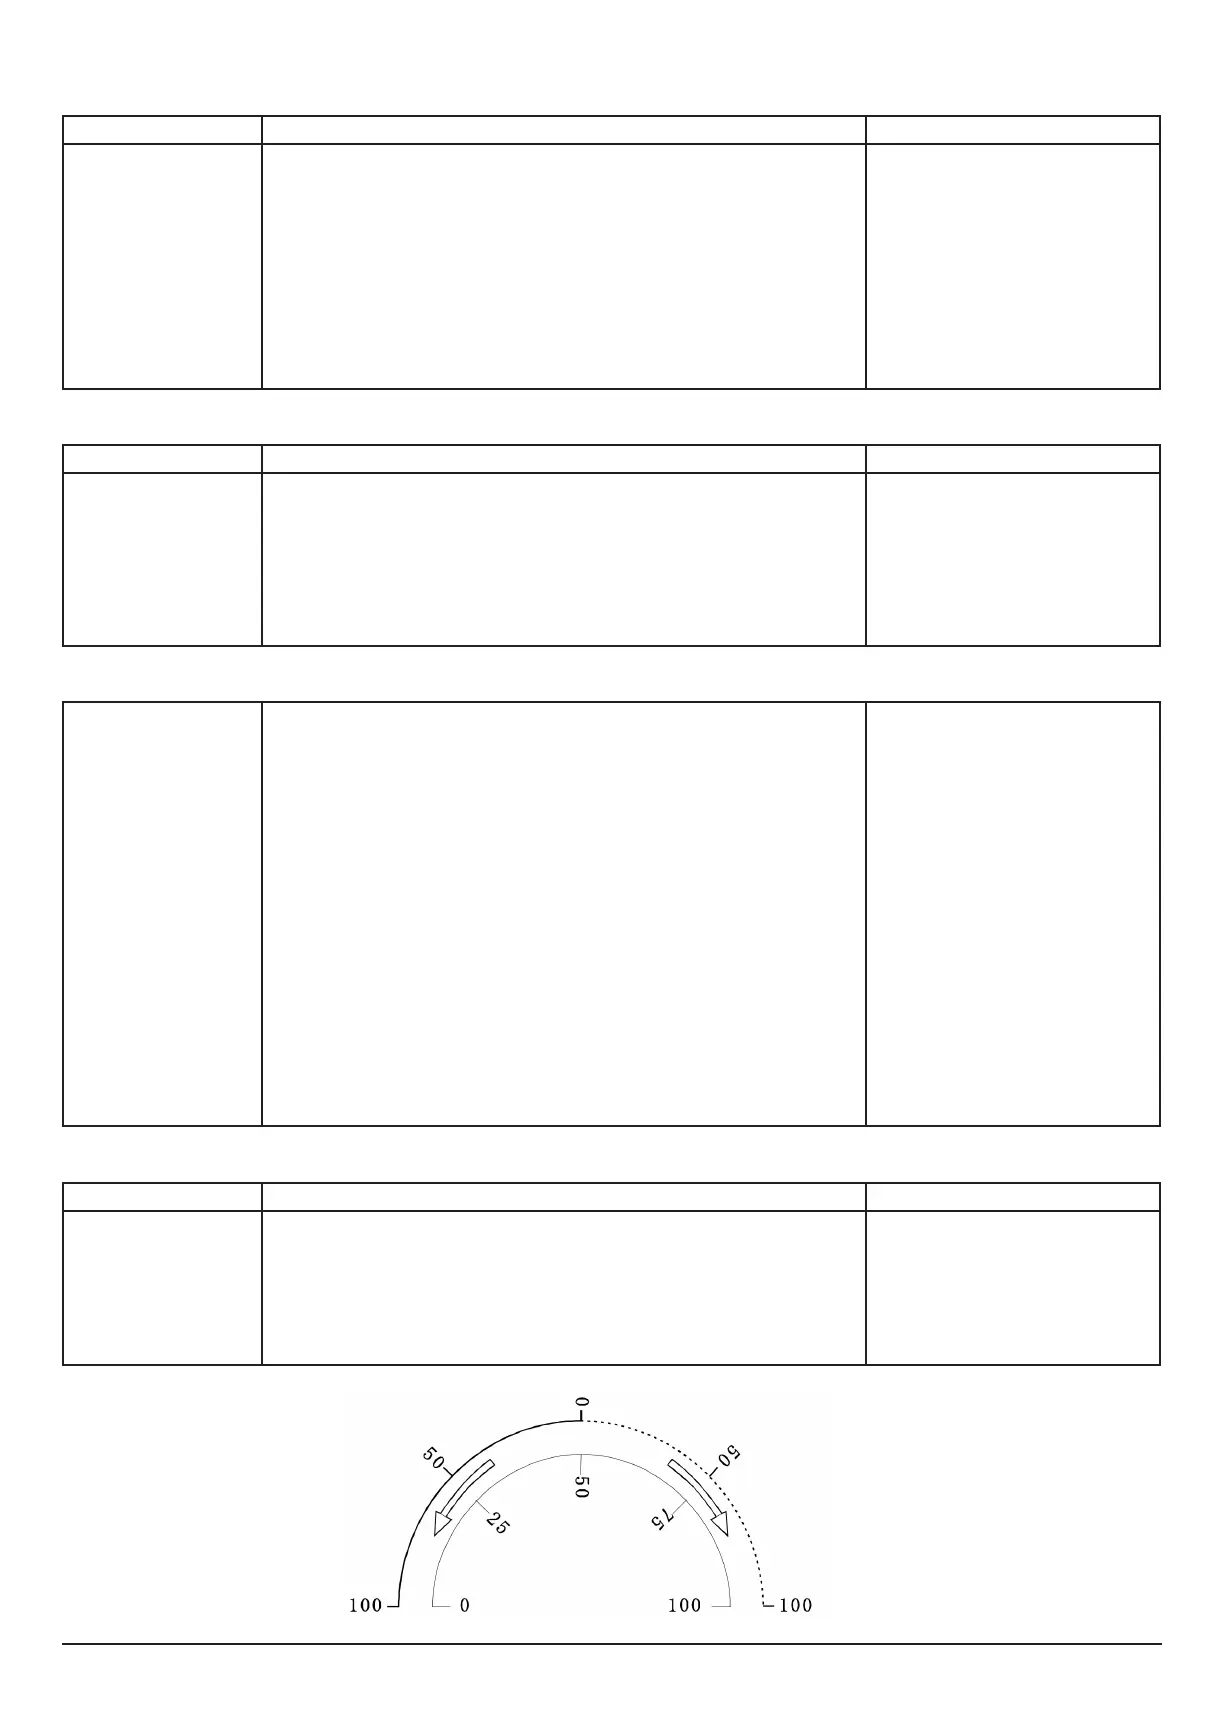
Gyro sensitivity
Description Steps to follow Instructions
This function allows you to set
the sensitivity of the gyroscope.
1. Turn on the transmitter
2. Press the A-button for 1 second and the “NOR REV” symbol and “123456” symbol will start ashing.
3. turn the D-knob until only the “G-S” symbol ashes.
4. Press the A-button or C-button and 3 digits on the throttle indicator will ash.
5. Use knob D to change the value of the gyro sensitivity. (By pressing the A-button, the factory setting
will be restored)
6.. Press the C-button to save the new value
7. Press the B-button twice in order to go back in the menu.
Use the switch SW(C) during setup in order
to program 2 different values. You can ip the
switch during ight if more or less gyro sensitiv-
ity is required.