Sdasdasdsdfdsdcdscsdcdcd
cdcsc
Nitronic
NitronicNitronic
Nitronic
Mattenstrasse 11
CH – 2555 Brügg Tel. +41 32 373 70 70
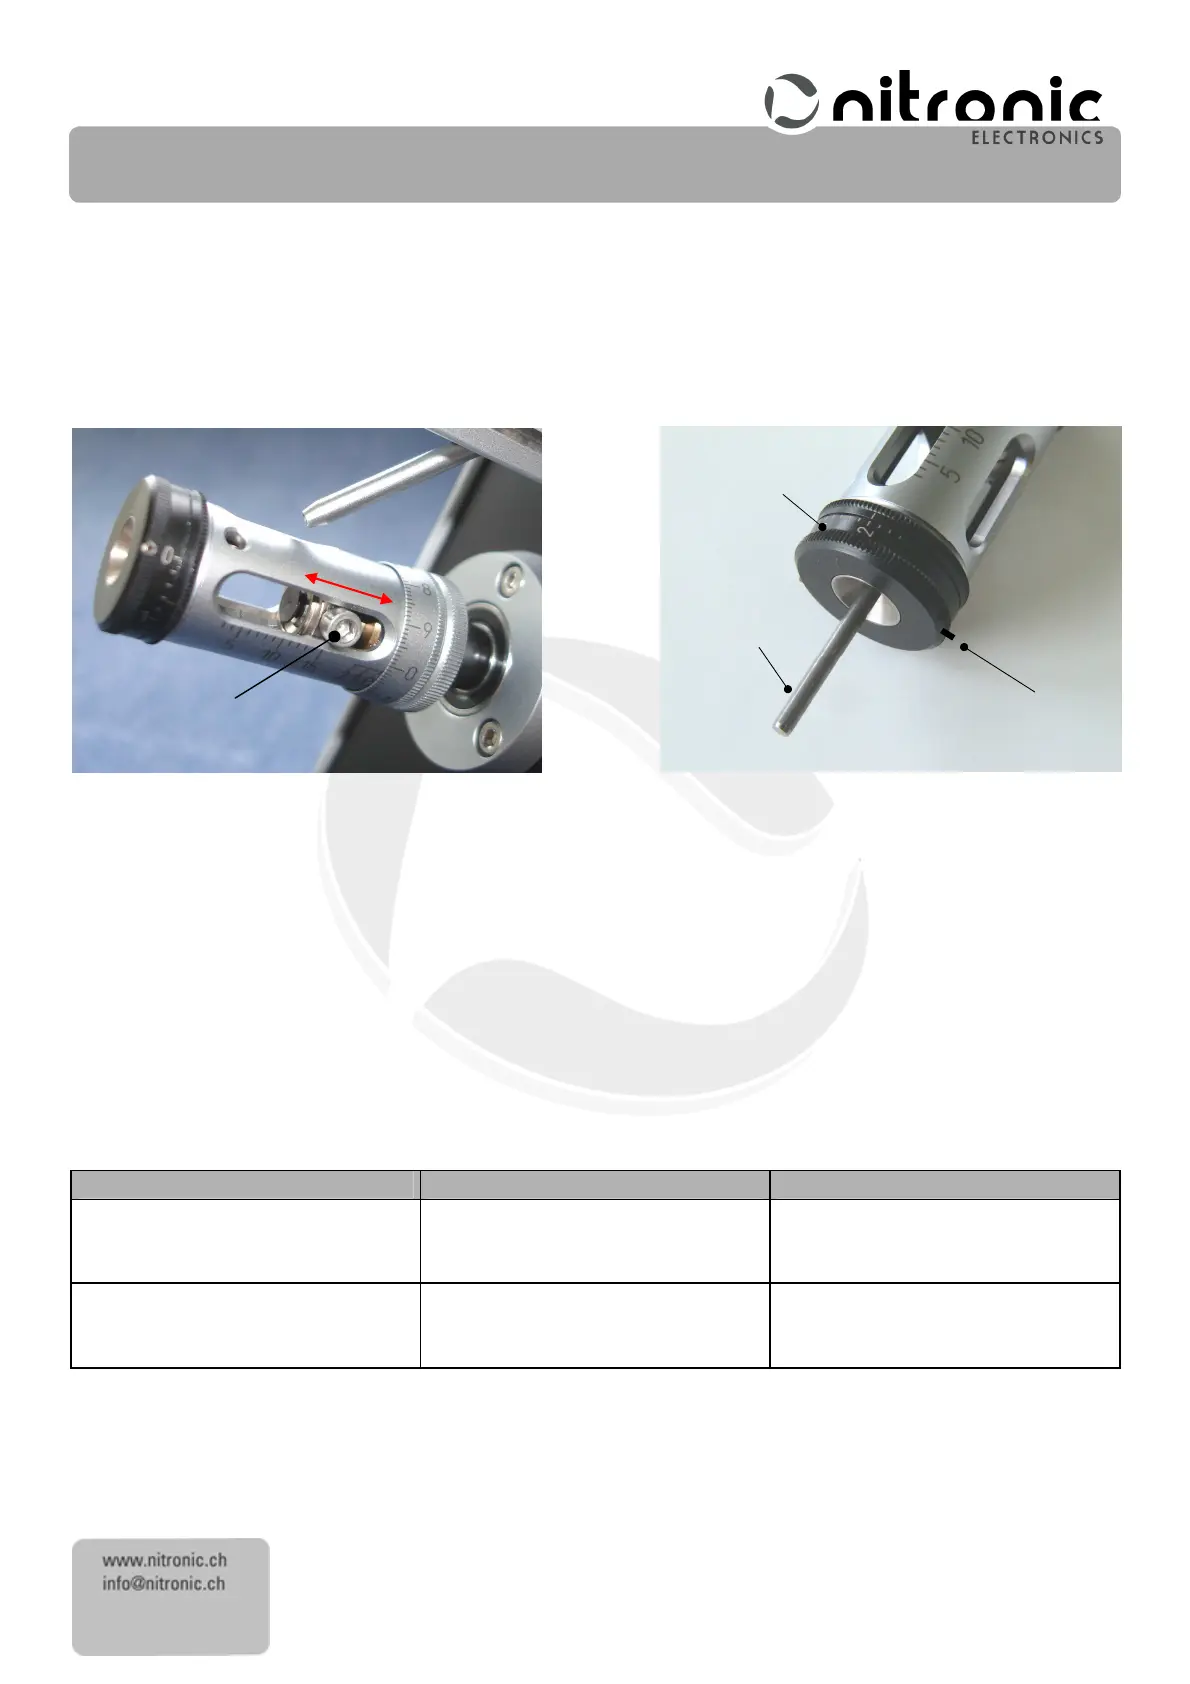
• Loosen the centering unit so that it is not tightened.
• Set the diameter scale to 0.0mm (0.0 Inch).
• Slowly push the big Allen screw (6)
(6)(6)
(6) back and forth. This will cause the four stripping blades to automatically fit into
the tracks on the guide plate Fig. 20.
• Now tighten the centering unit.
Fig. 20 Fig. 21
• Tighten a bit the screw (19)
(19)(19)
(19) (black)
(black)(black)
(black)
• By rotating the centering scale (17),
(17),(17),
(17), fully open the centering jaws (25)
(25)(25)
(25) and insert the calibrating pin (30)
(30)(30)
(30). Then by
rotating the centering scale (17)
(17)(17)
(17) close the centering jaws as far as the calibrating pin (30)
(30)(30)
(30)
Fig. 21.
• Loosen screw (19)
(19)(19)
(19) (
((
(black)
black)black)
black) and turn the centering scale (17)
(17)(17)
(17) clockwise to diameter
2.0
2.0 2.0
2.0 mm
mmmm
mm. Retighten carefully
screw (19) (
(19) ((19) (
(19) (black
blackblack
black)
))
) and remove calibrating pin (30)
(30)(30)
(30).
The ST215 is now ready for use.
Error
Error Error
Error sources
sourcessources
sources
Faults
FaultsFaults
Faults
on
on on
on cable
cablecable
cable
Diagnos
DiagnosDiagnos
Diagnos
rectification
rectificationrectification
rectification
ductor, screen or dielectric
cut into
Reduce centering diameter in steps
Very small difference in diameter
between Jacket and conductor.
Reduce centering diameter in small
steps