Transmitter troubleshooting
Introduction to transmitter (TX) troubleshooting
Please note the following before performing transmitter tests:
•
TX troubleshooting requires TX operation.
•
Do not transmit on frequencies that are in use!
•
The transmitter can be controlled in local mode for diagnostic purposes.
•
The most useful Phoenix tool for GSM transmitter testing is “RF Control”; in WCDMA transmitter testing
the best tool is “TX Control”.
•
Remember that re-tuning is not a fix! Phones are tuned correctly in production.
•
The TX path for GSM and WCDMA are using the same filters in some bands. Please refer to RF component
reference (page 4–25) for details.
Note: Never activate the GSM or WCDMA transmitter without a proper antenna load. Always connect
a 50Ω load to the RF connector (antenna, RF-measurement equipment or at least a 2W dummy load);
otherwise the GSM or WCDMA Power amplifier (PA) may be damaged.
GSM transmitter troubleshooting
Steps
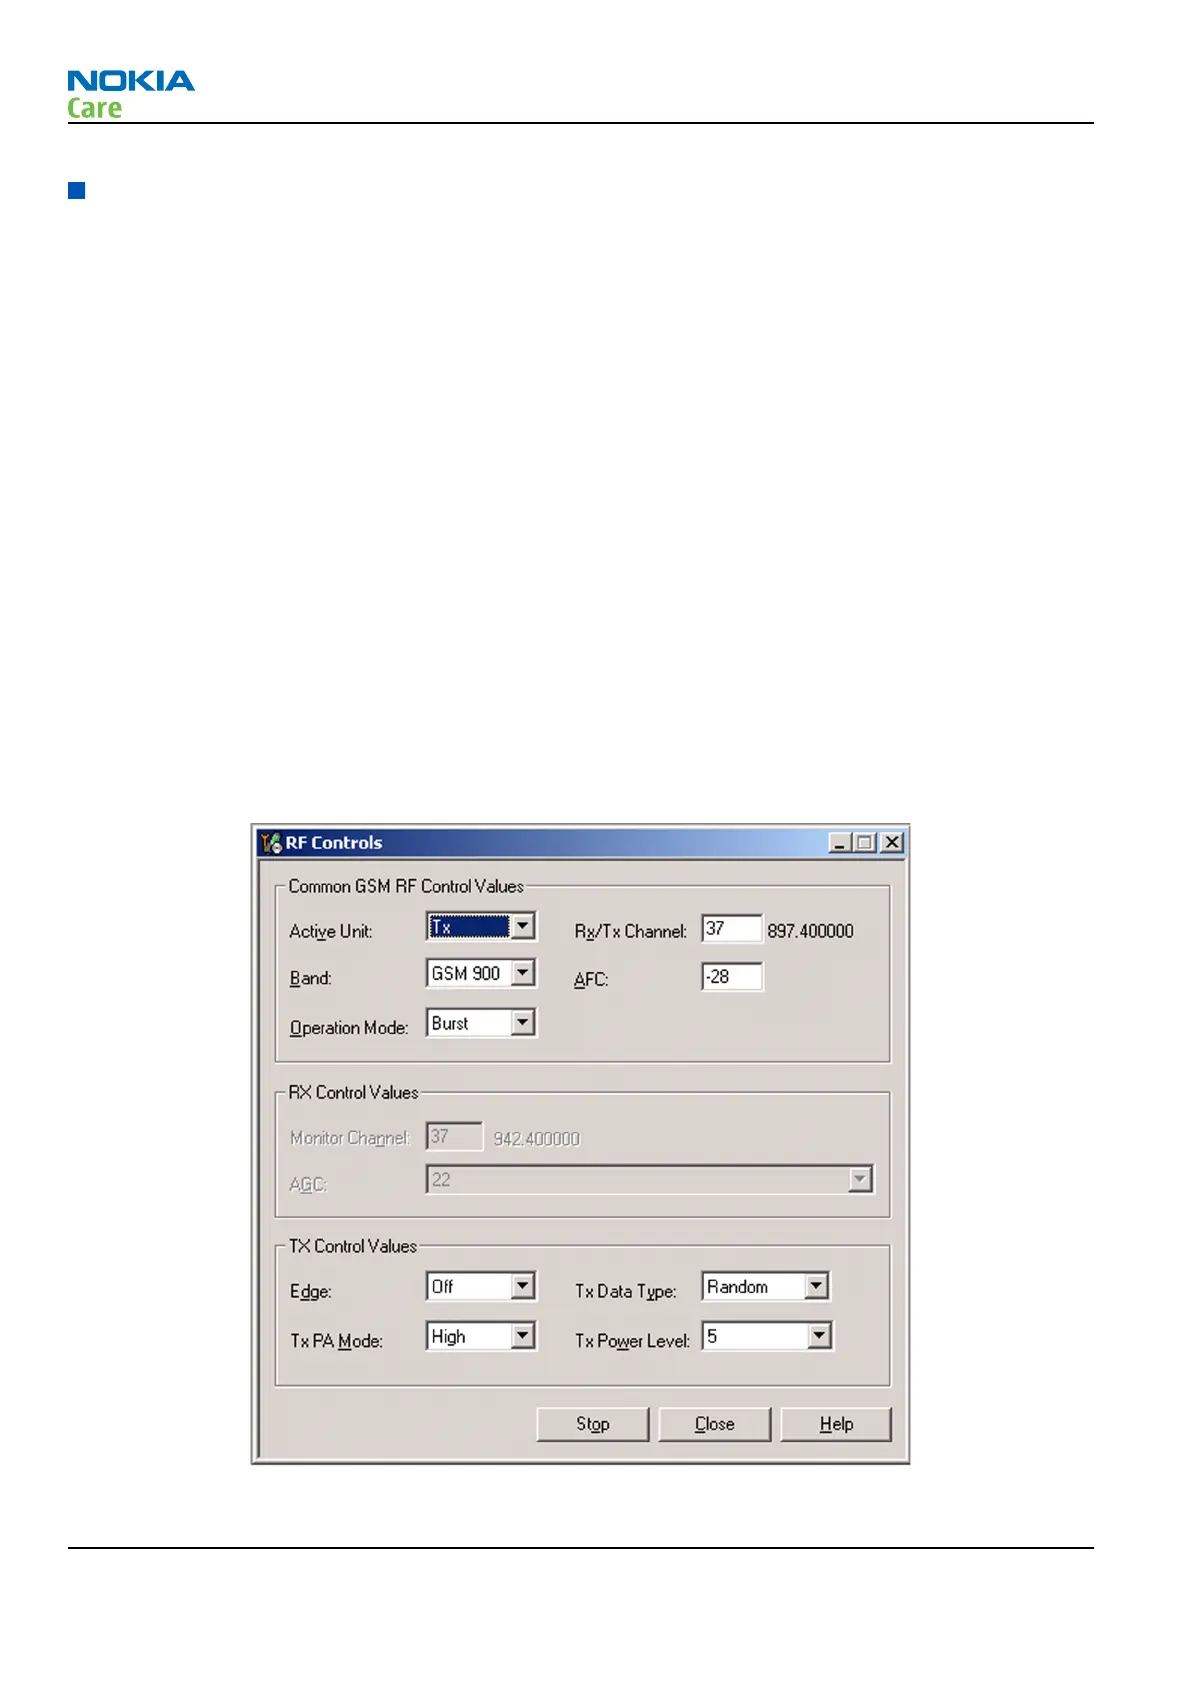
1. Set the phone to local mode.
2. In Phoenix, select Testing→GSM→Rf Controls . The RF Controls window opens.
Figure 22 Phoenix RF Controls window
3. Make the following settings:
RM-509; RM-510; RM-511
RF Troubleshooting
Page 4 –14 COMPANY CONFIDENTIAL Issue 2
Copyright © 2009 Nokia. All rights reserved.