11
4. INSTALLATION ON THE X-LITE HELMETS
This procedure must be followed for the installation of N-Com systems on X-lite helmets other than
model X-1005, X-903, X-552.
Important: Prior to installing the N-Com system, it is recommended to write down the identification
code affixed to the product (see chapter 19.4).
The installation video can be seen at www.n-com.it / Support section.
4.1. Preliminary operations
• Remove the internal comfort padding by following the specific instructions provided in the helmet
user manual.
• If present, remove from the polystyrene cheek pads the foam filling material that cover the
housings of the N-Com earphones. Keep this filling materials should you decide in the future to
use the helmet without the N-Com system installed.
4.2. Installing the system in the helmet
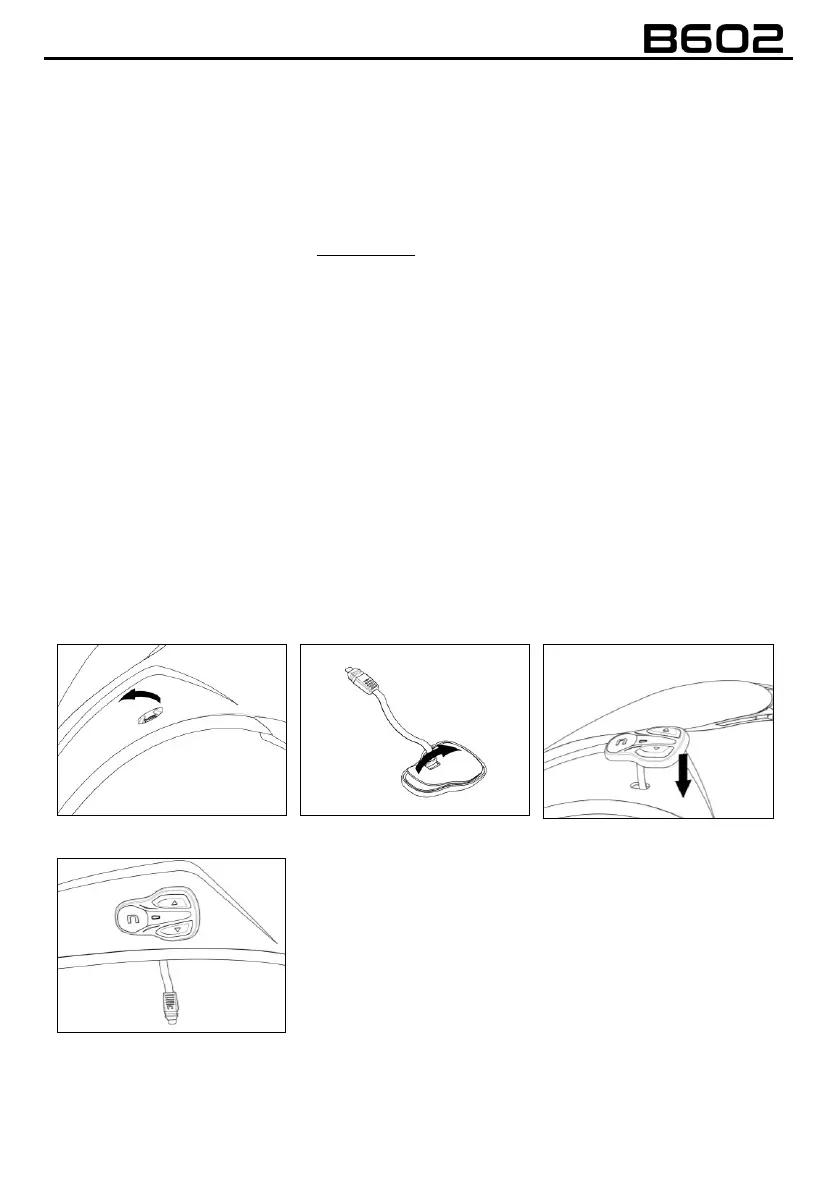
• Remove the small N-Com cap positioned on the left side of the helmet. To make the operation
easier, we recommend pushing the cap from inside the helmet (Fig. 24).
• Thoroughly clean the outside surface of the shell to make sure that the adhesive keypad sticks
properly. Before you apply the keypad, make sure that the shell area is completely clean and grease
or dirt free.
• Remove the protective film from the back of the adhesive keypad using the special tab (Fig. 25).
• Pass the keypad cable through the hole in the outer shell (Fig. 26).