4.7
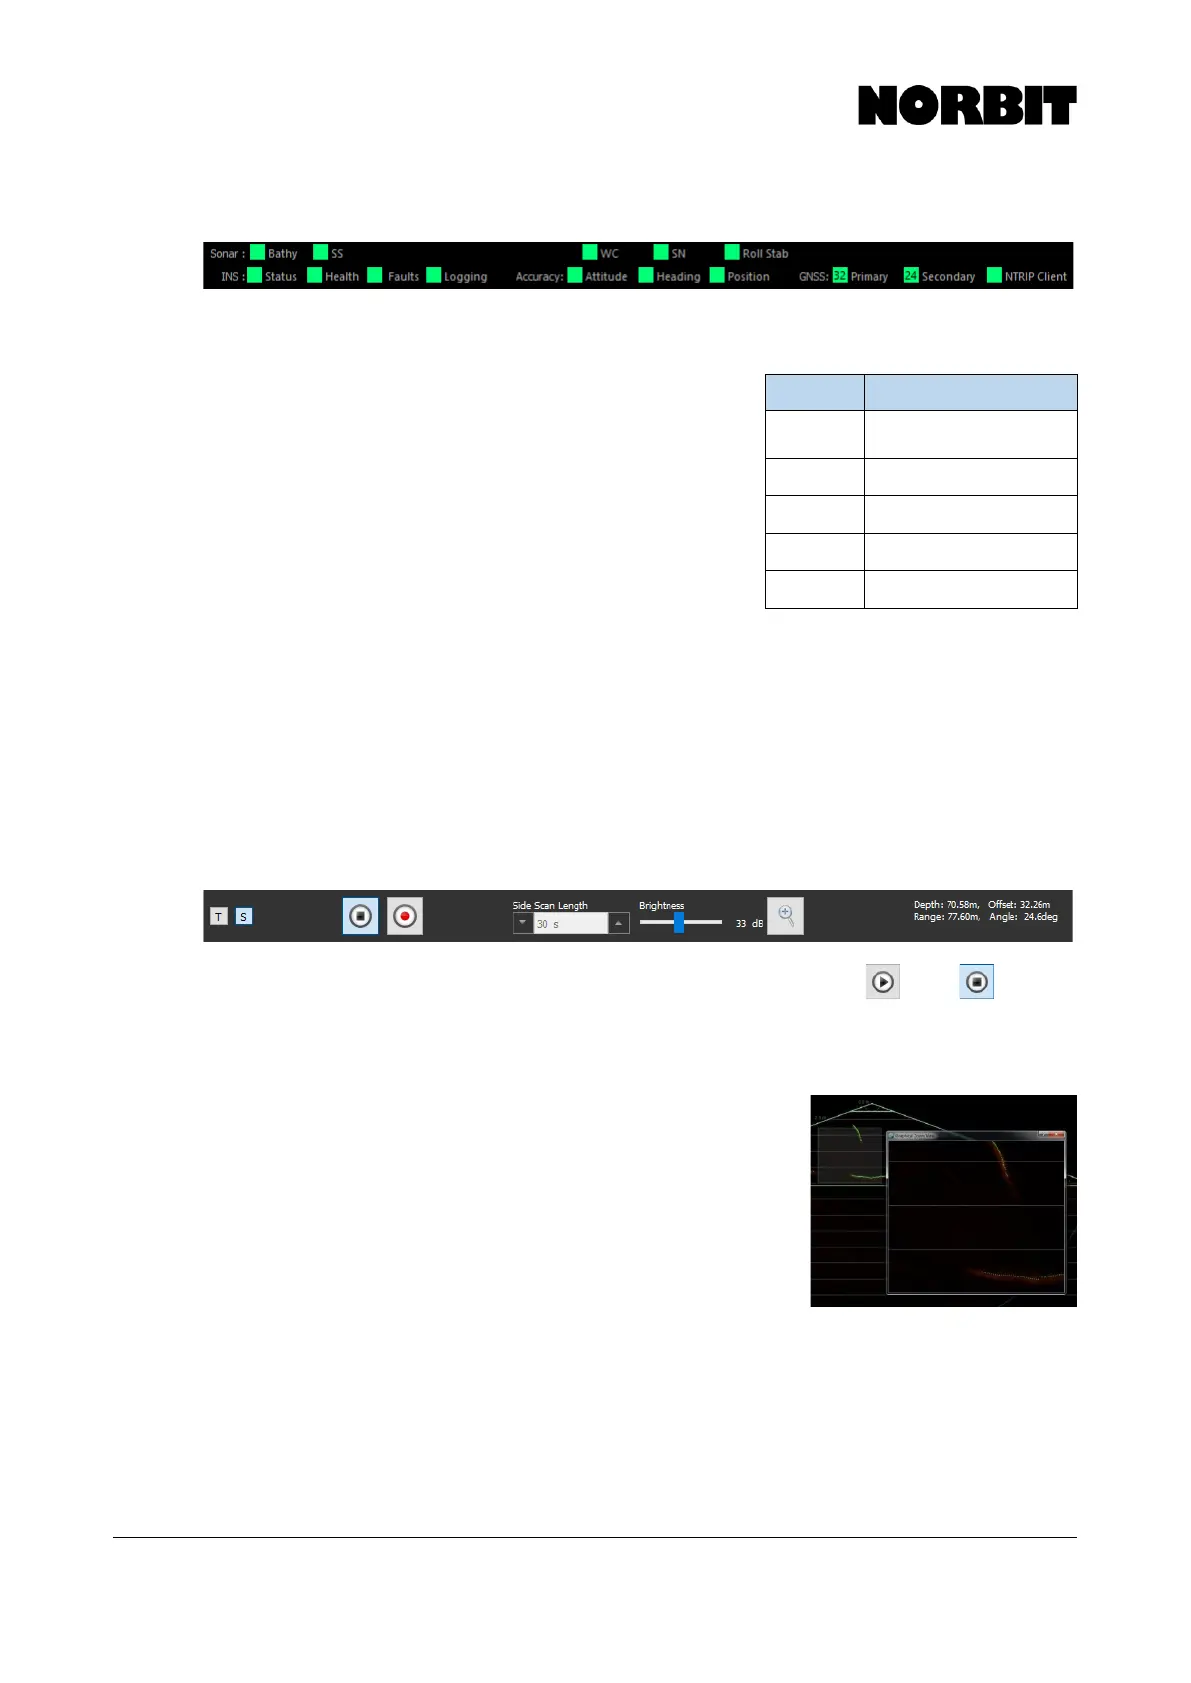
Upper GUI Status Indicators
The first row of indicators (Sonar) shows the streaming status of various data types as it is requested
by acquisition software. Data not requested shows a grey indicator. If the SS, SN or WC indicators
are red, it indicates that the signal is saturated. Adjust the TVG
settings under Backscatter Controls, as described in section
4.6.2.
The second row of indicators (INS) relate to the function and
health of the integrated Applanix system. Mouseover the
indicators to display additional information such as current
position, GNSS mode, and accuracy. Should a fault be
detected, more information can be found by selecting INS
Tools, then System Status.
The Status indicator provides the current solution status
(RTK, Pri. DGNSS, etc.) as well as the status of the current corrector stream. At times the indicator
may appear red and may report Pri. Fixed Status. This alerts the user that the correctors have
changed status and that the RTK fix may soon be lost. Additionally, if using NTRIP, the NTRIP
indicator may change color to red, indicating a loss in connection.
For users with Applanix firmware v10, the primary GNSS antenna shows many more satellites than
the secondary antenna. Currently, only the primary antenna is tracking all GNSS constellations and
SBAS satellites.
4.8
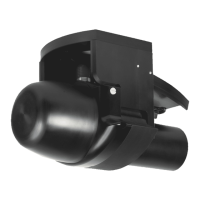
Lower GUI Viewer Bar
By default, the sonar starts pinging once connected to the GUI. The Play /Stop button is
used to start/stop sonar pinging. Once stopped, the Stop button changes to a Play button. Pinging
should be stopped when the GUI is running with the sonar out of water, to prevent the electronics
overheating.
Users may also set the Side Scan Length and adjust display
Brightness. The Brightness control bar only adjusts the wedge
intensity displayed on the GUI; it does not affect the raw data
signal. This can be used to effectively increase the illumination of
received acoustic data. Applying too much brightness will saturate
the image of the more reflective areas of the acoustic display, while
applying too little results in a very dark image.
To the right of the Brightness control is the Zoom tool. This opens
an adjustable pop-up window on the sonar wedge. The window can
be dragged to any location on the wedge to magnify any segment of the swath. The zoom pop-up
window remains on top of all open windows.