Create a Preset
1 Select one the Empty Programs.
2 Press the Drwb A button on the Preset panel and adjust the Swell
A (Preset) drawbars and Chorus/Vibrato controls to a setting that
you want to save.
3 Hold the Shift button and press one of the three Preset buttons to
store the settings as that Preset.
4 If you want the percussion to be active when you select this
particular Preset (or when a Program is selected), use the Swell
Drawbar B (Perc), set the percussion controls to your liking and
save this as Preset 1.
5 Select the Preset that you want to be in focus when the Program
is selected.
M If Drwb A or Drwb B is active, the physical position of the draw-
bars on the panel will determine the sound when such a program
is selected.
6 Press the Store button and choose a location for the Program if
you want to keep the changes you have just made.
Read more about presets for the organ models on “Presets” on
page 12.
Add effects
1 Select a program and play some notes on the keyboard while
you....
2 ... turn on the Delay (the On LED should be lit) and then press
repeatedly on the Feedback selector.
The feedback options are indicated with the selector LEDs and chang-
es in a cyclical fashion for each time the selector is pressed. When both
LEDs are lit you have the maximum amount of feedback.
3 Turn the Amount and the Tempo knobs while playing.
This changes the level of the delay effect and the time between
the repeats.
4 The Reverb is turned on and off with its On button.
5 Press repeatedly on the reverb selector.
Holding Shift while pressing the selector
(except the Organ Model) will cycle through the
selections in a counter clockwise fashion.
6 Turn off the effect.
If you now continue to press on the effect selector
after the effect is turned off, the effect setting will
change even though the effect is not active.
This method can be used to select a certain
effect setting while playing, without affecting
the sound until you actually activate the effect.
Activate an amplifier emulation
1 Press the Speaker Model button to activate the Amp emulation.
The Speaker Model LED will be lit.
2 Press repeatedly on the selector to cycle through the various options.
3 The Drive knob at the upper right of the panel controls the drive
for the amps and the rotary simulator. Make sure that Drive is On,
and then turn the knob to get the desired amount of overdrive.
M The Speaker Models cannot be used when the Pipe organ
selected.
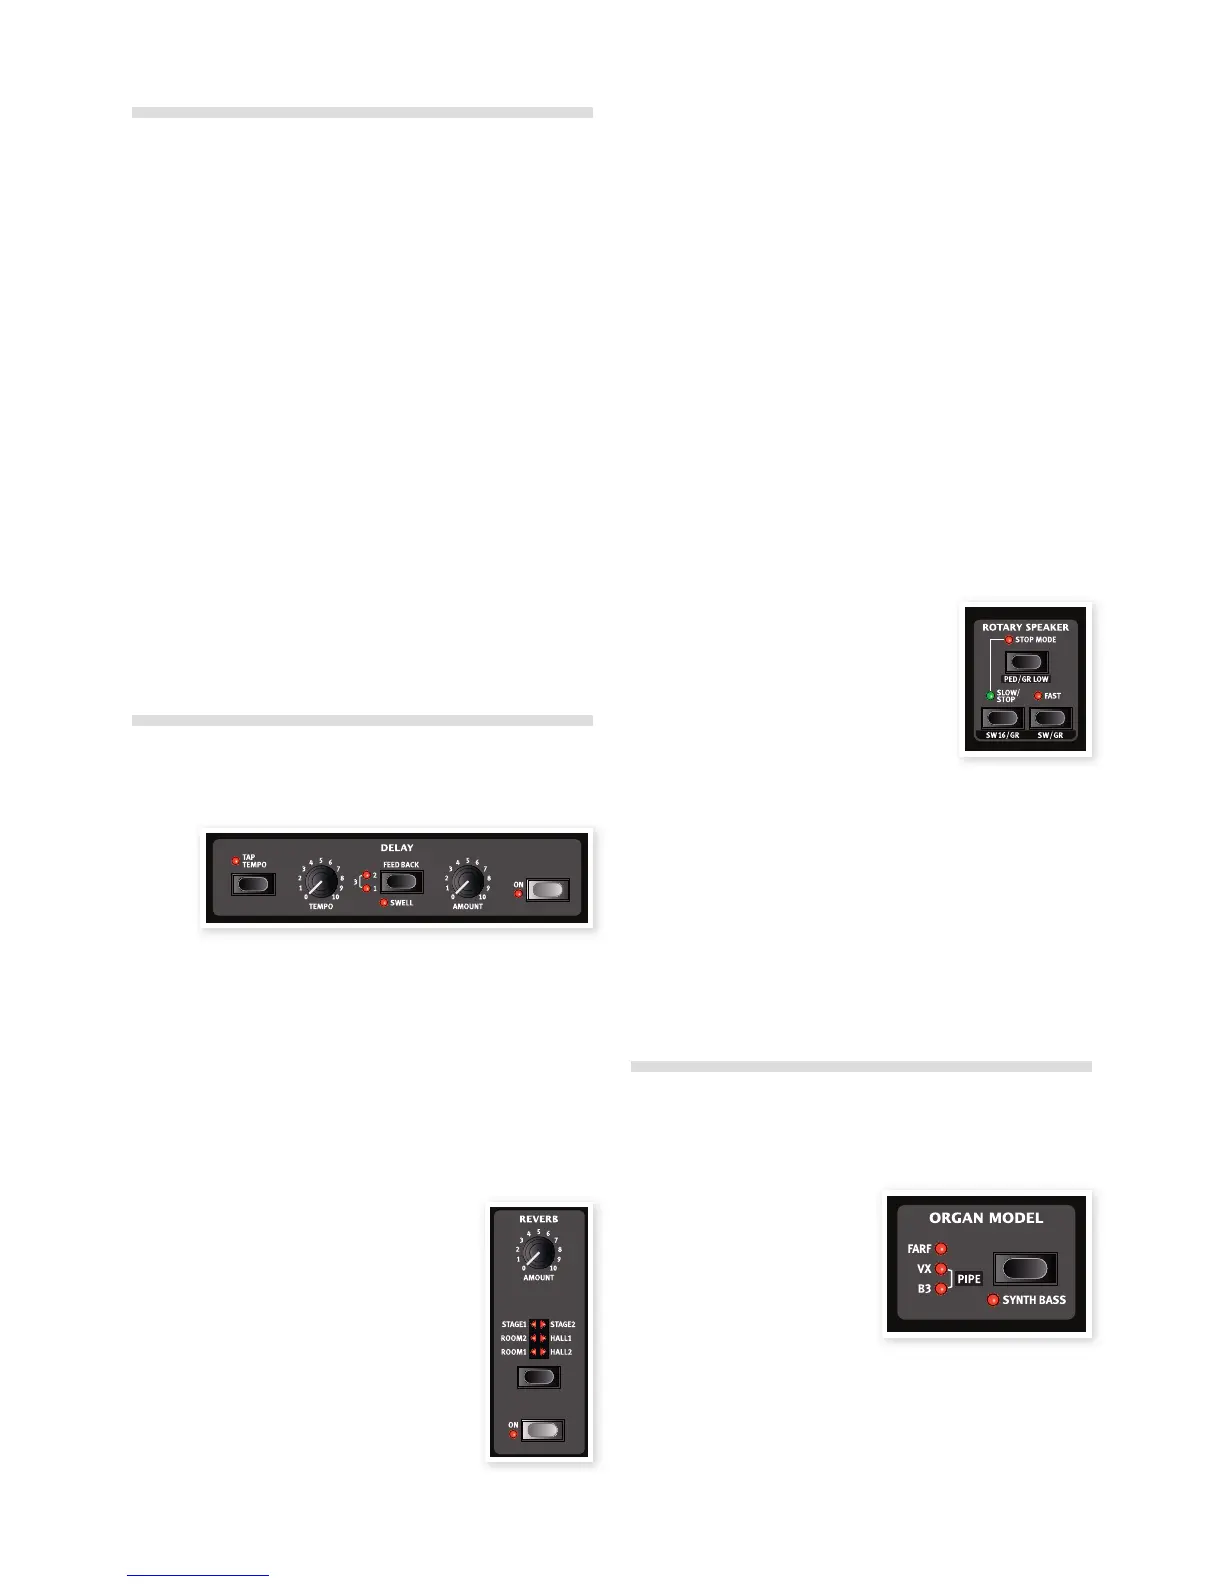
The Rotary effect
The rotary effect adds some great sonic drama to the sound. The Nord
C2D rotary has three available speeds: fast, slow and stop. Stop does
not disengage the effect; it only stops the rotating speakers.
1 Make sure that the Speaker Model is activated and select the
Rotary by pressing the effect selector.
The drive knob now controls the overdrive of the rotary amplifier.
2 Press the Slow/Stop and Fast buttons in
the Rotary Speed section to the left on the
panel, to cycle between the Fast and Slow
speeds of the rotary.
The rotors will speed up and slow down, pro-
ducing a nice swirly effect.
3 Press the Stop mode button to activate
this one-speed mode.
The Stop Mode LED will be lit.
4 Press repeatedly on the Slow/Stop button to cycle between Fast
and Stop.
The rotary will now emulate the functionality of an early, one speed
original rotary speaker that had only the fast and the stopped rotary
speed options.
If you connect a foot switch to the rotor pedal input, you can
control the rotary speed with this pedal.
Select an organ model
1 Press repeatedly on the Organ Model selector to cycle through
the four types - the B3, Vox, Farfisa emulations and the sampled
Pipe organ.
The settings for the organ sounds
are made using the drawbars. The
Farfisa and the Pipe organ uses
these in a switch mode, with only
two settings for each.
10 | Nord C2d User MaNUal os v1.X