Do you have a question about the NordicTrack Asr 1000 Elliptical and is the answer not in the manual?
| Resistance Levels | 20 |
|---|---|
| Maximum User Weight | 300 lbs |
| Weight Capacity | 300 lbs |
| Built-in Workouts | 20 |
| Bluetooth Connectivity | Yes |
| Heart Rate Monitoring | Yes |
How to contact customer care for questions or missing/damaged parts.
Toll-free phone number and operating hours for customer support.
Locating warning decals and instructions for obtaining replacements if missing or illegible.
Consult physician before exercise, especially if over 35 or with health issues.
Ensure all users are informed of precautions; machine is for home use only.
Keep equipment indoors, away from moisture, on a level surface with clearance.
Keep children/pets away; do not exceed 300 lbs user weight limit.
Wear appropriate clothing/shoes; use handlebars for stability; maintain straight back.
Pulse sensor is not medical; stop exercise if pain/dizziness occurs.
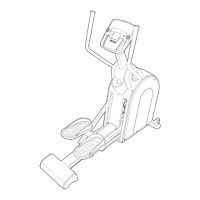
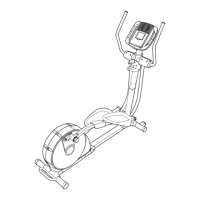
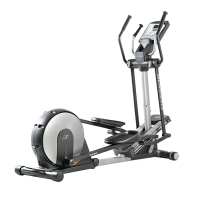
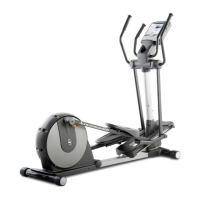
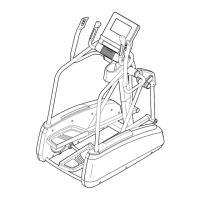
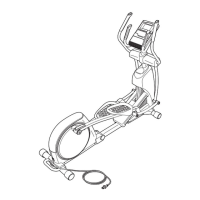
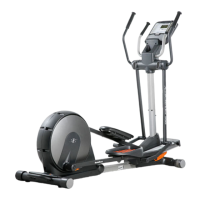
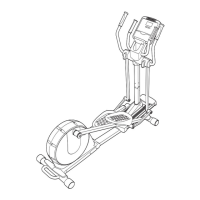
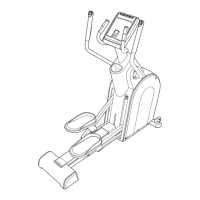
Familiarize yourself with the labeled parts of the elliptical exerciser using the diagram.
Assembly requires two people, clear space, packing material removal, and specific tools.
Identify small parts and hardware kits for assembly, noting any pre-assembled parts.
Attach the front stabilizer to the frame using specific screws and ensure correct orientation.
Connect handlebar wires and attach the handlebar to the upper body arm with screws.
Slide upright onto frame and attach cover with screws, managing wires.
Attach upright to frame using M8 x 19mm screws, avoiding wire pinching.
Slide upright cover down and secure it with a screw.
Connect console, pulse, and game wires to harness/extensions, then attach console.
Attach rear stabilizer to frame using bolts and locknuts, ensuring proper placement.
Grease and attach barrel nut to left pedal leg and link arm, then secure with a screw.
Insert rollers into link arms and secure with patch screws and washers.
Orient and attach pedals to pedal leg brackets using screws and locknuts.
Insert front edge of ramp cover into ramp and secure with screws.
Tip frame and tighten leveling feet into the underside of the frame.
Attach rear stabilizer cover to rear stabilizer using screws.
Ensure parts are tight, place mat, connect power cord after warming up.
Properly ground unit and connect power cord to an appropriate outlet.
Instructions for safely moving the elliptical exerciser, requiring two people.
Adjust leveling feet to ensure exerciser is stable and does not rock.
Step-by-step guide for safely mounting and dismounting the elliptical exerciser.
How to start pedaling, recommended direction, and note on flywheel motion.
Using manual mode, changing resistance/incline, and viewing exercise feedback.
Description of weight loss and classic workouts that control resistance and pace.
Playing games and using the iFIT system with cards for guided workouts.
Using the stereo sound system with iPod, MP3 players, or CD players.
Turn on console and select manual mode if a workout was previously chosen.
Use buttons to change pedal resistance and ramp incline during manual operation.
Understand console display for time, distance, calories, RPM, resistance, and incline.
Change display views, adjust volume, and select console backlight options.
Properly hold handgrip pulse sensor to measure heart rate accurately.
How the console automatically turns off after periods of inactivity or pausing.
Choose from four weight loss workouts and view their time and resistance profiles.
Follow segment prompts for resistance/RPM; manual override is available.
How workouts end, how to stop/restart, and follow progress on the display.
Choose from twenty classic workouts and understand their time and resistance profiles.
Follow programmed resistance and target RPM for segments, with pace guidance.
How classic workouts end, how to stop/restart, and follow progress on the display.
Maneuver and rotate blocks to form rows to score points in the game.
Pedaling pace affects block fall speed; game ends when blocks reach the top.
Display final scores, levels, top scores, and options to enter names or reset.
Monitor time, calories, pace, score, and game level during play.
Use laser blaster to hit drones and avoid being hit; shields protect the blaster.
Drones move faster; game ends when blasters disabled or drones reach bottom; high scores.
Monitor time, game level, and current score during play.
Compete against dealer for highest score under 21 using the touch screen.
Select bet amounts, choose game options (HIT, STAND, DOUBLE), and view credits.
Game continues until credits run out or indefinitely; GAME OVER displayed with no credits.
Monitor elapsed time and view exercise info via Display Mode button.
Form best five-card hand using hole and community cards to win credits.
Make betting decisions (CALL, RAISE, FOLD, CHECK) and view community cards.
Win showdown with best hand or continue until credits depleted or opponents out.
Monitor elapsed time and view exercise info using Display Mode button.
Insert iFIT card correctly and select a workout from the card.
Personal trainer guidance during iFIT workouts, similar to classic workouts.
Remove and store the iFIT card securely after workout completion.
Connect iPod, CD player, or MP3 player via audio jack or Integrated Universal Dock.
Play audio and adjust volume using device controls or console buttons.
Inspect/tighten parts, clean with damp cloth, keep liquids from console, avoid direct sunlight.
Resolve issues with heart rate display: no reading or inaccurate readings.
Refer to leveling instructions if exerciser rocks during use.
Importance of physician consultation and understanding pulse sensor limitations.
Use heart rate charts to determine proper intensity for fat burning and aerobic exercise.
Guidelines for warm-up, training zone duration, cool-down, and exercise frequency.
Perform toe touch stretch for hamstring, knee, and back flexibility.
Perform seated hamstring stretch for hamstrings, lower back, and groin.
Perform calf stretch against wall for calves, achilles tendons, and ankles.
Perform quadriceps stretch for quadriceps and hip muscles.
Perform inner thigh stretch for quadriceps and hip muscles.
List of frame parts, stabilizers, uprights, console, and major components with key numbers.
List of screws, bolts, nuts, washers, and other small hardware used in assembly.
List of extension wires, game controllers, hex keys, and other miscellaneous parts.
Details needed for ordering parts: model, serial, and part key number.
Warranty periods for workmanship, resistance mechanism, and frame, and limitations.
Exclusions for damage, misuse, commercial use, and limits on consequential damages.