10
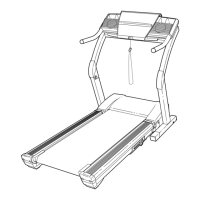
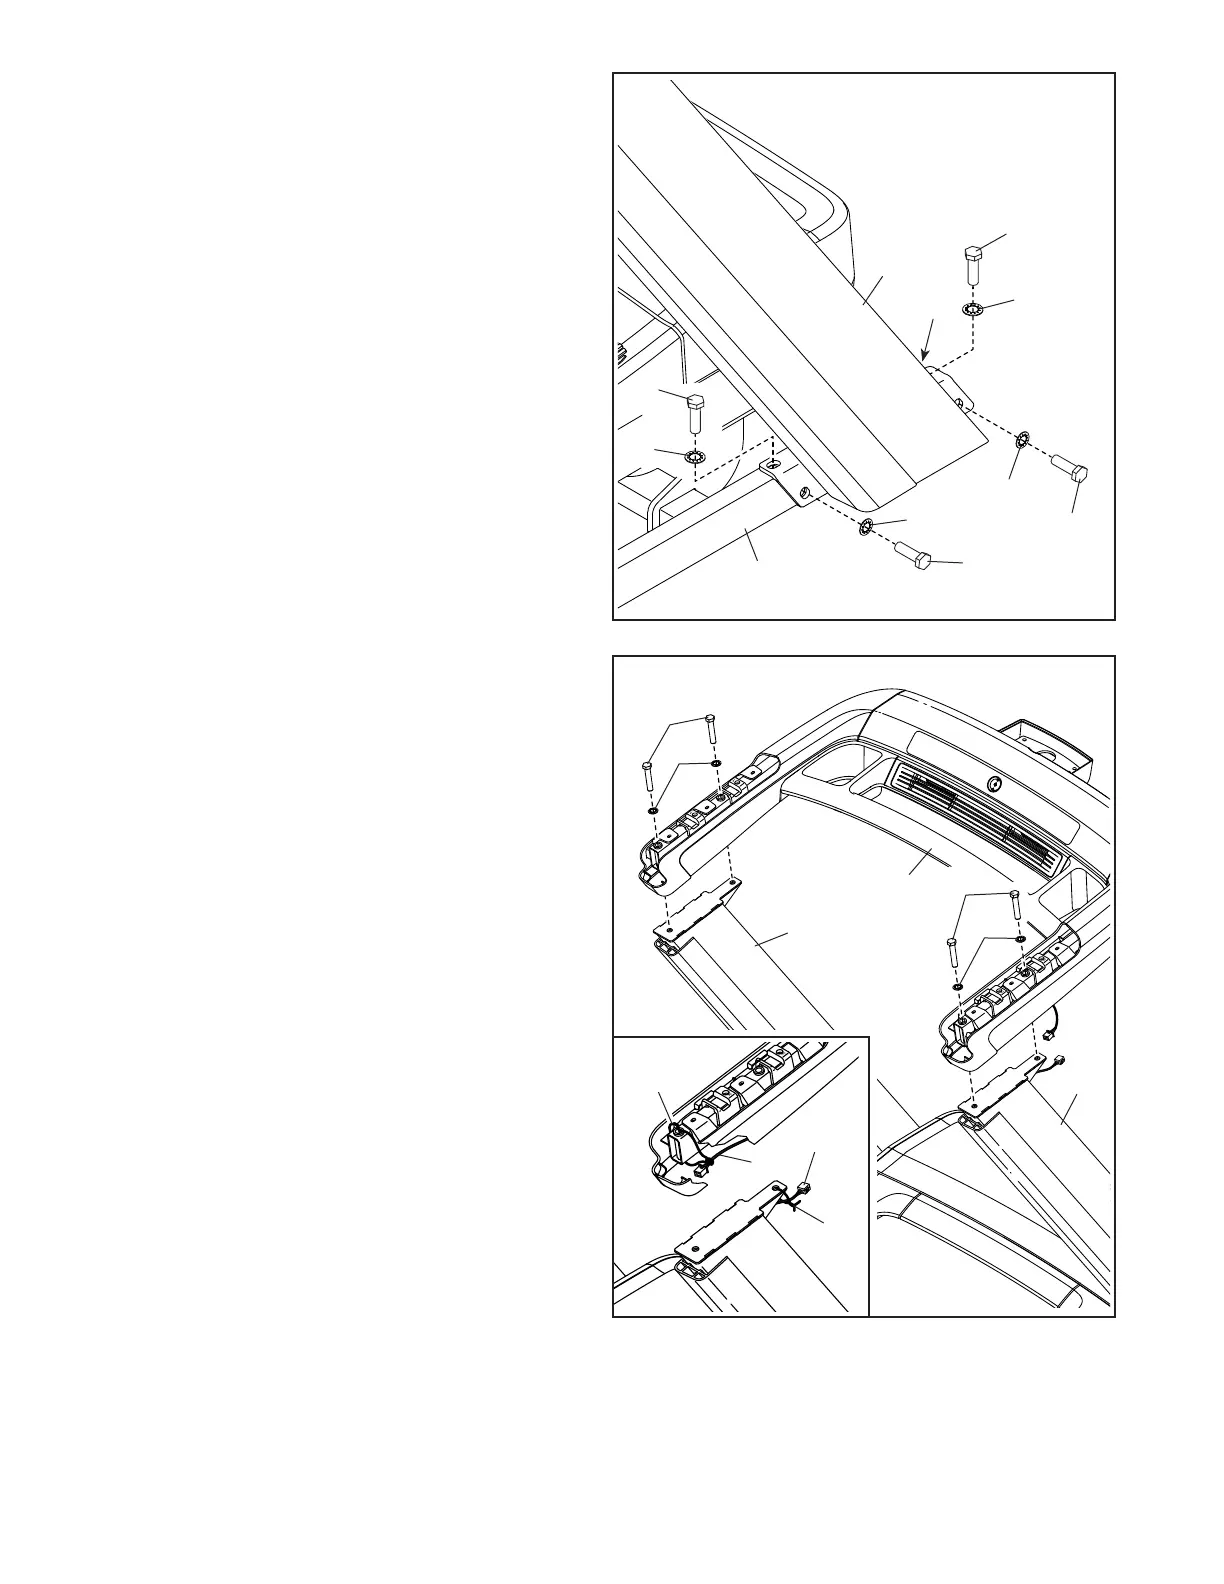
5. Do not pinch the Wires (91, 92) during this
step. Have a second person hold the handrail
assembly (E) near the Left and Right Uprights
(93, 94) as shown.
See the inset drawing. Remove the two ties (D)
securing the Handrail Wire (91) and the Upright
Wire (92).
Next, have the second person hold the handrail
assembly (E) on the Left and Right Uprights
(93, 94). Attach the handrail assembly with four
3/8" x 2 3/4" Screws (40) and four 3/8" Star
Washers (8); start all four Screws, and then
tighten them.
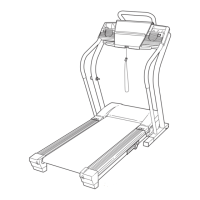
4. Do not to pinch the Belly Pan Wire (80)
during this step. Have a second person hold
the Right Upright (94) against the Upright Base
(101).
Insert two 3/8" x 1 1/4" Screws (1) with two 3/8"
Star Washers (8) into the top of the bracket on
the Right Upright (94), and partially tighten the
Screws into the Upright Base (101); do not fully
tighten the Screws yet.
Finish attaching the Right Upright (94) with
two additional 3/8" x 1 1/4" Screws (1) and two
3/8" Star Washers (8); do not fully tighten the
Screws yet.
Attach the Left Upright (not shown) in the
same way. Note: There is not a wire on the left
side.
4
5
E
40
8
94
8
93
40
91
92
D
D
101
94
1
1
1
8
80
8
8
1
8
 Loading...