Do you have a question about the Nordson ColorMax and is the answer not in the manual?
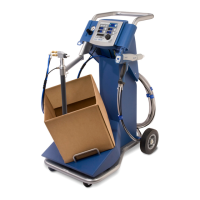
Provides an overview of color change procedures for the ColorMax Powder Spray System.
Operator A closes booth doors and moves the booth offline if applicable.
Operator B selects the Main Menu option.
Operator B navigates through Auto Menu to the Color Change screen.
Operator A disengages the coupling and cleans the transfer pan by blowing it out.
Operator A inserts four sponges into the reclaim tube.
Operator B selects 'Color Change' on the control panel.
Operator B selects the 'DISABLE SIEVE' option.
Operator B unclamps the under pan and turns the chute toward the back wall.
Operator B removes the powder source and notes the completion indicator light.
Operator B initiates the gun purge sequence.
Operator B blows off the lance assembly while it lowers and guns purge.
The lance assembly automatically raises when gun purge is complete.
Operator B continues blowing off the lance assembly.
The 'COLOR CHANGE CYCLE DONE' light flashes to indicate completion.
Operator A blows off door sills, ceiling, and walls within the booth.
Operator A blows off AeroDecks and the cyclone vertical inlet duct.
Operator A sets AeroDecks in operating position and exits the booth.
Operator B selects 'Color Change' and 'DISABLE RECLAIM TRANSFER'.
Operator B disconnects hoses, rotates receiver, and blows it out.
Operator B removes the filter assembly, filter element, and cleaning sponges.
Operator A blows out remaining powder from the transfer pan.
Operator A opens cyclone access doors and blows down the cyclone interior.
Operator A follows steps based on Spray-to-Reclaim or Spray-to-Waste mode.
Operator A closes cyclone doors, plugs reclaim port, closes transfer pan, and connects scrap hose.
Operator B installs the new filter element and filter assembly.
Operator B connects the vacuum hose and pulse air tubing.
Operator B selects 'CLOSE' for the Sure-Max Door on the panel.
Operator B removes the sieve deck and sieve screen.
Operator B performs steps for similar shade changes: blow off sieve deck, assemble sieve, turn chute.
Operator B follows steps for different shade changes: set sieve screen aside, blow off components, install screen.
Operator B turns the vacuum diverter valve to the spray-to-waste position.
New powder source installation is delayed until Procedure 8.
Operator A removes powder feed hose from each spray gun and installs another.
Operator B removes hose manifolds, blows down pumps, then installs other hose manifolds.
Operator B installs the new powder feed source and connects fluidizing air.
Operator B selects 'ENABLE SIEVE' on the Color Change screen.
Operator B navigates to the Auto Menu and selects options like 'AUTO MENU'.
Operator B selects 'ENABLE RECLAIM TRANSFER' on the Auto Menu screen.
Operator B selects 'Select Box' or 'Select Hopper' in the Auto Menu.
Operator B configures system for reclaiming or scrapping oversprayed powder.
Operator B enables virgin powder feed and vibrasonic sieve screen as needed.
Operator B must spray 0.5 kg of powder to waste before Procedure 10.
Operator A disconnects the scrap hose and installs a plug onto the scrap port.
Operator A removes a plug from the reclaim port and couples the reclaim tube to it.
Operator B turns the vacuum diverter valve to the spray-to-reclaim position.
Identifies cyclone access doors, reclaim tube, and reclaim port.
Identifies scrap port, scrap hose, and transfer pan.
Identifies sieve deck, sieve screen, and sieve under pan.
Identifies Sure-Max receiver and filter assembly.
Identifies lance assembly and feed hose manifold.
| Display | LCD touchscreen |
|---|---|
| Interface | Ethernet |
| Operating Temperature | Typically 50-104°F (10-40°C) |
| Dimensions | Varies by model |
| Weight | Varies by model |