Do you have a question about the Nordyne JS5BD SERIES and is the answer not in the manual?
Important safety markings and warnings for potential user hazards during operation and maintenance.
Guides for setting thermostat modes and fan operation for cooling, heating, and automatic modes.
Guidance on routine maintenance for optimal performance and longevity of the unit.
Steps to diagnose and resolve common issues with the air conditioner system.
Crucial safety warnings for installers regarding electrical, parts, and refrigerant handling.
Essential information for installers on local codes, wiring, refrigerant handling, and safety equipment.
Instructions on locating the outdoor unit, required clearances, and pad requirements.
Procedures for connecting refrigerant lines, including best practices for brazing and insulation.
Guidelines for proper electrical connections, compliance with codes, and safety precautions.
Requirements for ensuring a safe and uninterrupted electrical ground for the unit.
Instructions for connecting the low-voltage control circuit wiring for the thermostat.
Information on the PTCR component for compressors, including its function and installation.
Procedures for pre-start checks, system startup, and initial operational adjustments.
Detailed instructions and warnings for safely and correctly charging the refrigerant system.
Routine maintenance tasks to ensure optimal performance, including cleaning and inspection.
Detailed wiring diagram for the outdoor section of the split system air conditioner.
This document serves as both a user's manual and installation instructions for the JS5BD Series Split System Air Conditioner, designed for R-22 refrigerant and rated at 13 SEER. It emphasizes the importance of reading all information thoroughly to become familiar with the appliance's capabilities and proper usage before operation or maintenance. The manual is primarily intended to assist qualified individuals experienced in appliance installation, noting that some local codes may require licensed personnel. It strongly advises against owner attempts to install or service the equipment due to potential hazards.
The user information section begins with important safety information, highlighting the use of "WARNING" for potentially hazardous situations that could result in injury or death, and "CAUTION" for situations that could lead to minor injury or property damage. It then details operating instructions for cooling and heating. For cooling, users are instructed to set the thermostat's system mode to COOL or AUTO and the fan mode to AUTO, then set the desired temperature. The outdoor fan, compressor, and blower motor will cycle to maintain the indoor temperature. A protective timer circuit may delay compressor and outdoor fan startup for approximately 5 minutes after a system mode reset or power interruption. For heating, the process is similar, setting the thermostat to HEAT or AUTO and the fan to AUTO, then selecting the desired temperature for the optional heating equipment to cycle. The manual also explains how to operate the air conditioner for automatic cooling and heating by setting the system mode to AUTO and the fan mode to AUTO, allowing the thermostat to automatically switch between cooling and heating. Continuous indoor blower operation, useful for circulating air and equalizing temperature imbalances, is achieved by setting the fan mode to ON. To turn the unit off, the thermostat's system mode should be set to OFF and the fan mode to AUTO.
The manual includes a warranty information section, stating that a warranty certificate with full details is provided and advises reviewing responsibilities with a dealer or service company. It clarifies that the manufacturer is not responsible for costs related to improper setup, installation, adjustments, or operating procedures by the user. Examples of non-warranty service calls include correcting wiring problems, resetting circuit breakers, or adjusting thermostats.
The installer information section reiterates important safety information, emphasizing that all electrical power must be shut off before maintenance or service to prevent injury or death. It warns that only factory-authorized parts or accessory kits should be used, as improper installation or maintenance can lead to explosion, fire, electrical shock, or other hazardous conditions. A critical caution notes that the unit uses R-22 refrigerant and no other refrigerant should be used, as it will damage the unit. The manual stresses that the JS5BD Split System Air Conditioners leave the factory with a nitrogen holding charge, and the unit should not be operated with this charge, as it can damage the compressor. All charging instructions must be followed for maximum performance and efficiency, and refrigerant charging must be performed by qualified personnel familiar with safe handling procedures.
Further installer warnings include compliance with local codes and regulations, the National Electrical Code (ANSI CI), and Canadian Electric Code Part 1 CSA C.22.1 for all electrical wiring. It states that the equipment contains high-pressure liquid and gaseous refrigerant and warns against using any portion of the charge for purging or leak testing. Installation and servicing should only be done by qualified, trained personnel. Fully annealed, refrigerant-grade copper tubing should be used and fully insulated for suction lines. Brazing operations require safety equipment. All precautions in the literature, tags, and labels must be followed.
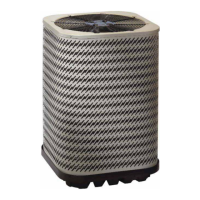
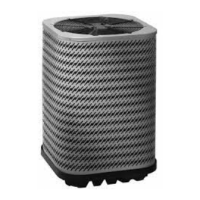
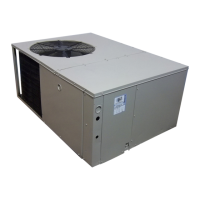
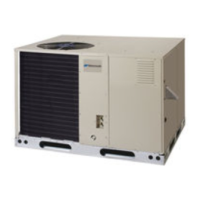
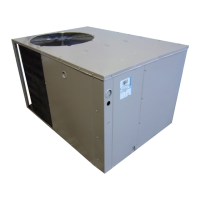
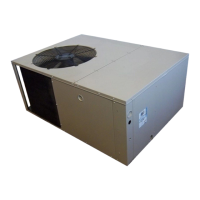
The air conditioner installation section provides general information, noting that the JS5BD series is designed for outdoor rooftop or ground level installations and has been tested for capacity and efficiency. It promises years of safe and dependable comfort if properly installed and maintained, warning that abuse or improper maintenance can shorten life and create hazards. Periodic maintenance is recommended for optimum performance. Before installation, installers must calculate the cooling load, verify adequate electrical supply and circuit protection, ensure the indoor section is installed, inspect for shipping damage, and consult their dealer for maintenance contracts.
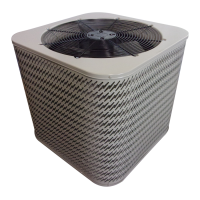
Locating the air conditioner involves surveying the job site for the best outdoor unit placement, avoiding overhead obstructions, poorly ventilated areas, and debris accumulation. Sufficient clearance for unobstructed airflow is crucial for rated performance. Considerations also include electric power availability, service access, noise, and shade. Packaging removal instructions advise carefully removing the carton and user's manual to prevent tubing damage. For ground-level installations, clearances must be maintained, and a suitable, level, strong mounting pad, at least 2 inches (5 cm) above grade with adequate drainage, must be provided.
Connecting refrigerant tubing between the indoor and outdoor units requires caution, as the system uses R-22 refrigerant with POE oil, and openings should be covered or sealed to minimize moisture and contaminant accumulation. Tubing should be routed to minimize length and bends, using a copper tubing bender if precise forming is needed, and avoiding sharp bends or contact with metal surfaces. Tubing must be supported to prevent vibration or abrasion. It must be kept clean during installation. The maximum recommended interconnecting refrigerant line length is 75 ft, and the vertical elevation difference should not exceed 20 ft. Installing a filter dryer is optional but good practice when replacing evaporator and/or condenser. Optional equipment like liquid line solenoid valves or low ambient controls should be installed per manufacturer instructions.
The electrical wiring section includes a warning to disconnect all electrical power before servicing to avoid shock, injury, or death, noting that the unit may have multiple electrical supplies. Wires should be labeled before disconnection to prevent improper and dangerous operation. All electrical connections must comply with local, state, and national codes, and the National Electric Code (ANSI/NFPA 70) or Canadian Electric Code Part 1 CSA C.22.1. A pre-electrical checklist includes verifying voltage, frequency, and phase, ensuring the service provided by the utility is sufficient, and confirming factory wiring against the unit diagram. Line voltage wiring requires familiarity with the outdoor unit's electrical box wiring diagram. An electrical disconnect must be located within sight and readily accessible to the unit. Line voltage should come from a dedicated branch circuit with correct fuse or circuit breaker size, and wiring must comply with the outdoor unit data label. The outdoor unit needs both power and control circuit connections, with overcurrent protection sized per the unit rating label and local codes. Only copper wire should be used for line voltage, with proper code-agency listed conduit. For 208/230V units, a lead may need to be moved for 208V operation. Optional equipment wiring must follow NEC and local codes.
Grounding is critical, with a warning that the unit cabinet must have an uninterrupted electrical ground to prevent personal injury from electrical faults, and gas piping should not be used for grounding. Grounding must comply with local codes or, if absent, with the National Electrical Code or CSA C22.1, using the provided grounding lug. Thermostat connections should follow thermostat and indoor equipment instructions. The outdoor unit operates from a 24 VAC Class II control circuit, and wiring must comply with NEC and local codes. Low voltage wires must be properly connected to the terminal block. The thermostat should be mounted about 5 feet above the floor on an inside wall, avoiding locations affected by radiant or convective heat. The Positive Temperature Coefficient Resistor (PTCR), factory-installed for soft starting reciprocating compressors, must be removed if a hard start kit is needed.
The startup and adjustments section includes a pre-start checklist: verifying the indoor unit is level and drains properly, the outdoor coil and top are free of obstructions, air filters are clean, ductwork is sealed, line voltage leads are connected and grounded, low voltage wires are connected, branch circuit overcurrent protection is sized correctly, and the thermostat is wired correctly. Startup procedures involve setting the thermostat to OFF and fan mode to AUTO, then closing all electrical disconnects. For air circulation, the fan mode is set to ON to verify continuous blower operation and balanced air distribution, then returned to AUTO. For system cooling, the thermostat is set to COOL and AUTO, temperature lowered, and outdoor unit and indoor blower energization verified. Blower wheel direction, air temperature, and refrigerant pressures are checked, and unusual noises investigated. For system heating (optional), the thermostat is set to HEAT, temperature raised, and heating equipment and indoor blower energization, air temperature, and unusual noises checked.
Refrigerant charging is a critical process, with a warning against operating the unit with a nitrogen holding charge, as it can damage the compressor. Charging must be done by qualified personnel following specific instructions for maximum performance and efficiency. These steps include reading installation instructions, completing brazing, leak checking and evacuating the system, purging nitrogen, evacuating to 350-500 microns, allowing a 30-minute vacuum hold, and weighing in the proper amount of new or reclaimed R-22 refrigerant. Refrigerant charging charts are only applicable to matched NORDYNE equipment and listed airflows. JS5BD outdoor units with unlisted indoor coils are not recommended.
Air conditioner maintenance is crucial for optimum performance and requires mechanical skills and tools. If these skills are not possessed, a dealer should be contacted for maintenance contracts. Routine maintenance includes inspecting and cleaning/replacing air filters at the start of each season, inspecting the condensate drain and outdoor coil for debris, cleaning the outdoor coil and louvers with mild detergent and water, and inspecting electrical connections for tightness. A caution states that the unit should never be operated without a filter in the return air system, and disposable filters should be replaced with the same type and size. It also warns against adding oil to motors not equipped with oil tubes, as the compressor is hermetically sealed and does not require lubrication.
Troubleshooting tips include checking thermostat settings, electrical panel for tripped circuit breakers, air filters for dust, and ensuring the outdoor unit is clean and unobstructed. Replacement parts are available through Nordyne distributors, and the complete model and serial number of the unit should be provided when ordering.
| Series | JS5BD |
|---|---|
| SEER Rating | 13 |
| Refrigerant Type | R-410A |
| Voltage | 208/230V |
| Phase | 1 |
| Compressor Type | Scroll |
| Fan Motor Type | PSC |
| Cooling Capacity | 18, 000 to 60, 000 BTU/h |