- 16 -
MOUNTING INSTALLATION
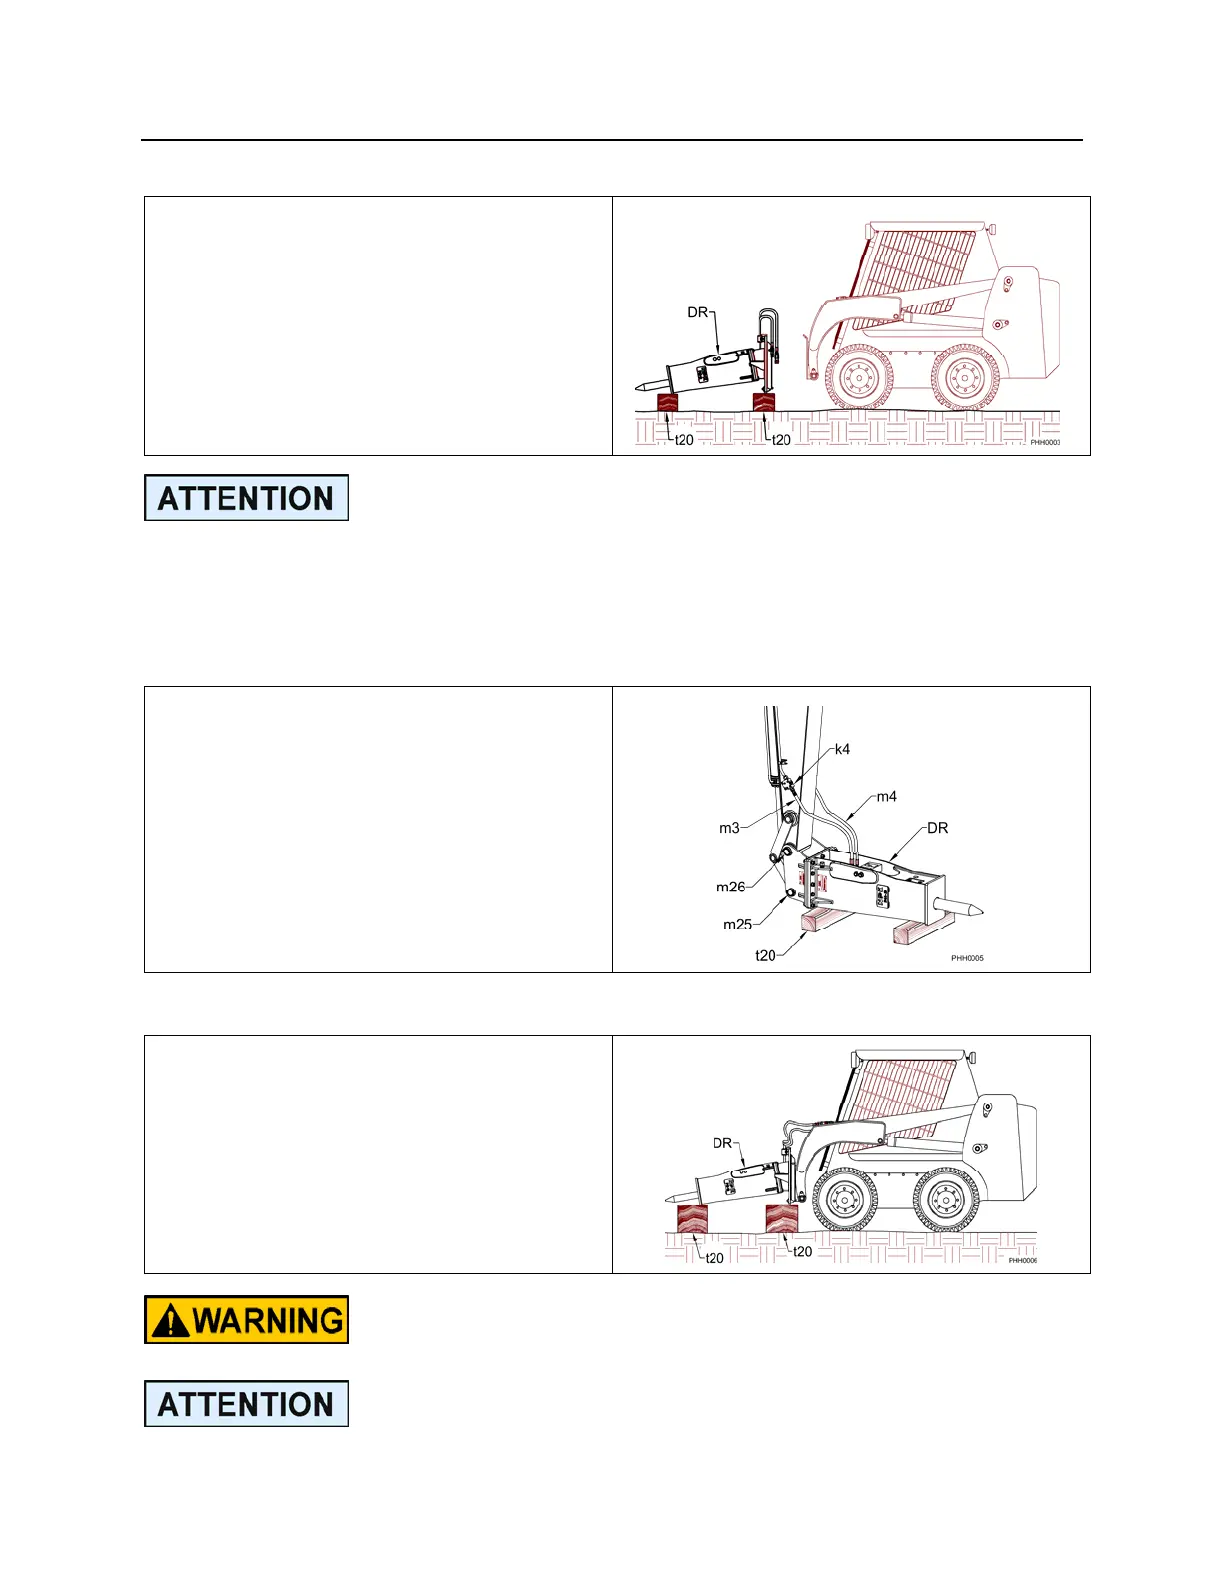
REMOVAL FROM THE SKID STEER
1. Position the hammer (DR) horizontally
onto the ground or wood blocks (t20)
as shown.
2. Disconnect both inlet and outlet hoses.
3. Unlatch the mechanism holding the
hammer bracket to the carrier’s
coupler plate. (Consult the machine
manufacturer’s operator/instruction
manual for this procedure.
The tool end of the hammer should be set lower than the head end to prevent
moisture from entering the hammer through the tool area.
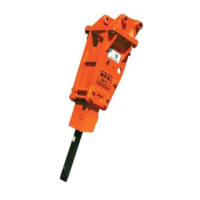
MOUNTING TO THE CARRIER
BACKHOES and EXCAVATORS
1. Place the hammer assembly (DR)
horizontally on wood blocks (t20) as
shown.
2. Align the stick pin bore (m26). Install
the stick pin. Then align the link pin
bore (m25).
3. Connect the pressure side hose (m3)
and the return side hose (m4).
4. Open the shut-off valves (k4) if
available.
MOUNTING TO THE SKID STEER
1. Place the hammer (DR) horizontally
onto wood blocks (t20) as shown.
2. Align the carrier’s coupler plate with
the hammer bracket. Couple the two
per the machine manufacturer
recommendations.
3. Connect the hoses.
Consult the skid steer manufacturer’s operators manual to
review the mounting and removal process!
The hydraulic lines must be handled carefully and sealed to
prevent contamination from entering the hammer or the
carrier’s hydraulic system.