upgrading appliances for better usage and for your
convenience. For that reason, the style you have may not be
exactly what is described in this manual. In this manual, you
will find general information for the operation of the
appliances for more detailed information, please refer to the
appliance manuals provided to you in your Nücamp RV
Owner’s packet.
After taking delivery of your Nücamp RV camper, spend
some time familiarizing yourself with the exterior and interior
features. Your interior has been designed with utility and
comfort in mind to provide spaciousness and versatility.
Familiarize yourself with the bedding and dining arrangements
as well as the various storage areas inside and out.
Each appliance in your camper is warranted by its’
manufacturer. It is very important that you review all the
literature provided in the Owner’s packet that came with your
camper. Fill out and return all warranty registration cards as
required by the appliance manufacturers. If you have any
questions regarding the operation of the appliances in your
unit, contact your selling dealer. Also, please notify your
dealer of any shortage of literature you may have.
It is important that you read all the manufacturer’s information
provided, regarding both operation and maintenance of the
appliance. Pay close attention to all safety precautions given
and follow them closely. Keep all literature, including this
manual with the camper for easy reference. If service on any
appliance is required, contact your dealer or an authorized
service representative of the appliance manufacturer. Most
appliance manufacturers have toll free service telephone
numbers for your convenience. You will find some listed
under the Component Manufacturers.
Roof
All Nücamp RV models have a fully decked and laminated
roof that may be walked on from front to rear. When walking
on the roof use deck shoes as leather shoes become slippery
and can also leave marks on the decking. When on the roof,
use caution to avoid slips and falls. Use caution when loading
sharp articles on the roof as you can gouge or puncture the
roof. If you add accessories or new equipment on the roof, use
a qualified installer, or consult your dealer. Care must be taken
when working on the roof to avoid disrupting the seals which
could void your warranty.
Compartment Doors
Various exterior compartment doors provide access to certain
appliances, controls, and general storage.
Outside storage compartments are not air sealed or vented
enclosures Do not store hazardous chemicals/materials or
flammable, volatile liquids in these areas.
The Propane Tank Compartment Door provides access to the
storage propane tank(s) and regulator valve(s). This
compartment door must remain unlocked as required by
National Fire Protection Association (NFPA) to allow
immediate access in case of a propane leak or fire.
The Refrigerator Vent/Door provides access to the rear of the
refrigerator for service and supplies inlet ventilation for proper
operation.
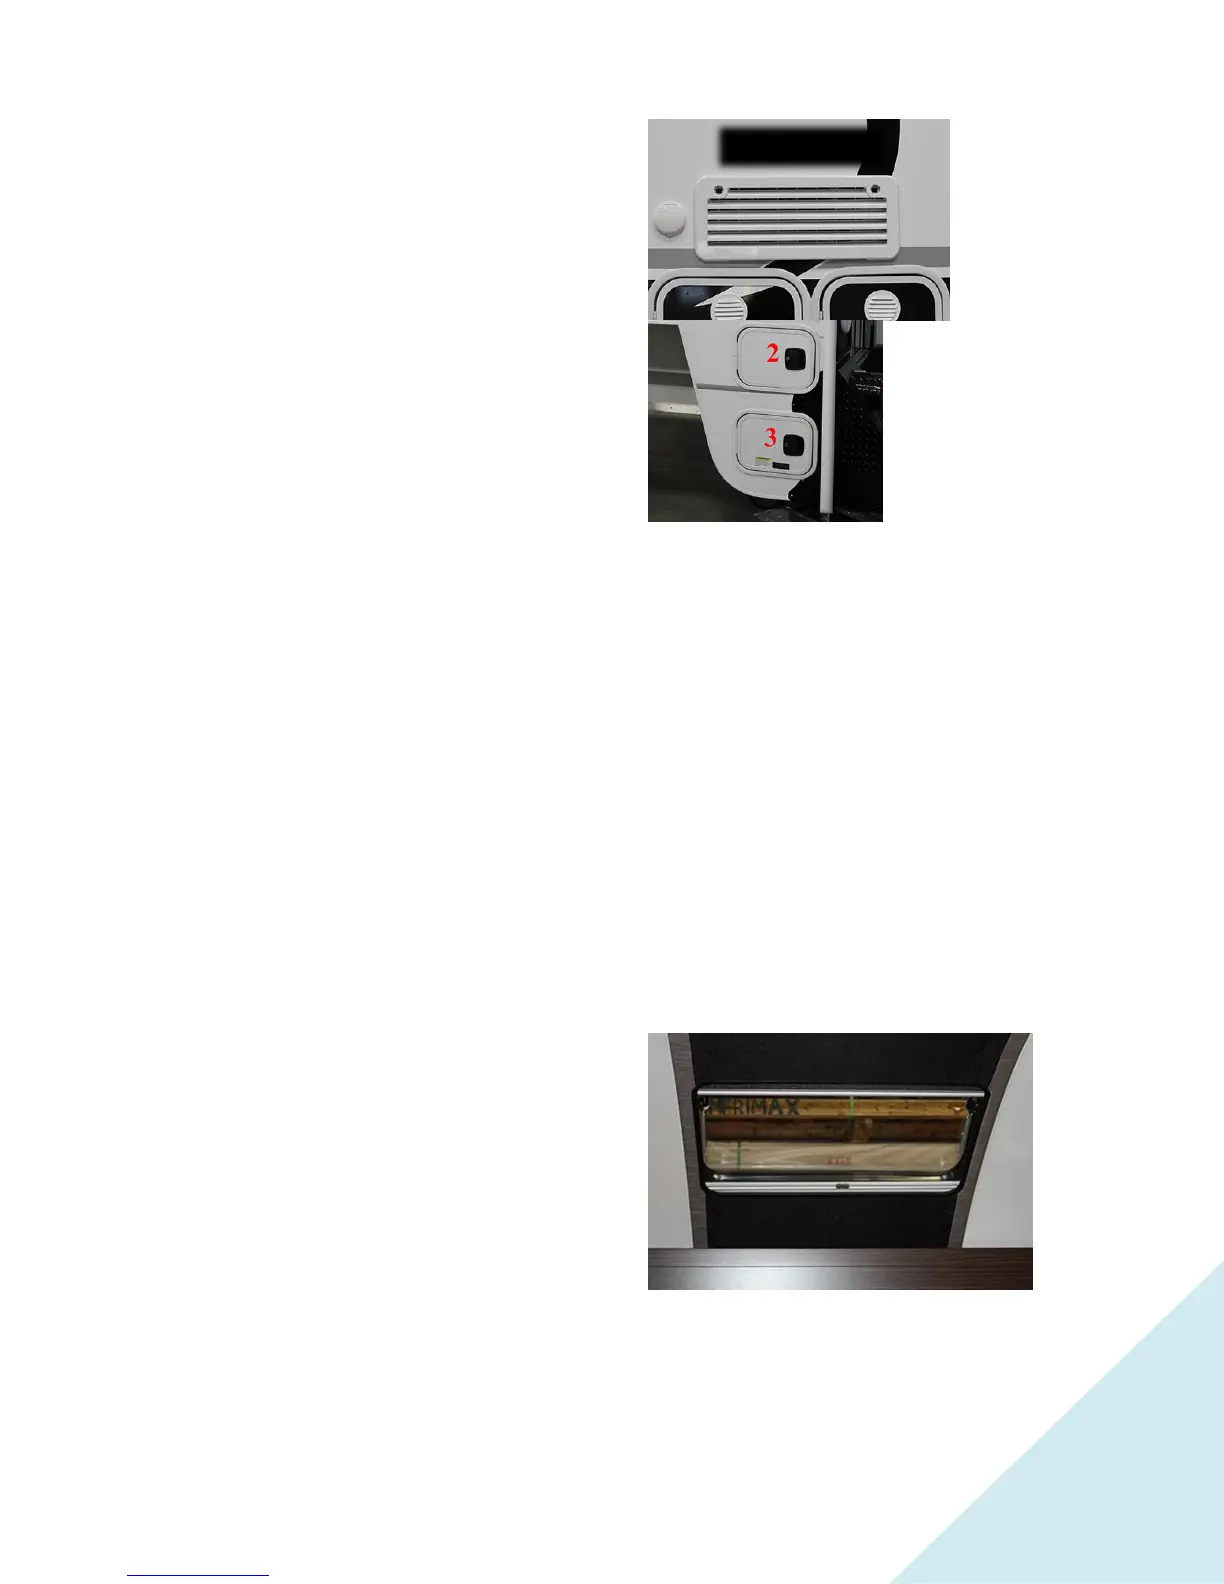
The exterior Service Center Door #2 provides access to the
jack control center.
The Exterior Service Center Door #3 provides access to waste
tank dump valves, fresh water tank drain valve.
Vents
All exterior vents and louvers provided need air circulation.
Be sure not to block these vents because damage to
equipment, as well as hazards to individuals could result.
Roof Vent
The roof vents are operated from inside and have built-in
screens. To operate, turn the crank on the vent clockwise to
open and adjust. The bath vent may be equipped with a 12-
volt exhaust fan. The switch to control the fan is located on the
vent.
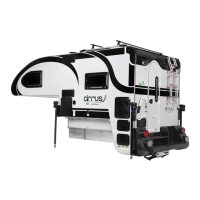
Skylight
This skylight
is dual pane
and opens. It
has a sliding
screen.
To open;
Depress the
button on the
latches and
turn to open.
And tighten
knobs on the
window stays.
To close;
Loosen the window stay knob, close and latch.
The shade and screen operate independently of each other and are
engaged by connecting to each other and sliding.
Close the skylight completely when traveling and leave shade
partially open. The shade could pull up into the vent due to