huts in places like the furnace exhaust ports. This can
be dangerous in two ways. First by causing a
restriction that could cause carbon monoxide to build
up on the inside of the camper, second, the same
restriction can also cause heat and flame problems
which could cause a fire. Both scenarios are
dangerous and can cause death.
3) Open vents and windows.
12-Volt System
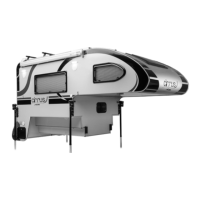
1) Prior to the battery installation, check charge level.
Refill and recharge as necessary. Inspect cable ends
and ensure that terminals are clean and free of
corrosion. Place the battery into the compartment,
install tie downs, and connect cables. Turn battery
switch to “USE” position. Check battery condition on
monitor panel.
2) Be sure all 12-volt DC and 120-volt AC circuit
breakers are ON.
3) Inspect and operate all 12-volt lights and accessories.
120-Volt System
1) Inspect the 120-volt electrical system: Power cord,
converter, and outlets. If defects are found, refer
service to a Nücamp RV Dealer Service Center.
2) Prepare the AC generator (if equipped) for operation
following instructions in the generator operating
manual in your Owner’s Information Package.
3) Operate 120-volt AC appliances and air conditioner.
Fresh Water System
1) If the fresh water system has been winterized, drain
the antifreeze from fresh water system.
2) Turn the water pump on and open all faucets until
flow of antifreeze stops.
3) Do not let antifreeze stand on plastic sinks or outside
shower components or stains may occur.
4) Open the water heater bypass valves.
5) Flush and sanitize the fresh water system as outlined
in the “Fresh Water System” section.
6) Operate all faucets and fixtures in the fresh water
system. Check for leaks at all joints and fittings.
Repair if necessary.
Propane System
1) Turn on propane valve and inspect all pipes and
fittings in the propane system. Check for leaks as
outlined in the “Propane System” section.
2) Operate each propane appliance. Observe all burners
and pilot flames for proper color and size. If there are
any problems, refer to an authorized Nücamp RV
Dealer Service Center.
General
1) Install new 9-volt battery in smoke detector.
2) Check the monitor panel operation.
3) Open and operate vents and vent fans.
Maintenance
1) Check the sealant around all roof, body seams, and
windows. Reseal if necessary. See “Sealant renewal”
subsection of the “MAINTENANCE” section.
2) Lubricate all exterior locks, hinges, and latches.
3) Wash and wax the exterior. Inspect the body for
scratches or other damage. Touch-up or repair as
necessary.
General Maintenance
This section explains why it is important to keep your camper
well maintained, how to preserve the appearance of the
exterior and interior and to follow basic maintenance safety
precautions. Also included are several things you can do to
help prevent corrosion. This section also includes
Maintenance Schedules for when service should be performed
on your camper and instructions for simple maintenance tasks
you may want to take care of yourself. Regularly maintaining
your camper is the best way to protect your investment. Proper
maintenance is essential to your safety and will also reward
you with many years of trouble-free use of your camper. The
Maintenance Schedules specifies how often you should have
your camper serviced and what things need attention. It is
essential that you have your camper serviced as scheduled to
retain its high level of safety and dependability.
Keep accurate records of maintenance, service performed and
follow all owner obligations, as required, to keep warranty in
force.
Exterior Maintenance
Some exterior parts of your camper are made of fiberglass,
metal, rubber, and plastic materials. The finish on these parts
is durable, but not indestructible. Any material and finish will
deteriorate over time. Exposure to sunlight, moisture, and
airborne pollutants can chemically alter the composition of the
base and finish materials and cause dulling and fading of the
finish. Generally, changes in the finish due to the weather are
cosmetic. There are on the surface of the part and do not affect
its strength.
The best insurance against these effects is routine
maintenance. If the finish is not washed thoroughly and
waxed, the surface can deteriorate very rapidly. The following
guidelines can help you reduce these weathering effects
Wash the exterior at least once a month using a mild liquid
detergent. Never use strong abrasives to clean the exterior
surfaces. Wash your camper in a shady area, not in direct
sunlight. If the camper is parked in the sun, move it into the
shade and let the exterior cool down before you start.
Chemical solvents and strong cleaners can damage the siding,
roofing, metal, and plastic trims on your camper. Rinse the
camper thoroughly with cool water to remove loose dirt. Fill a
bucket with cool water. Mix in a mild detergent, such as
dishwashing liquid or a product made especially for auto or
RV washing. Wash the camper using the water and mild
detergent solution and a soft-bristle brush, sponge, or soft