Revision 2.2
5-4
ChannelMaster TX1 Transmitter
“PRE” Button
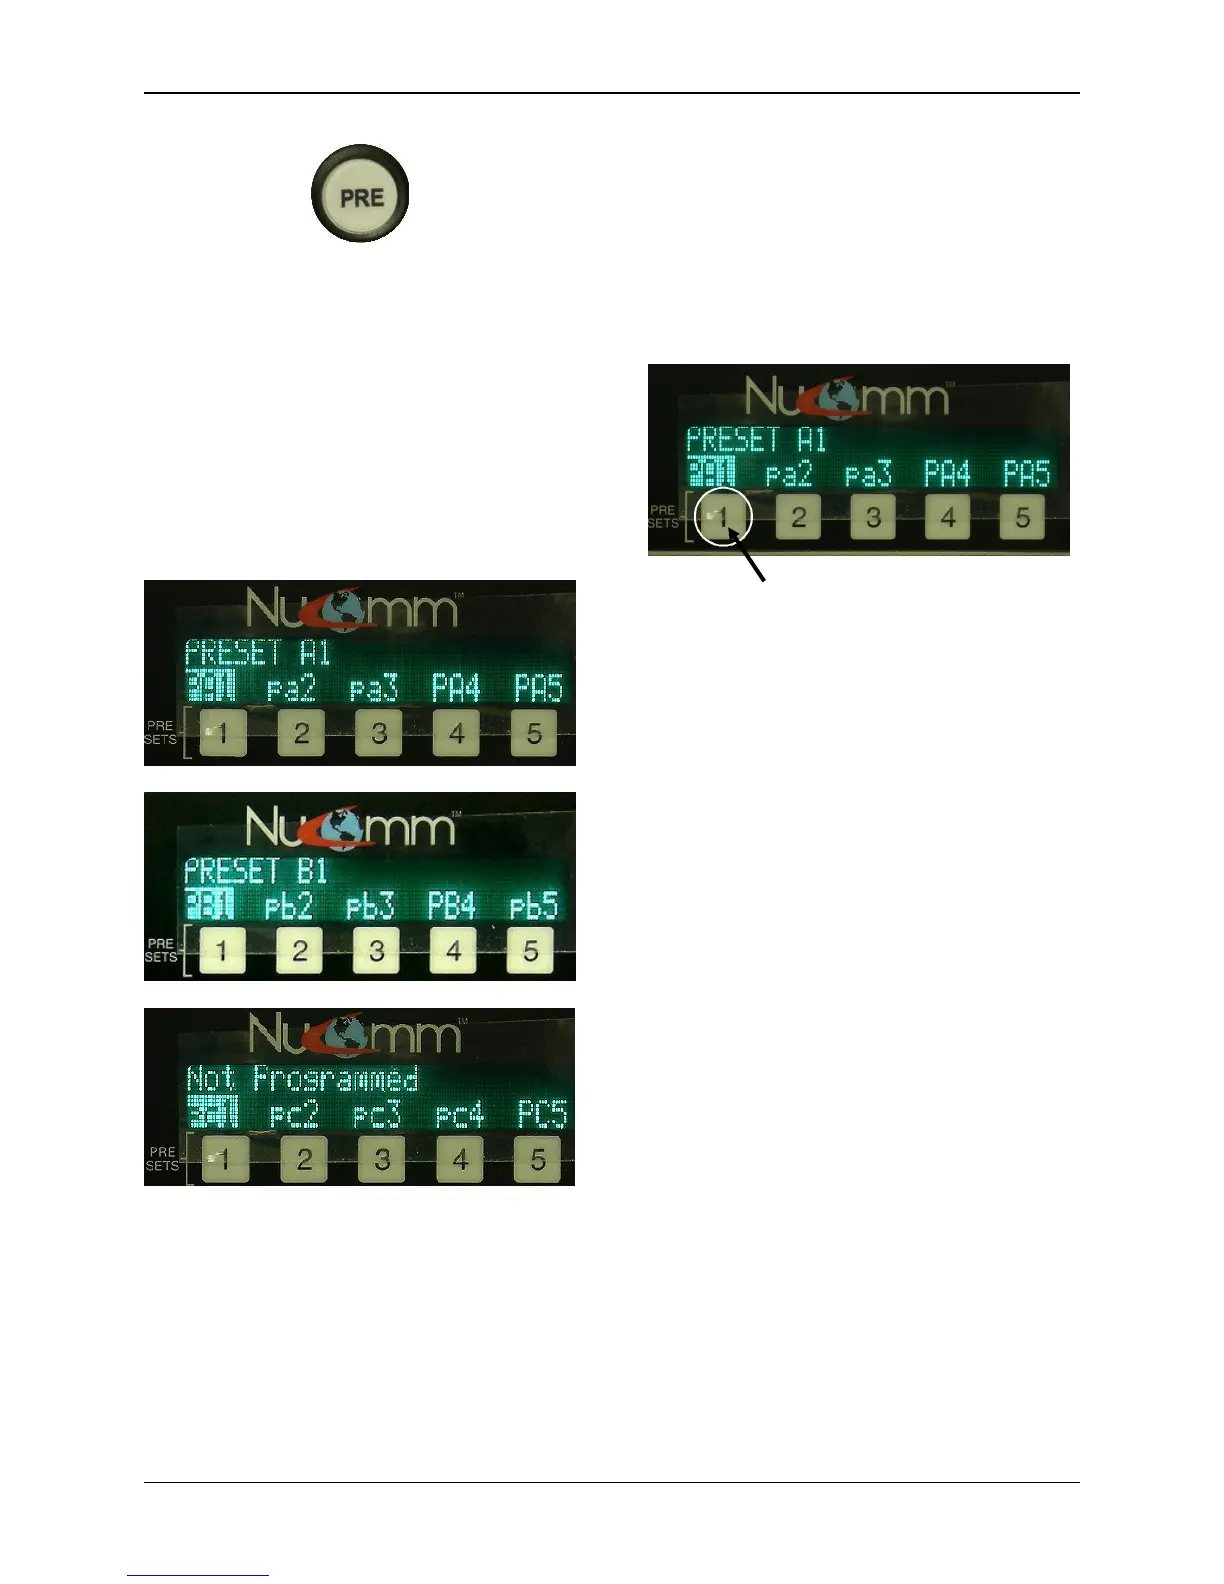
As well as also bringing up the first group
of presets (pa1 – pa5), the other two sets
of presets are only accessible through
the “PRE” (Preset) Button. Pressing the
“PRE” Button once brings up the presets
pa1 – pa5. Pressing the “PRE” Button
twice, brings up the presets pb1 – pb5.
Pressing the “PRE” Button three times,
brings up the presets pc1 – pc5.
These presets are set and saved in the
same way as the numbered “Preset”
Buttons.
Changing & Setting Preset
Parameters.
Before saving a preset, program the
radio with the desired parameters.
To change these parameters, refer to
Section 5.2.1 or 5.5.
For Presets pa1 – pa5, simply press &
hold the numbered button just below the
desired preset to save it.
Press & hold numbered button below
the desired preset to save it.
For Presets pb1 – pb5, & pc1 – pc5,
press the “PRE” Button the appropriate
amount of times to bring up the set
containing the desired preset. Rotate the
“Quick-Knob” until it highlights the
desired preset, and press & hold the
“Quick-Knob” to save it until the
confirmation message is displayed
(approximately 4 seconds).
When a preset is saved, all system
parameters are stored into memory with
the associated preset. These
parameters include:
• Modulation Parameters
• Input Type
• Power Mode
• Channel Number & Frequency
• Audio Settings
The ChannelMaster LCD indicates which
of the presets have been programmed as
well as those that have not been
programmed. All presets represented by
capital letters have been programmed.