14 Copyright © 2016 Broan-NuTone LLC
Z-Wave Installaon
Z-Wave controllers from various manufacturers may support the Z-Wave Thermostat General V2
Device class used by the Go Control Z-WAVE Thermostat. The following procedure will allow the
thermostat to be added to a Z-Wave network.
NOTE: Before adding the thermostat to a Z-Wave Network, check that it does not already belong to
one by viewing the Node ID (ZNID) located in the Thermostat Info screen. An uninstalled thermostat
should show zeros for the Node ID (000). Consult your controller’s user manual for details on
removing a device from a Z-Wave network.
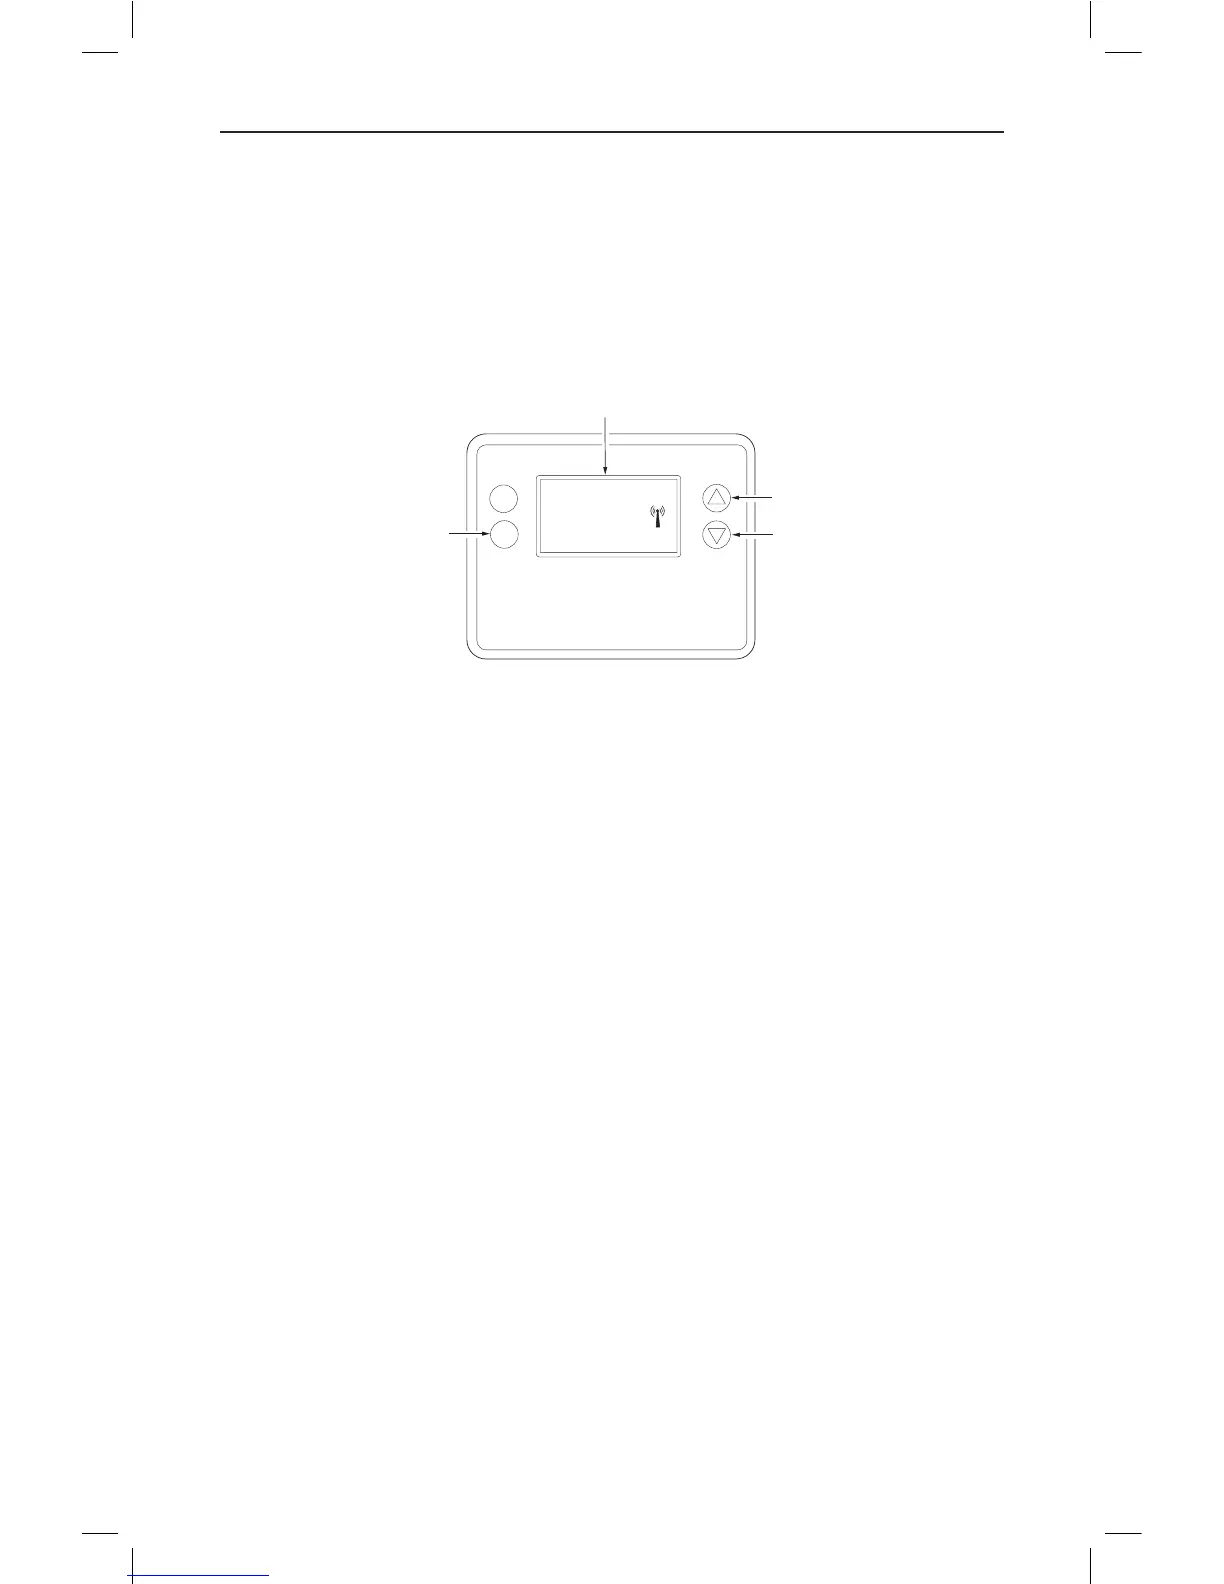
Figure 16. Z-Wave Menu Setup
General Programming Procedure (for controllers supporng the thermostat device class):
1. Set your primary controller to Include, Add or Install mode, to add the thermostat as a node on
your network (see your controller’s user manual for detailed instrucons).
2. Press any buon to take thermostat out of sleep mode.
3. Press and hold the FAN buon for 5 seconds. SETUP will be displayed in the status display line.
One (1) of ve (5) menu choices appear in status display line.
4. Scroll to “Z-Wave” using buons. Press SELECT.
5. When prompted by your Z-Wave controller, press the YES buon in the Z-Wave Install screen.
6. Press SELECT (mode buon) to add the thermostat to network.
7. Display line should ash WAIT, then SUCCESS if Z-Wave connecon is made.
8. If Z-Wave does not connect to controller, WAIT, then FAIL will ash in status display line.
9. If thermostat fails to connect, repeat Steps three (3) thru (7) to re-try connecng.
Your controller will indicate the thermostat was successfully added to its network (see your
controller’s user manual for details). Also, you can check if the thermostat was successfully added
to the network by checking the ZHID (Home ID) and ZNID (Node ID) located in the Thermostat Info
screen.
For other specic tasks such as adding the thermostat to Scenes or Groups, or deleng the thermostat
from an exisng network, refer to the Z-Wave controller instrucons.
Inclusion and Exclusion
Inclusion or exclusion is started by pung the controller into add node or remove node state
and performing the General Programming Procedure outlined above. As part of the process, the
thermostat sends a node informaon frame at normal power. Low power inclusion or low power
exclusion is not possible.
CAUTION: Do not install baeries and temporarily power the thermostat from 24VAC to include onto
a Z-Wave network. Shortened baery life may occur when 24VAC power is removed.
MODE
FAN
Select
Done
z-wave
USE THE
BUTTONS TO CHANGE
TO THE DESIRED MENU
ITEM, THEN PRESS
SELECT
MENU CHOICES
ARE DISPLAYED IN THE
STATUS DISPLAY LINE
PUSH AND HOLD
FOR 5 SECONDS
76