Overlays and Macros (Windows only) > 57
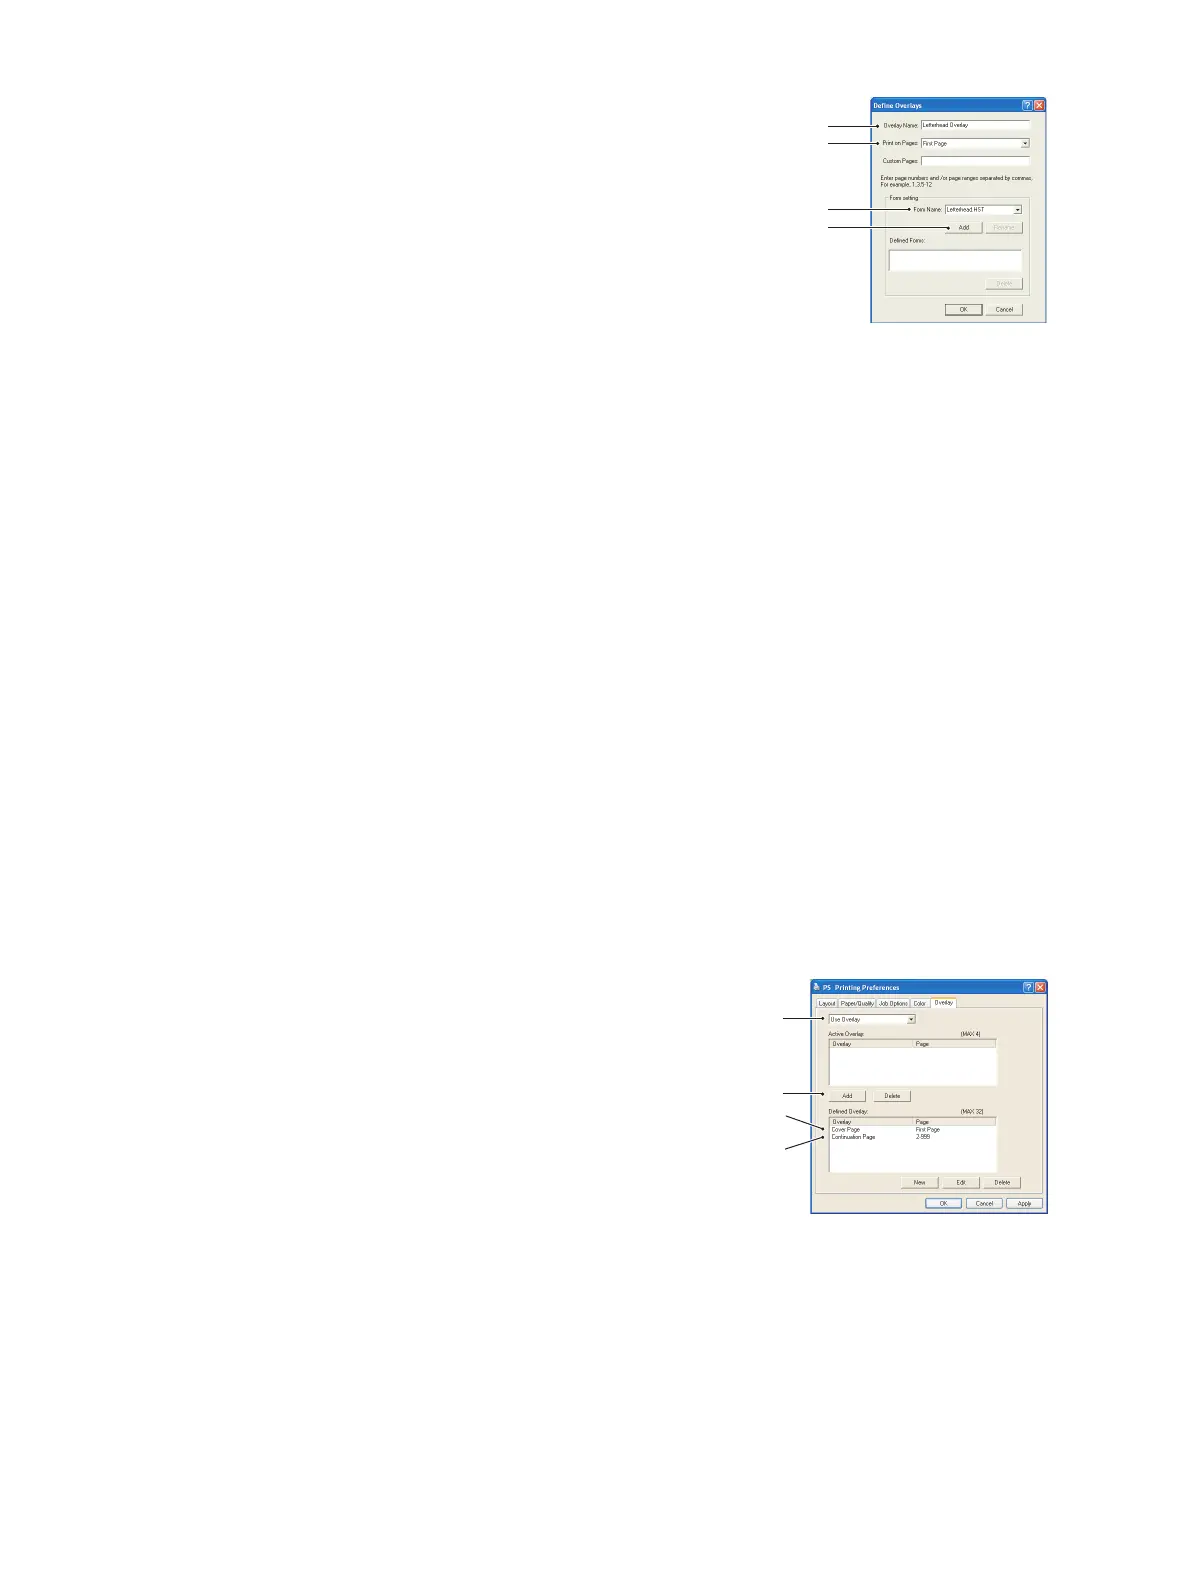
4. In the Define Overlays window, enter a suitable name (2)
for this overlay and choose which page(s) (3) of your
documents will use this overlay.
5. Enter the name of the overlay file (4) exactly as it appeared
in the Storage Device Manager project window. Remember
that this name is case sensitive.
If you forgot to note the overlay names when you created
them, you can find them using Storage Device Manager to
view the project file, or the printer’s Information Menu to
print a file list and identify them from there.
6. Click Add (5) to add this overlay into the defined overlays list.
7. Click OK to close the Define Overlay window.
The new overlay now appears in the Defined Overlays list in the printer properties
window.
8. Repeat the above procedure if you wish to define more overlays.
9. When done, click OK to close the printer properties window.
Your new overlays are now ready and available to be used for any future documents you
wish.
P
RINTING
WITH
P
OST
S
CRIPT
OVERLAYS
Once you have defined your overlays you are ready to use them for any documents you
wish. The example illustrated here uses two overlays for business letters. The first prints
on just the top page, and the second prints on any or all subsequent pages.
1. Prepare your document in the normal way using your own application software.
Remember, if necessary, to format the document so that it will fit within the
appropriate space.
2. Open your application’s Print… dialogue and choose any options you will require,
ensuring that the target printer is your PostScript printer driver in which the overlays
have been defined.
3. Click the Properties button to open the Printing Preferences window.
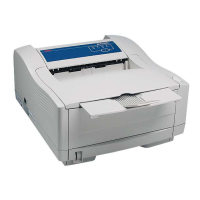
4. On the Overlays tab, choose Use Overlay from the
drop-down list (1).
5. Click on the first overlay (2) you wish to use. In this
example it is the Cover Page overlay. Then click the
Add button (3).
6. If you want to use another overlay, in this case it is the
Continuation page, click the second overlay (4) and
then click the Add button (3) again.
7. When you have selected all the overlays you want to
use for this document, click OK.
8. Finally, in your application’s print dialogue, click OK to begin printing.
2
3
4
5
1
3
2
4