29 - English
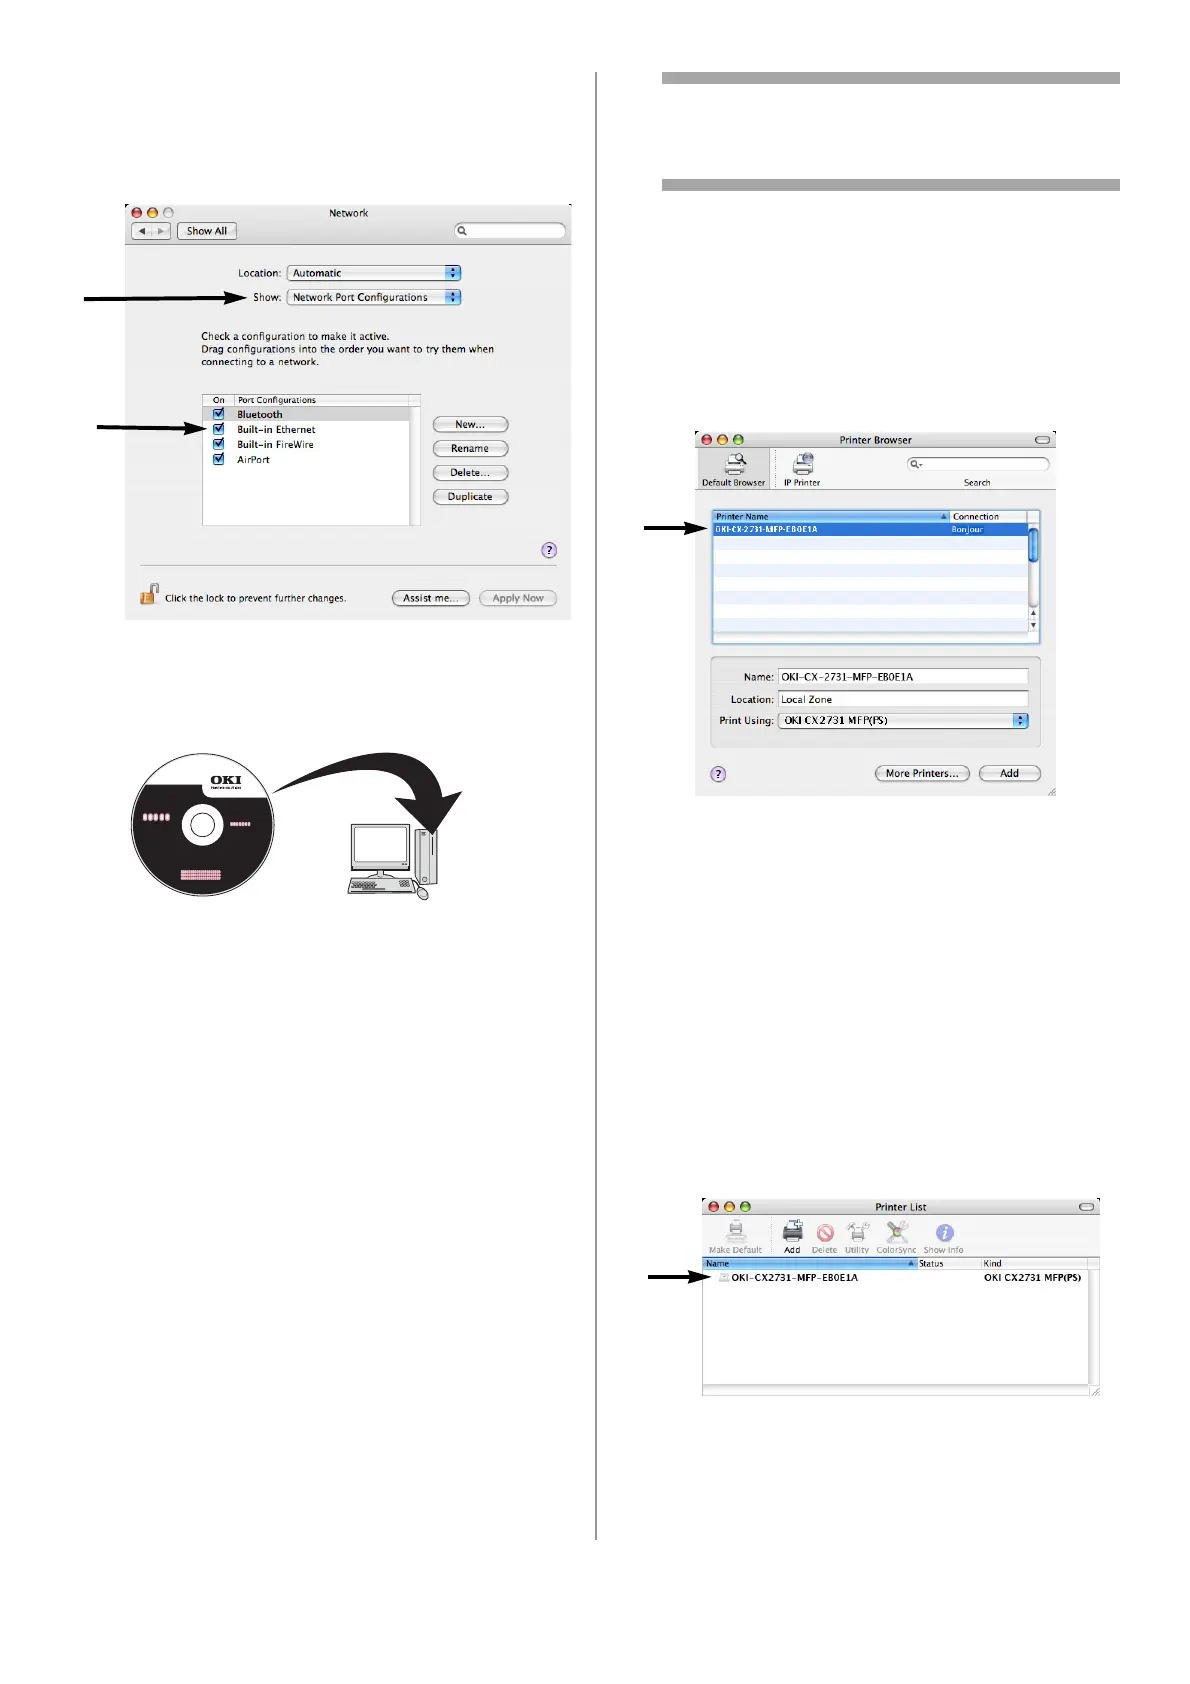
3 Select [Network].
4 Select [Network Port Configurations] from
[Show], and then check that [Built-in
Ethernet] is selected.
5 Close [Network].
6 Insert the DVD supplied with your machine
into the computer.
7 Double-click the icon that appears on the
desktop.
8 Double-click the [Driver] folder, then the
[Printer] folder.
9 Double-click [Installer for Mac OSX].
10 Enter the administrator’s name and password,
and then click [OK].
11 Follow the instructions displayed on the
screen to complete the installation.
12 Remove the DVD from the computer.
13 From the [Go] menu, select [Utilities] and
then double-click [Printer Setup Utility].
Important!
If [Printer Setup Utility] is already running,
close it and open it again.
14 Click [Add].
Note
If the [You have no printers available] dialog
box appears, click [Add].
15 For Mac OS 10.3.9, select [Rendezvous].
16 Select the name of your machine whose
[Connection] is [Bonjour], and then check
that the name of your machine is displayed in
[Print Using].
Your machine is displayed with the last six
digits of the MAC address in the printer list.
17 For Mac OS X 10.3.9, select the name of your
machine and select [OKI] from [Print Model],
and then select [OKI CX2731 MFP(PS)] from
the list.
18 Click [Add].
19 If the [Installable Options] window appears,
click [Continue] unless you have already
installed options. If you have installed
options, configure each option before clicking
[Continue].
20 Check that the name of your machine is
displayed in [Printer List], and then close the
window.
21 From the [Go] menu, select [Applications] >
[TextEdit].
22 Select the [File] menu > [Page setup].

 Loading...