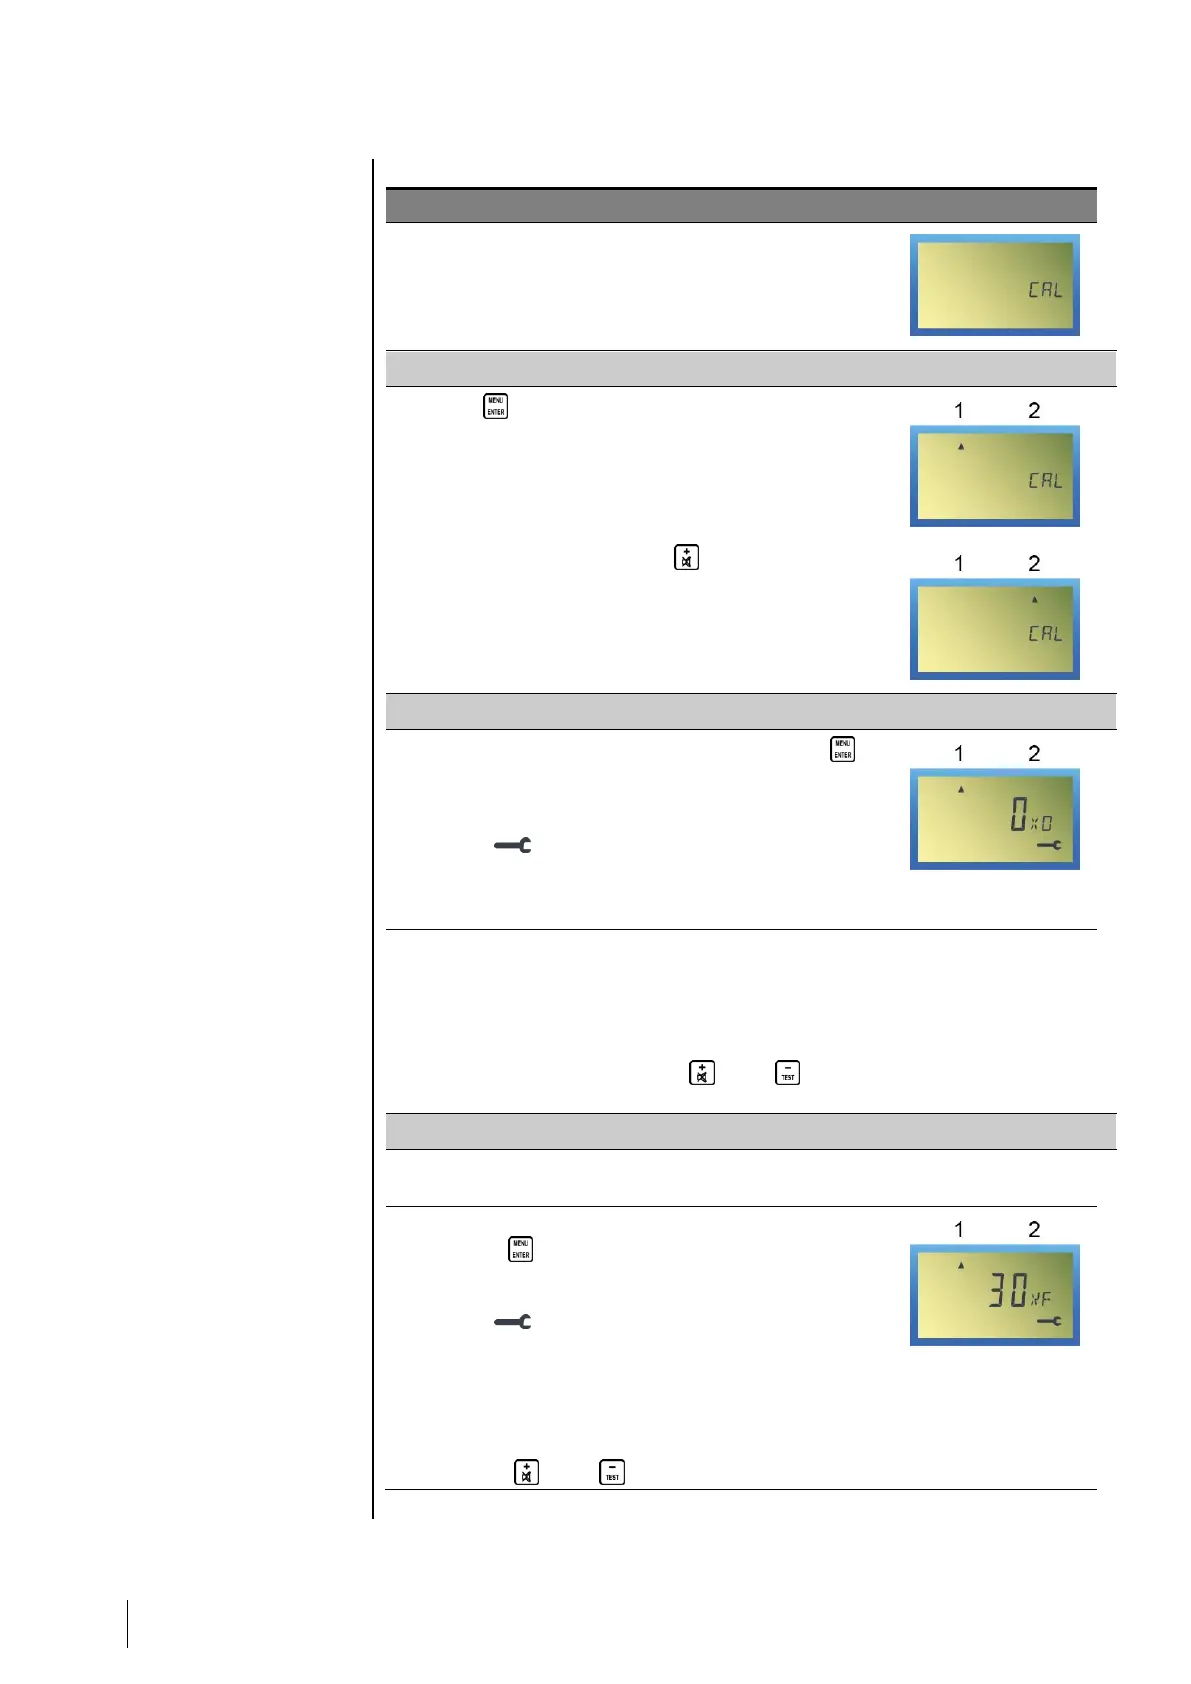
■ The CAL indicator blinks.
Selecting the channel to calibrate
■ Press (ENTER) to confirm.
The Channel 1 icon blinks indicating Channel 1
has been selected.
■ To select Channel 2, press (+).
The Channel 2 icon blinks indicating Channel 2
has been selected.
■ Confirm the channel to calibrate by pressing
(ENTER).
- Display of the current value (±0).
X0 = zero settings.
- The icon is displayed.
- The yellow indicator of the corresponding
channel blinks (the channel relays are
blocked).
■ Make sure that the air is clean, if not, using a test
kit, inject air at the level of the detector at a flow
rate of 60 l/h, then wait for stabilization of the
signal.
If the display is a value other than zero, adjust the
zero measurement using the (+) or (-)
buttons.
■ Inject the calibration gas (60 l/h) at sensor level
and wait for signal stabilization.
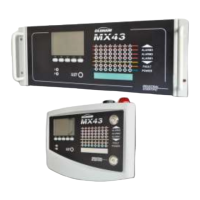
■ Confirm the entry in the sensitivity settings by
pressing (ENTER).
- Display of the current value (±0).
XF = sensitivity settings (blinking icon).
- The icon is displayed.
- The yellow indicator of the corresponding
channel blinks (the channel relays are
blocked).
If necessary (displayed value other than the value
of the calibration gas), adjust the sensitivity by
using the (+) or (-) buttons.