12
Fig. 15
Fig. 14
Fig. 16
4-5 Rotary Stage
1
Placing Specimen on the Stage
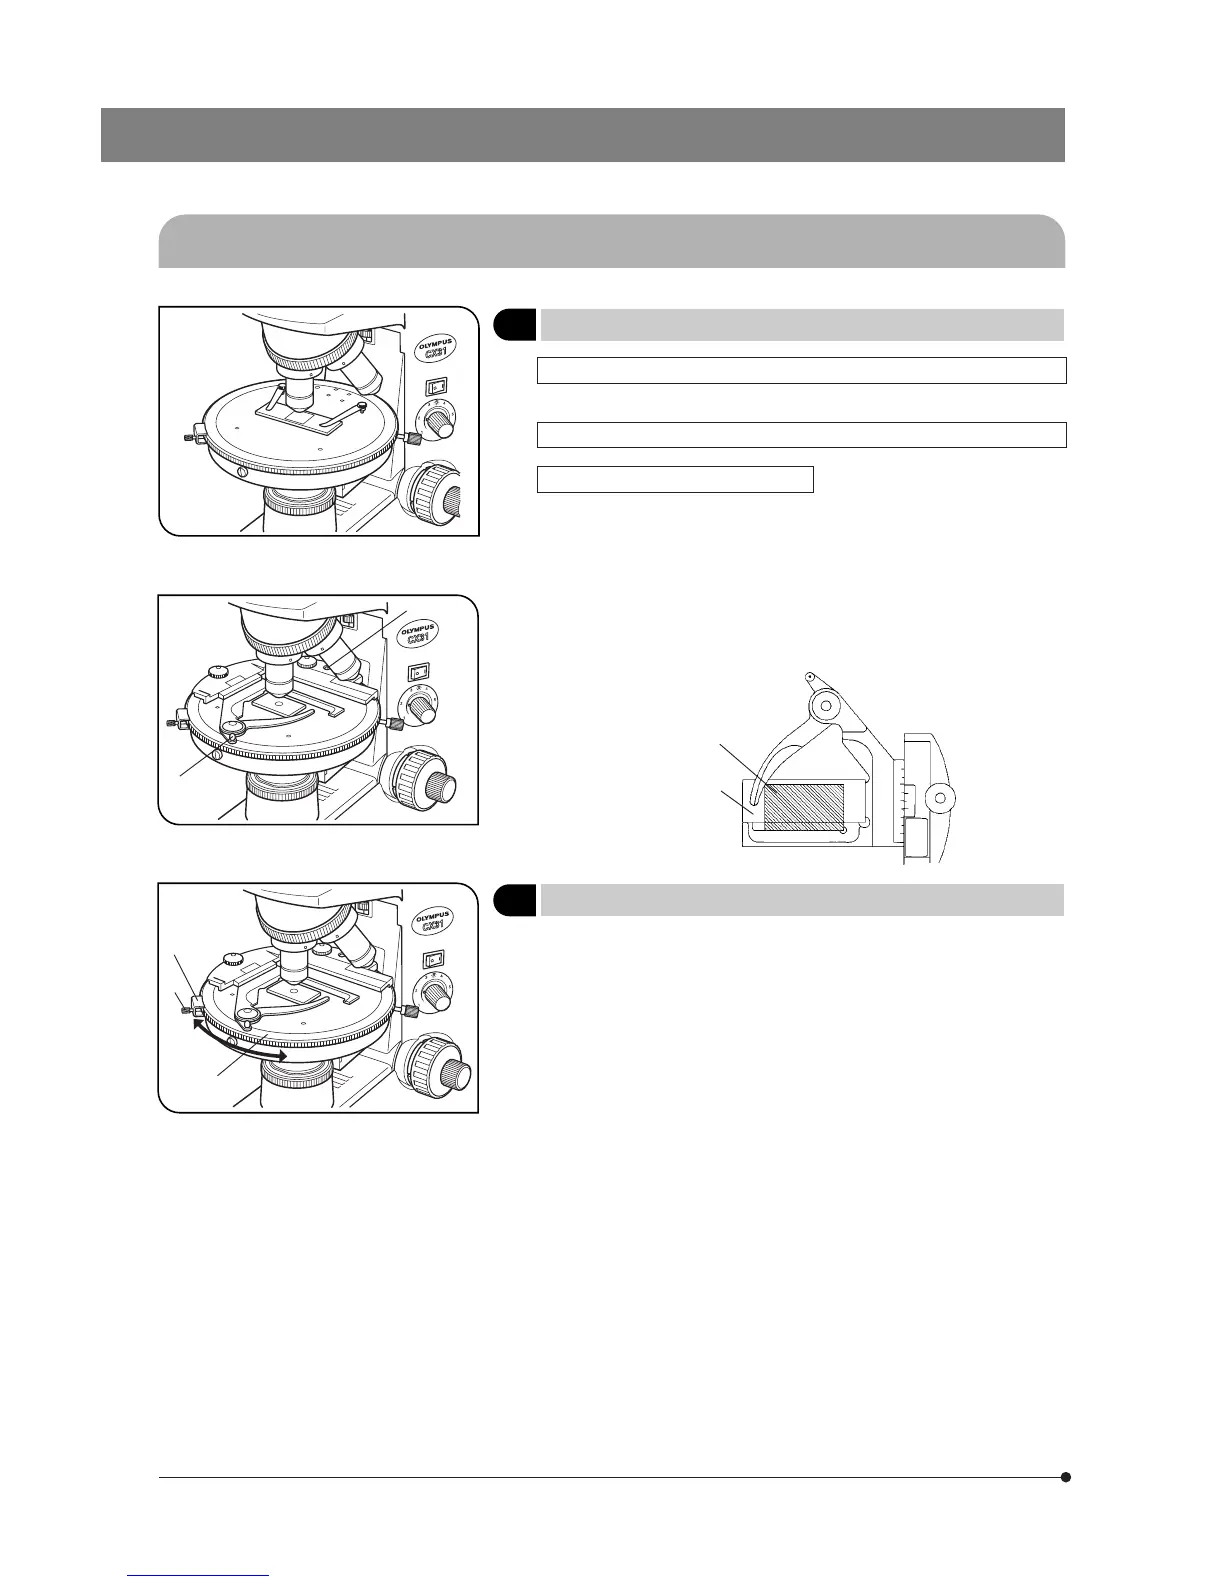
When the specimen holder is used (Fig. 14)
Place the specimen on the center and hold it with the specimen holder.
When the mechanical stage (U-FMP) is used (Fig. 15)
How to attach the mechanical stage
Fit the guide pins on the bottom of the U-FMP into the holes on the stage
top, and tighten the clamping screw 1 of the U-FMP using an Allen
wrench.
· While expanding the clamping lever 2 of the specimen holder, set the
specimen in place by sliding it on the stage.
#Use a slide glass for mineral specimen (28 x 48 mm) or that for
biological specimen (26 x 76 mm). The cover glass thickness should
be 0.17 mm.
Mineral specimen
Biological specimen
2
Rotating the Stage
(Fig. 16)
Loosen the stage rotation clamping knob 1 to allow the stage to be
rotated horizontally by up to 360°.
The rotation angle can be read on the scale on the circumference 2
(360° partial scale, minimum graduation 1°). Readout down to 6’ is pos-
sible by using the vernier 3.
1
3
2
1
2
 Loading...