12
EN
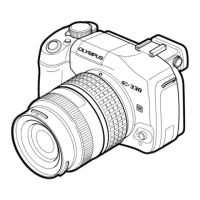
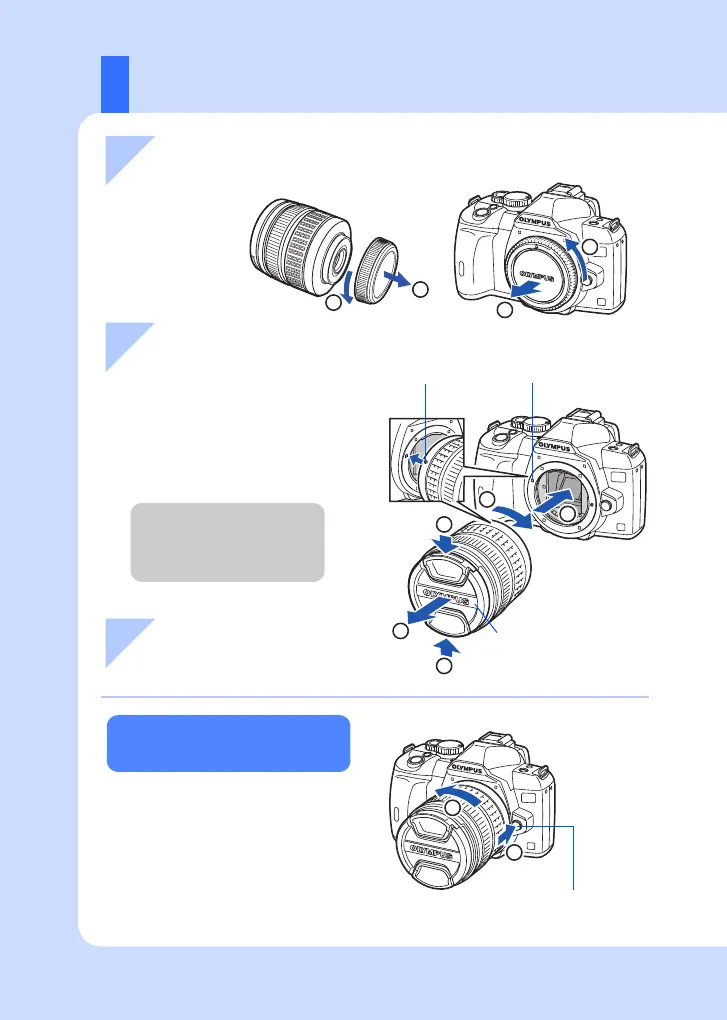
Attaching a lens to the camera
1
2
3
4
3
2
1
1
2
Rear cap
Body cap
Lens cap
Lens attachment
mark (Red)
Alignment mark (Red)
Lens release button
1 Remove the body cap from the
camera and the rear cap from the lens
2 Attach a lens to the camera
• Make sure the power switch
is set to OFF.
• Do not press the lens release
button.
3 Remove the lens cap
(
3, 4)
Removing the lens from the
camera
While pressing the lens release button
(1), rotate the lens in the direction of
the arrow (2).
• Align the lens attachment mark
(red) on the camera with the
alignment mark (red) on the
lens, then insert the lens into
the camera’s body (1).
• Rotate the lens in the direction
indicated by the arrow until you
hear it click (2).
2
1
s0018_e_00_0_unified.book Page 12 Tuesday, March 18, 2008 4:08 PM