15
EN
Preparation
1
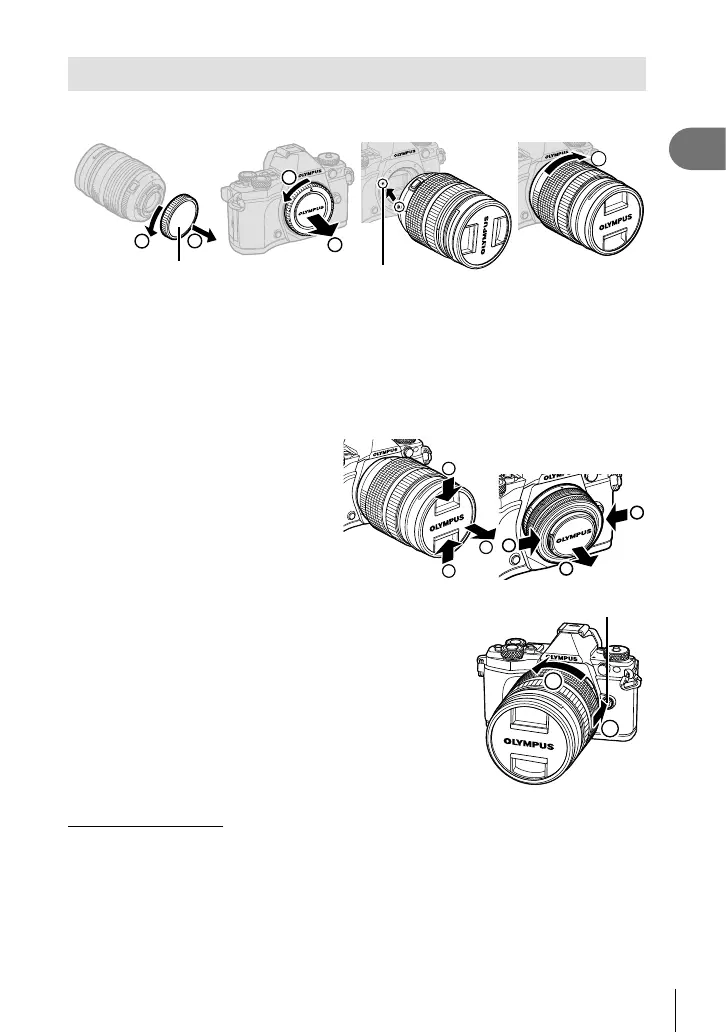
Attaching a lens to the camera
1
Attach a lens to the camera.
Lens attachment mark
1
2
Rear cap
2
1
3
• Remove the rear cap of the lens and the body cap of the camera.
• Align the lens attachment mark (red) on the camera with the alignment mark (red) on
the lens, then insert the lens into the camera’s body.
• Rotate the lens clockwise until you hear it click (direction indicated by arrow
3
).
Cautions
• Make sure the camera is turned off when attaching or removing the lens.
• Do not press the lens release button.
• Do not touch internal portions of the camera.
2
Remove the lens cap.
1
1
2
1
1
2
Removing the lens from the camera
Make sure the camera is turned off when removing the lens.
1
While pressing the lens release button, rotate the
lens in the direction of the arrow.
2
1
Lens release button
Interchangeable lenses
Read “Interchangeable lenses” (P. 134) .