8
REFLECTED LIGHT BRIGHTFIELD/DARKFIELD
OBSERVATION PROCEDURE
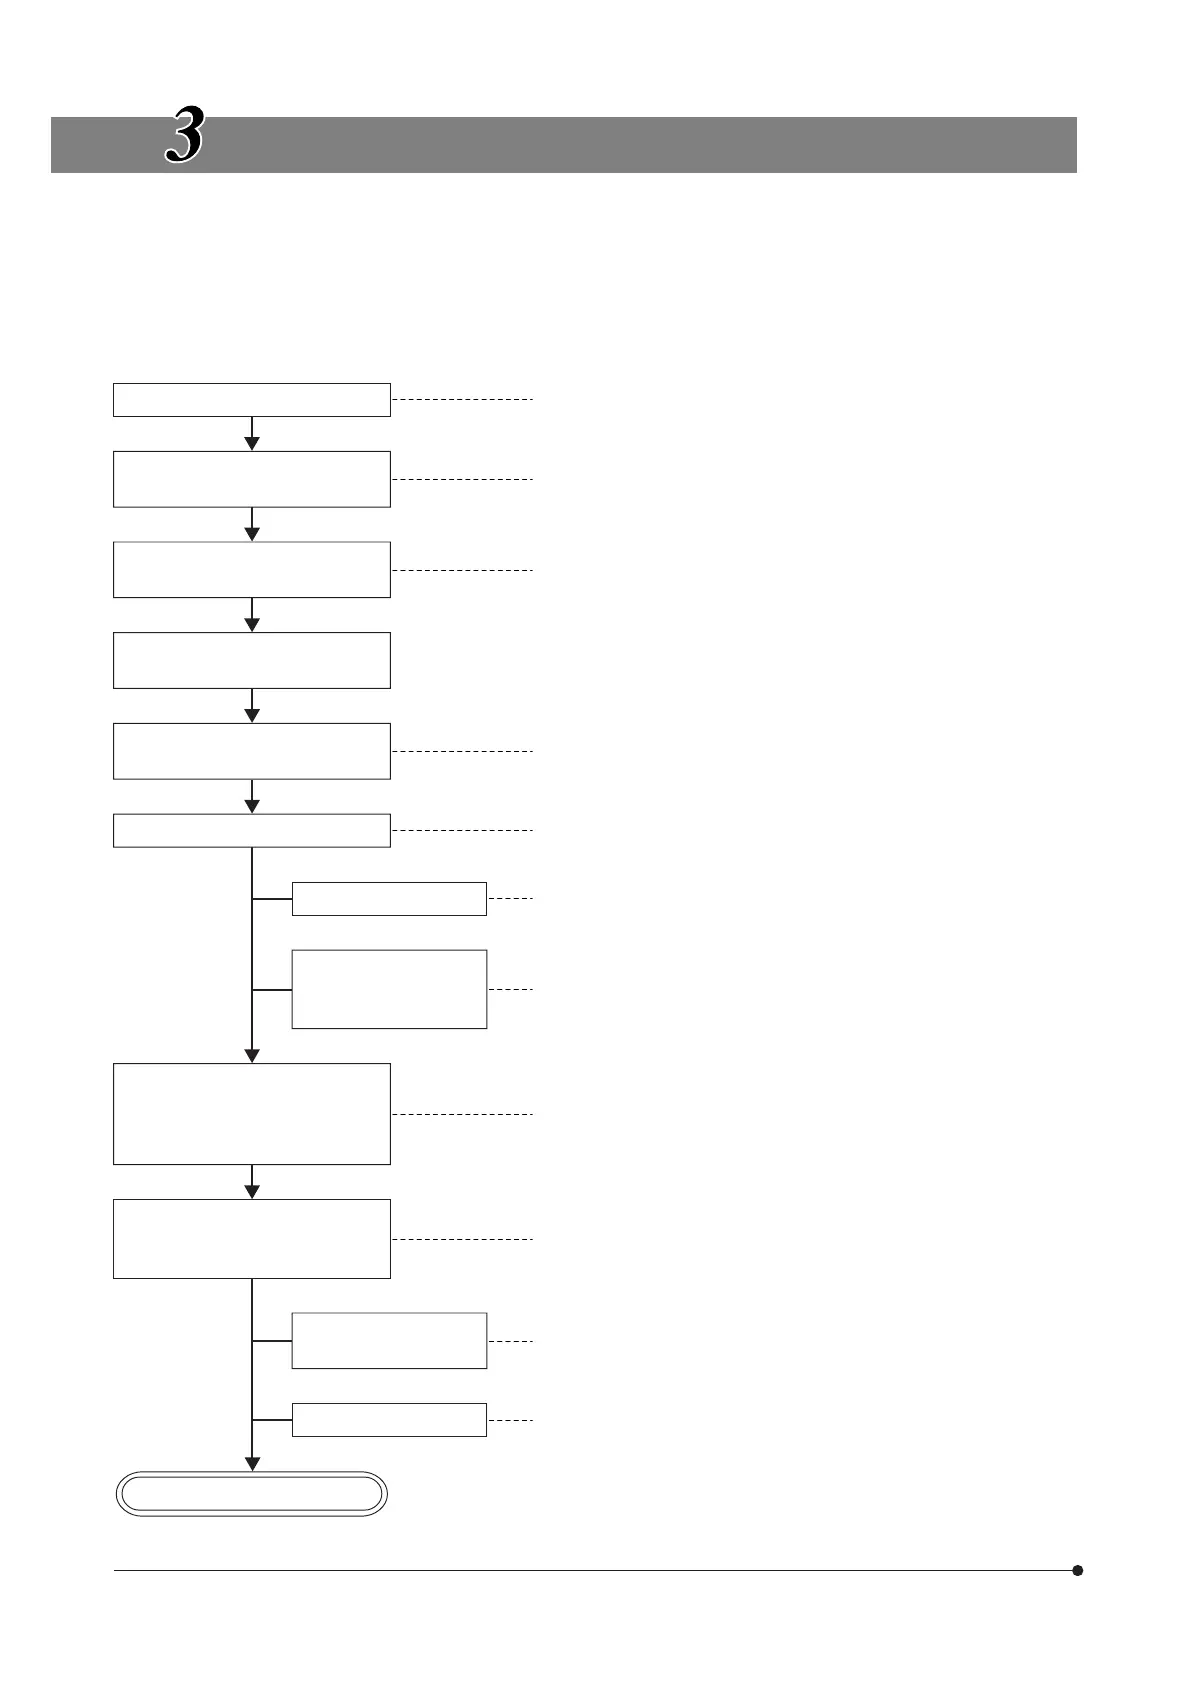
}The following flow chart pertains to the reflected light brightfield/darkfield observations.
The controls used for a system using the U-HSTR2 hand switch, U-FH focus adjustment knob unit and TH4 power supply
unit for halogen bulb together with those used for a PC-controlled system.
For details on the PC control, also refer to the tutorial or help provided with the BX2-BSW software.
Start observation.
(Non PC Controlled System) (PC Controlled System)
Set the main switch to “ I ” (ON).
1BX-UCB main switch “ I ” (ON)
2TH4 main switch “ I ” (ON)
1Main switch “ I ” (ON)
3PC “ I ” (ON)
Select BF (brightfield) or DF
(darkfield).
4BF/DF button (Page 10) 3PC command
Select the light path (when a trin-
ocular tube is used).
5
Light path selector knob (Page 15)
5
Light path selector knob (Page 15)
Place the specimen on the speci-
men table.
Engage the 10X objective in the
light path.
6Revolving nosepiece button 3PC command
Bring the specimen in focus.
7Objective Up/Down buttons, or
8Focus adjustment knob
3PC command
Adjust the brightness. 9Light intensity adjustment knob 3PC command
Adjust the interpupil-
lary distance.
Adjust the diopter.
aBinocular sleeves (Page 14)
b
Diopter adjustment ring (Page 14)
aBinocular sleeves (Page 14)
b
Diopter adjustment ring (Page 14)
Adjust the aperture iris and field
iris diaphragms.
}In DF observation, both should
be opened fully.
cAS+/– buttons (Page 11)
dField iris diaphragm auxiliary
lever (Page 11)
3PC command
dField iris diaphragm auxiliary
lever (Page 11)
Engage the objective to be used
in the light path and bring the
specimen in focus.
6Revolving nosepiece button
7Objective Up/Down buttons or
8Focus adjustment knob
3PC command
3PC command
Engage the required
filters.
eFilter insertion slot (Page 13) eFilter insertion slot (Page 13)
Adjust the brightness. 9Light intensity adjustment knob 3PC command