10.
ASSEMBLY
OF
STAND
V-STA
10-1
Glue Rubber
Legs
AA235400
to
Base
AA920500.
(See
Fig. 78.)
a)
Use
Araldite
OT
1028
as
an
adhesive.
b)
Upon solidification
of
the
adhesive
that
glues
the Rubber
Legs
to
the
Base,
place
Base
AA920500
on the level surface
of
a board
and
check
to
see
if
the
Base
shakes
on
it.
c)
If
it
does,
shorten
with
a file
or
the like whichever rubber
leg
is
longer than the others,
to
prop up
the
Base
horizontally.
10-2 Screw Pinion
Sleeve
AA949700
to
Pillar AA949400
with
2
pieces
each
of
CSK2.6x6SA
and
ACU2.6
x8SA.
Screw Cover
AA949900
to
Pillar AA949400
with
6
pieces
of
3PUK2x4SA.
10-3 Screw Plate
AA950000
to
Mounting Bracket AA920700
with
6
pieces
of
CSK2.6x6SA.
(See
Fig. 72.)
10-4 Screw Dovetail
AA949500
to
Mounting Bracket AA920700
with
3
pieces
of
HK3x4SA.
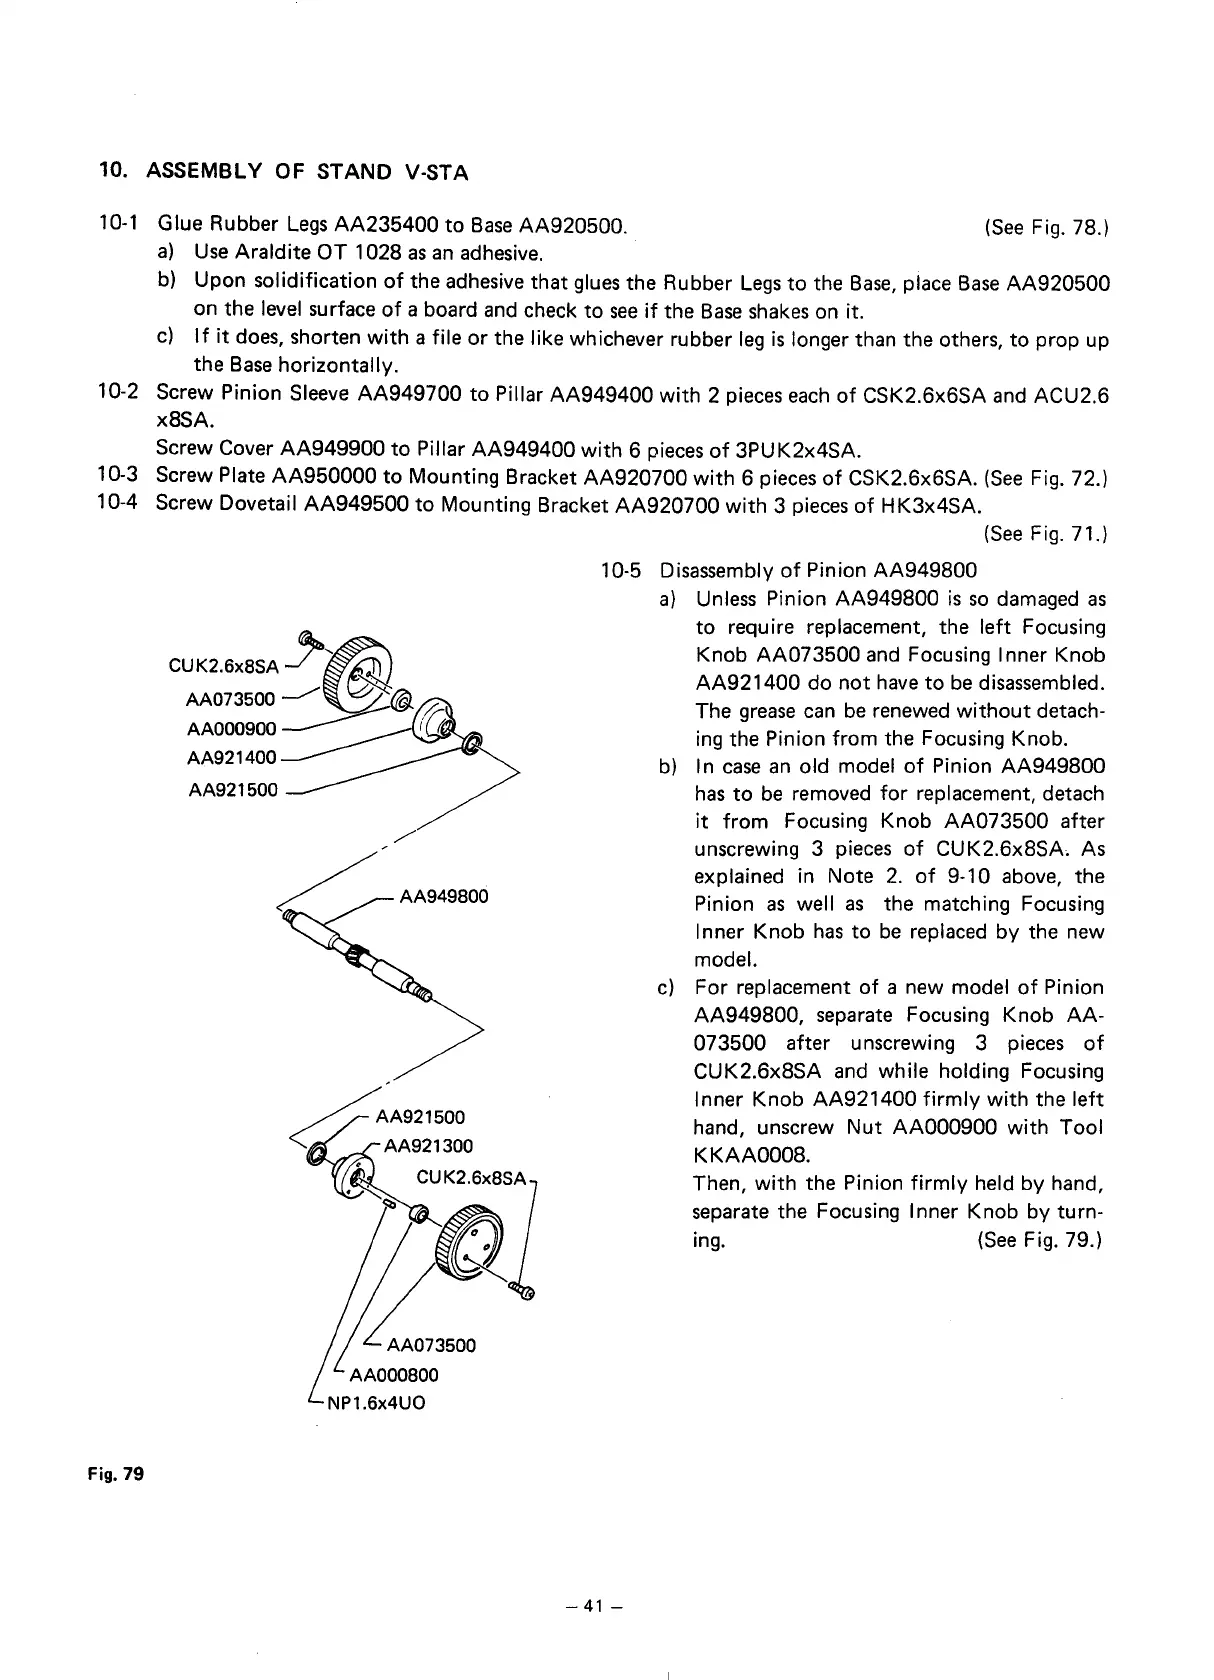
Fig.
79
CUK2.6x8SA
~~
AA073500
_..........~
;:::
AA000900----
f
({;
AA921400
AA921500
~~A921500
</·;_AA921300
AA000800
(See
Fig. 71.)
10-5 Disassembly
of
Pinion AA949800
-41-
a)
Unless
Pinion AA949800
is
so
damaged
as
to
require replacement, the
left
Focusing
Knob AA073500
and
Focusing
Inner
Knob
AA921400 do
not
have
to
be
disassembled.
The
grease
can
be
renewed
without
detach-
ing the Pinion from the Focusing Knob.
b)
In
case
an
old model
of
Pinion AA949800
has
to
be
removed
for
replacement, detach
it
from Focusing Knob
AA073500
after
unscrewing 3
pieces
of
CUK2.6x8SA.
As
explained in Note
2.
of
9-10 above, the
Pinion
as
well
as
the matching Focusing
Inner
Knob
has
to
be
replaced by the new
model.
c)
For replacement
of
a new model
of
Pinion
AA949800, separate Focusing Knob
AA-
073500 after unscrewing 3
pieces
of
CUK2.6x8SA
and
while holding Focusing
Inner
Knob AA921400
firmly
with
the
left
hand, unscrew
Nut
AA000900
with
Tool
KKAA0008.
Then,
with
the Pinion
firmly
held by hand,
separate the Focusing
Inner
Knob by
turn-
ing.
(See
Fig. 79.)