V. OPERATION
The stage plates
fit
into
the
circular
opening in
the
base.
The clear plate can be
used
for
both
reflected and
transmitted
illumination.
Colored background can be achieved
by
placing suitable material
beneath
the
plate,
for
contrast,
etc.
The
frosted
plate
is
used
with
reflected
illumination.
The plate
is
frosted
white
on one side,
and
black on the
other.
If
the
specimen
is
white
or
brightly
colored,
use
the
black side
of
the
plate
to
increase image
contrast
by
darkening
the
background.
For
dark
or
black specimens, reverse
the
plate
with
the
white
frosted
side facing
the
objective.
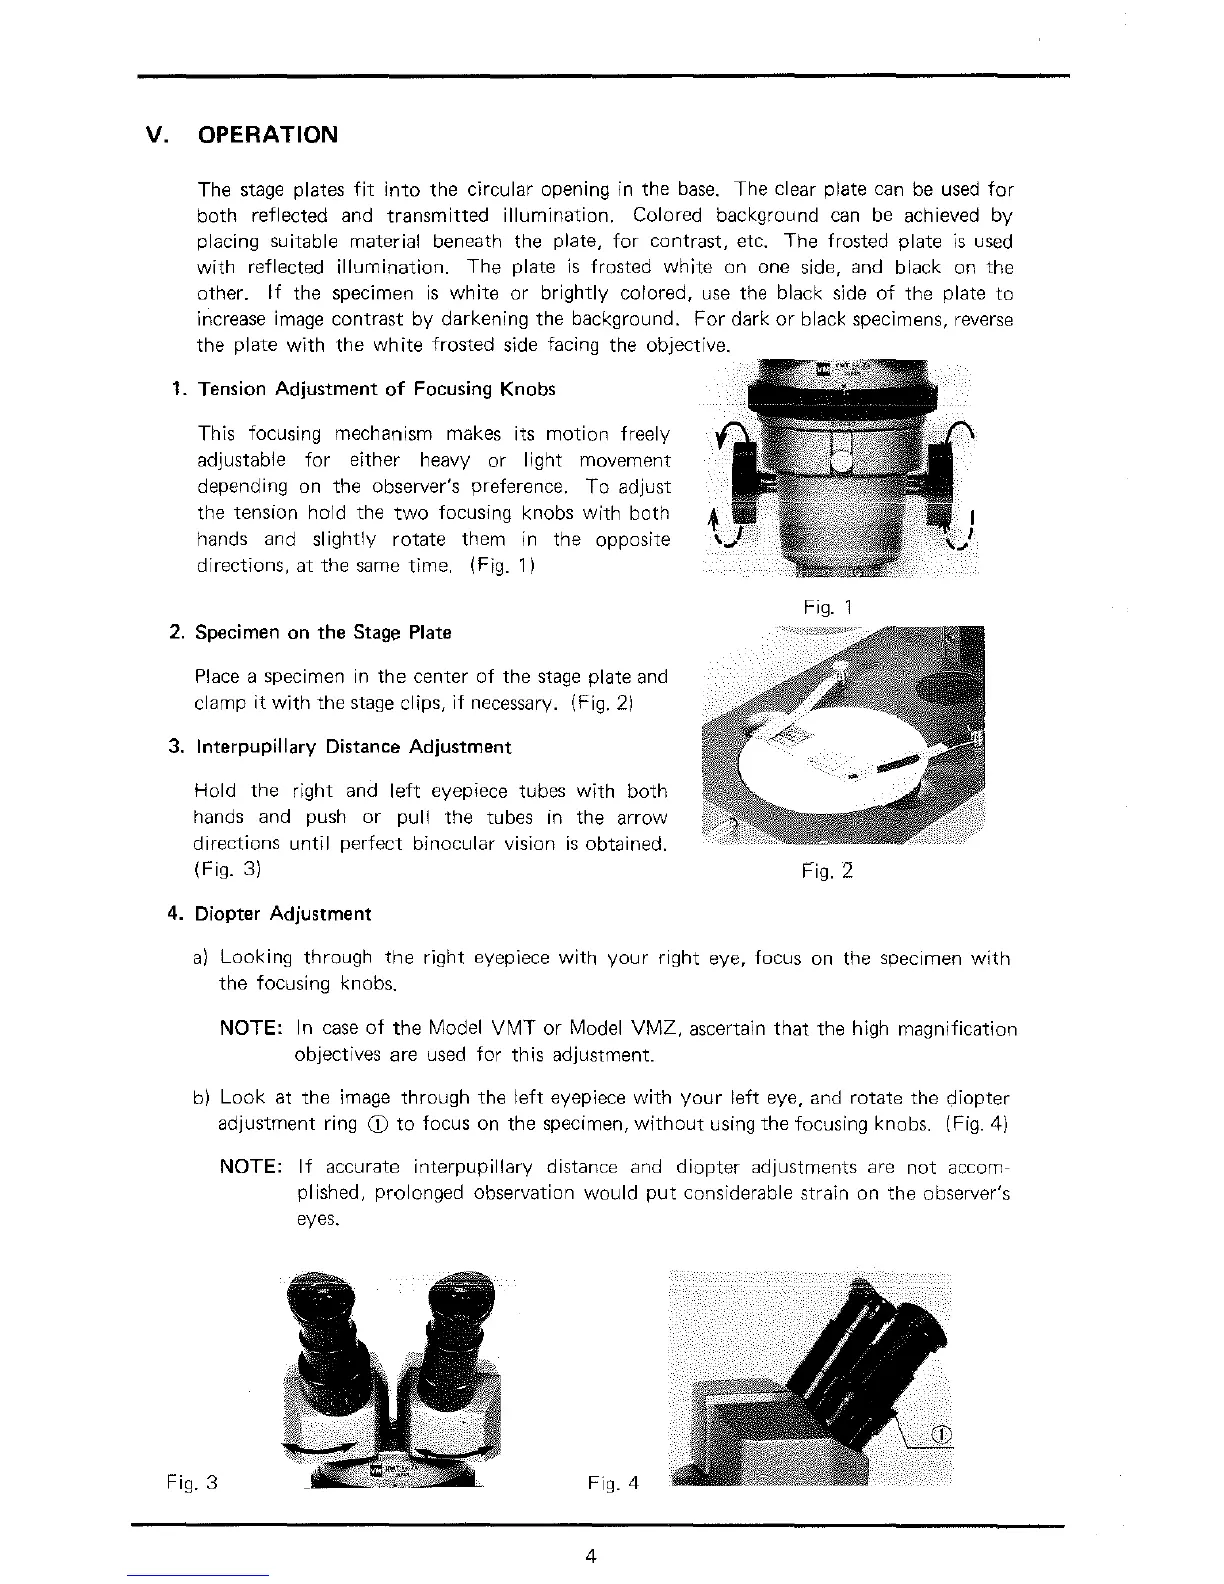
1. Tension Adjustment
of
Focusing Knobs
This focusing mechanism makes its
motion
freely
adjustable
for
either heavy
or
light
movement
depending on
the
observer's preference.
To
adjust
the tension
hold
the
two
focusing knobs
with
both
hands and
slightly
rotate
them
in
the
opposite
directions,
at
the
same
time.
(Fig.
1)
2. Specimen
on
the
Stage Plate
Place
a specimen in
the
center
of
the
stage
plate and
clamp
it
with
the
stage clips,
if
necessary. (Fig. 2)
3. Interpupillary Distance Adjustment
Hold
the
right
and
left
eyepiece tubes
with
both
hands and push
or
pull
the
tubes in
the
arrow
directions
until
perfect
binocular
vision
is
obtained.
(Fig. 3)
4. Diopter Adjustment
Fig. 1
Fig. 2
a)
Looking
through
the
right
eyepiece
with
your
right
eye, focus on the specimen
with
the
focusing knobs.
NOTE:
In
case
of
the
Model
VMT
or
Model
VMZ.
ascertain
that
the high
magnification
objectives are used
for
this
adjustment.
b)
Look
at
the
image
through
the
left
eyepiece
with
your
left
eye, and
rotate
the
diopter
adjustment ring
CD
to
focus on
the
specimen,
without
using
the
focusing knobs. (Fig. 4)
Fig. 3
NOTE:
If
accurate
interpupillary
distance and
diopter
adjustments are
not
accom-
plished, prolonged observation
would
put
considerable strain on
the
observer's
eyes.
Fig. 4
4