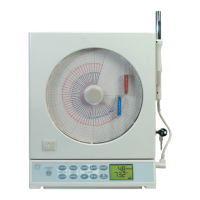
NOTE: ROTATE CHART PAPER
UNTIL PRESENT TIME
LINES UP WITH ARROW.
H
35
T
2
1
2
°C
°F
SCALE
CLOCK SPEED SET
LIGHT
NO
DISPLAY
POWER
CHART ALARM
CONFIGYES MODE
°F
RH
%
7D
1D
7 PM
8 PM
PM
6 PM
5
Figure 2-8. Changing Chart Paper and Setting the Time
2.5 Installing and Removing Pens
The recorder already comes with the two pens installed. While the unit is turned
off, open the recorder door and remove the pen caps from the two pens. Place
the pen caps in a secure location for reuse.
2.5.1 Installing the Pens
The recorder uses two different colored pens to record information. The
red (upper) pen records temperature. The blue (lower) pen records relative
humidity. Pen life varies with use and climate. Under normal operating
conditions, pens last at least one month. We recommend that you install a fresh
set of pens after every month of use.
To install pens:
1. Make sure the recorder is turned off. The recorder door should be closed.
2. Examine the location of the pen arms through the window in the recorder door.
a. If the pen arms are offset as shown in Figure 2-9, continue to Step 3:
OR
Te mperature
Pen
Te mperature
Pen
Humidity
Pen
Humidity
Pen
Figure 2-9. Offset Alignment of Pens (For Ease of Pen Installation)
Setting Up the Recorder
2
2-7
X 7:00 PM

 Loading...