Wiring Instructions
4
Pin No. Code Description
1 B RS485 B signal, RS232 TX (to remote device)
2 A RS485 A signal, RS232 RX (from remote device)
3 RTN signal for serial communications
Section 4.4 - Connecting Communications
Table 3 - Connecting Communications
Note: The RTN signal is isolated from the Signal RTN and the Power GND.
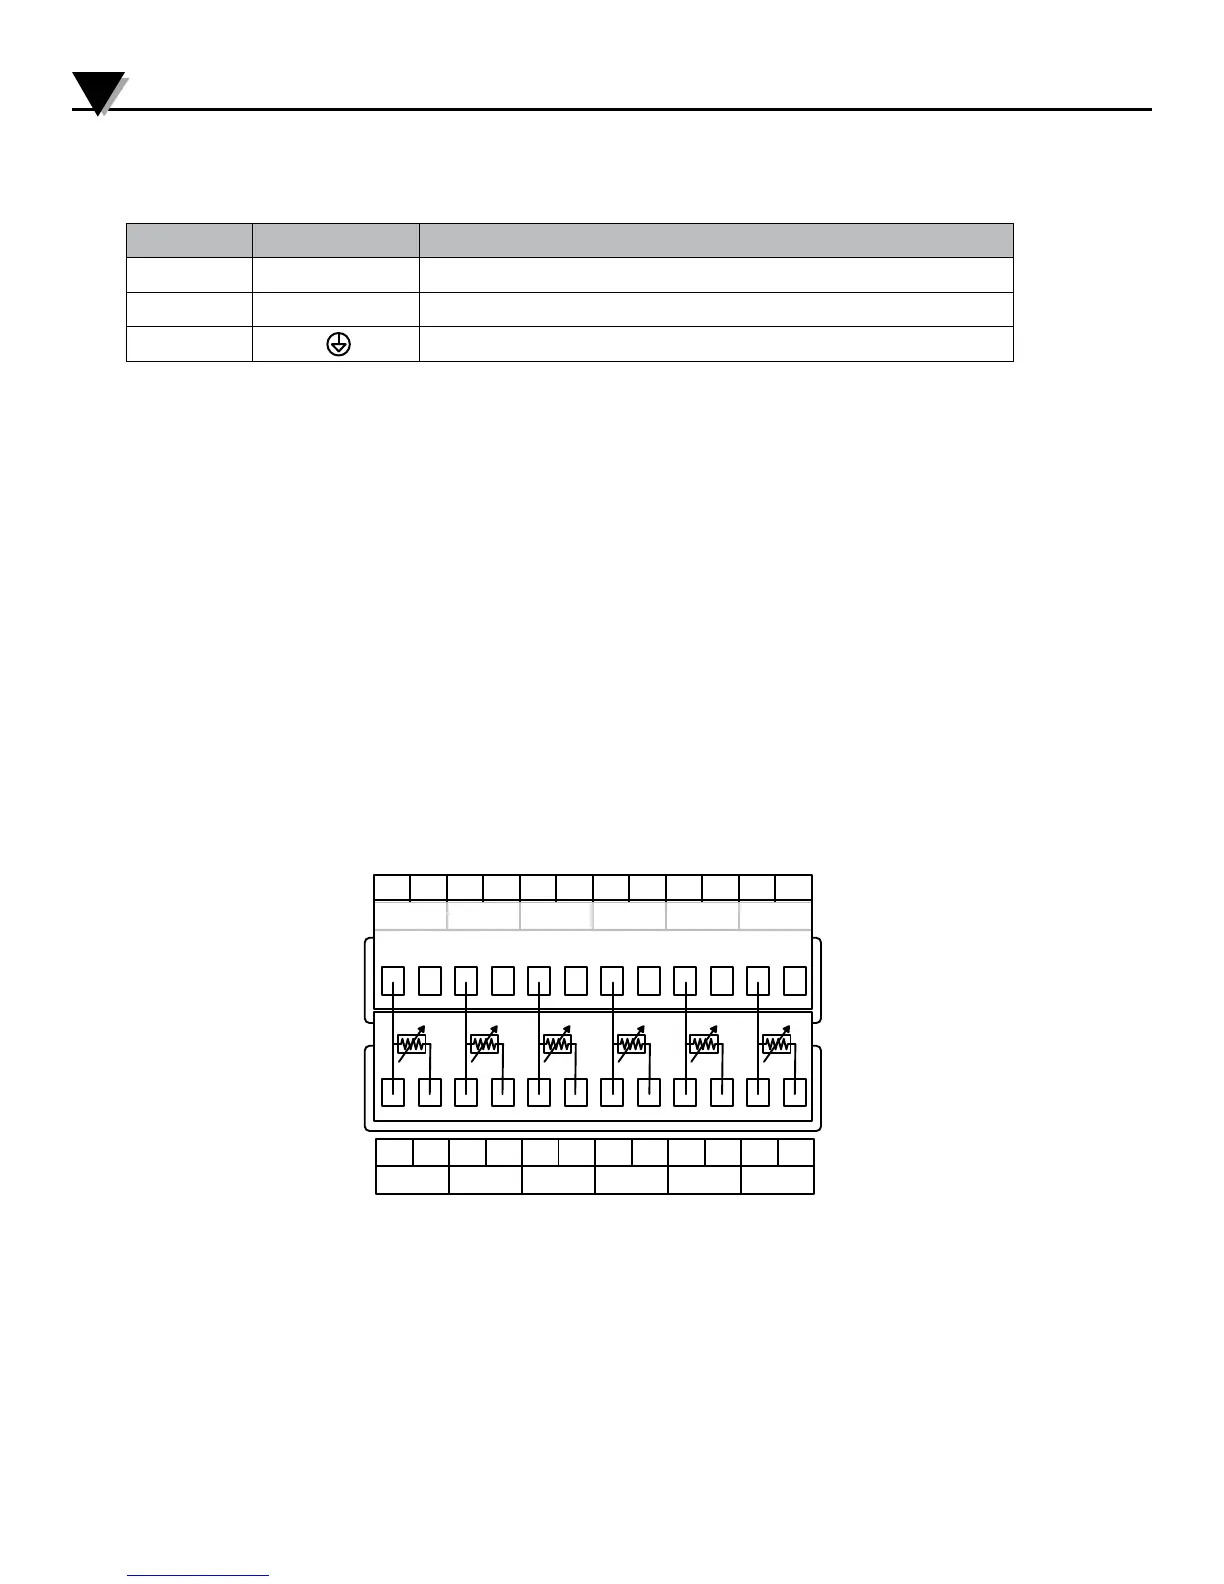
Section 4.5 - Connecting Inputs
Connect Input sensors to the terminals Marked Zone 1 though Zone 12 (Z1 – Z12) on
the rear panel. For the DP606A only Zones 1 through 6 are active and Terminals Z7
– Z12 are only used for 3 Wire RTDs. When connecting sensors follow the polarity
indicated on the rear panel. For Thermocouples the Negative wire is Red (NA) or
White (IEC 584-3). For Process Inputs the Negative terminal is ground.
For the RTD 3 wire option the common wires must be connected to the + terminals
of both the upper (Z1 – Z6) and lower (Z7 – Z12) input boards. The negative terminal
of Z7- Z12 remains unconnected. If a 2 wire RTD needs to be used in 3 Wire mode
use a jumper wire to connect the upper and lower terminals together. Refer to the
wiring diagram below.
+ -
Z1
+ -
Z2
+ -
Z3
+ -
Z4
+ -
Z5
+ -
Z6
+ - + - + - + - + - + -
Z7 Z8 Z9 Z10 Z11 Z12
Figure 5 - 3 Wire RTD Wiring Diagram
Note that all negative input terminals share a common internal ground connection.
Ensure that all sensors share a common ground or are fully isolated.
7

 Loading...


