5
L. Laser Head—The laser head holds the 3rd mirror, focus lens, and air assist outlet and directs the laser
beam down into your materials. Its components are normally protected by a rectangular shell that locks
magnetically into place.
M. X-Axis Rail—The X-axis rail supports the movement of the laser head left and right across the workbed.
When using either of the rotary axes, this rail should be positioned to connect the matching arrows.
N. Tray Interlock—This switch stops your laser when the debris tray is removed. For pass-through and
rotary engraving, close this switch using the nearby bracket.
O. Water Pump—This pump circulates your water or laser-safe coolant through the laser tube to keep it
cool and stable.
P. LED Light Strips—These integrated lights help keep your workbed easy to see.
Q. Camera—This fisheye camera helps you position your designs precisely.
R. Water Tank—This tank helps keep your laser tube cool and stable. It arrives full of OMTech antifreeze but
can also be replaced with distilled water.
S. Mainboard—This circuit board located under the left panel controls the engraving process, responding
to commands from your computer’s engraving software.
T. Honeycomb Workbed—The workbed supports your material up to 0.59 inches (15 mm) thick while
allowing effective airflow. It can also be removed to fit thicker materials or to use the rotary axes.
U. Start Button and Laser Status—This button begins, pauses, and resets the engraving process. The ring
around it changes color to indicate your engraver’s current status:
Status Color Meaning
Blue Active Laser
Green Ready to Work
Red Error or Malfunction
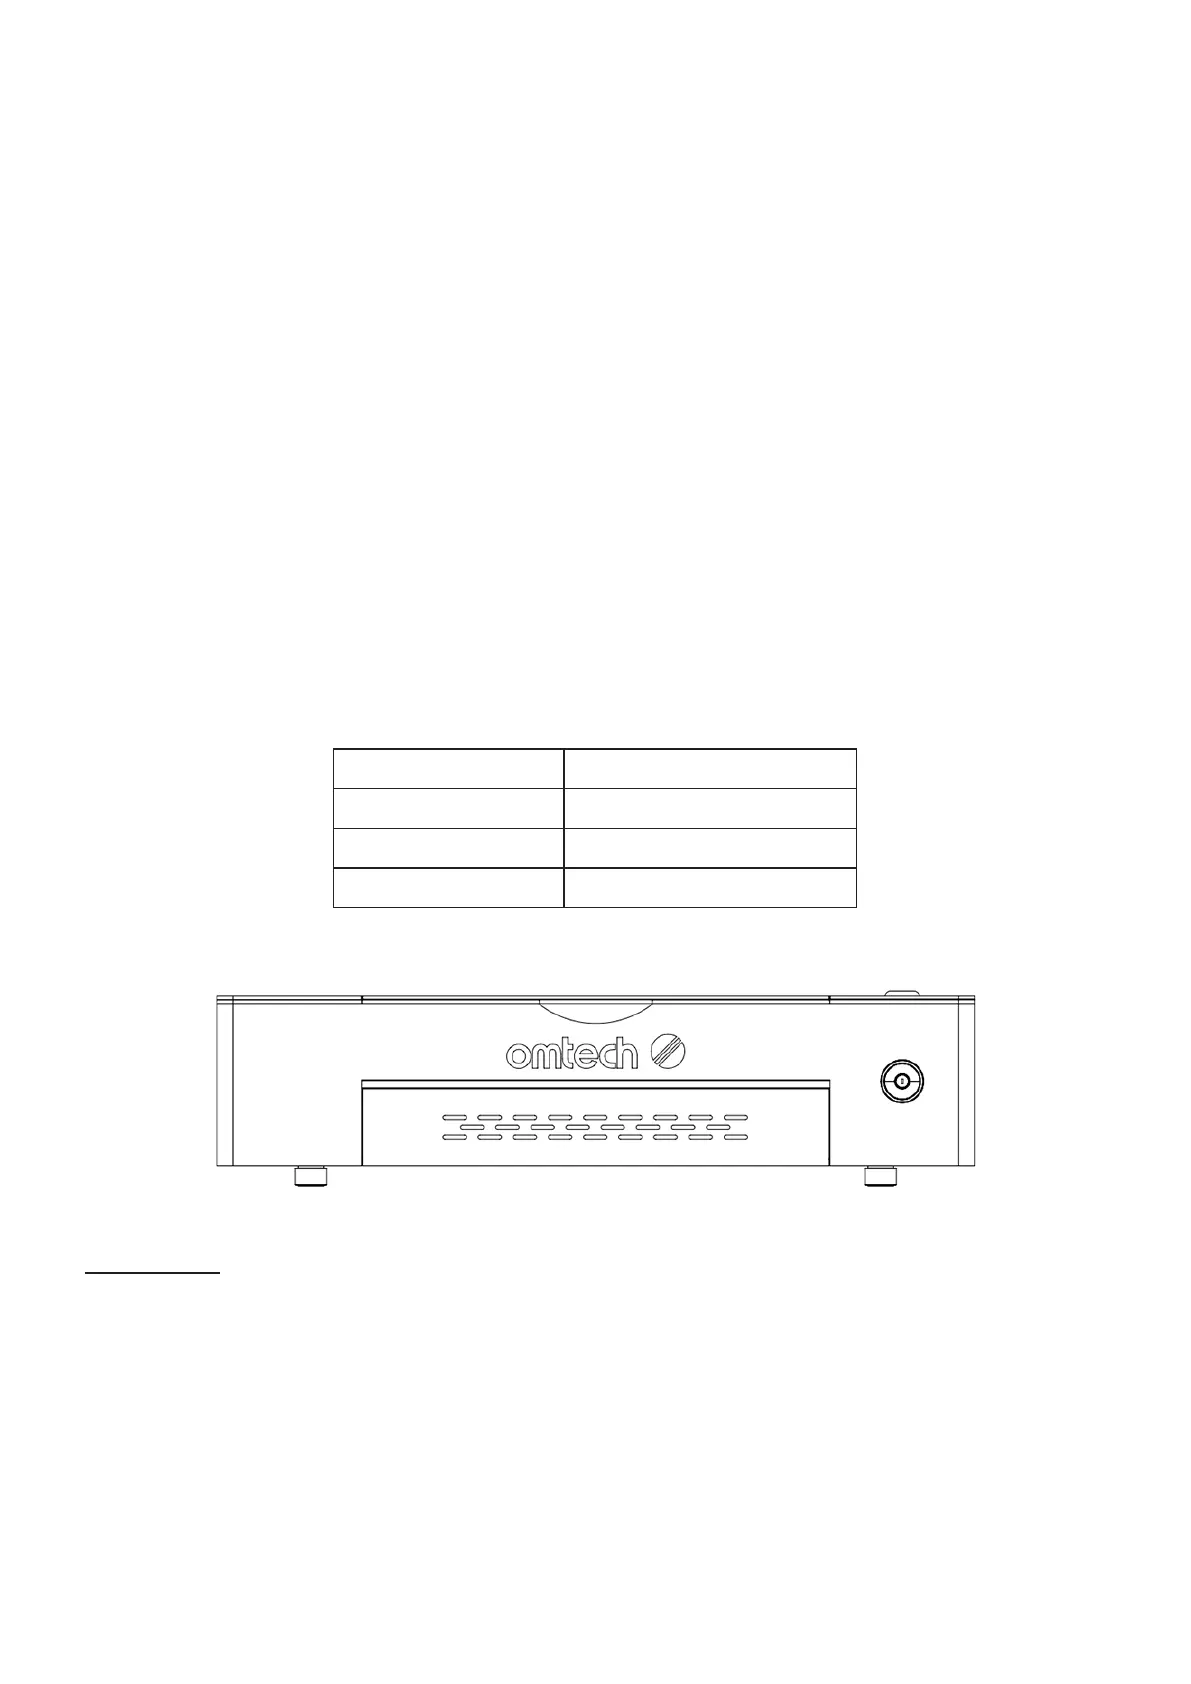
Front View
A. Cover—This acrylic window shields you and others from the laser and its reflections, allowing monitoring
of the engraving process. However, you should never stare continuously at the laser during operation,
even through the window.
B. Debris Tray—This tray is easily removable to clean debris after use and to install or remove the honeycomb
workbed. It can also be left open to function as the front pass-through.
C. Laser Key—This lock turns the laser power supply on and off, helping ensure only approved operators
can use your laser.
D. Legs—These padded legs help avoid any damage to your table or counter.
AAAA
CCCC
BBBB
DDDD