24
Step 8. Customize your design’s contrast and engraving depth by adjusting the speed, power, and other parameters
in your engraving software.
If you see the power setting in milliamperes, use the following conversion chart to fi nd the appropriate
power setting:
It is NOT recommended to use the laser tube at full capacity, especially for extended periods. The
recommended maximum power setting is 70%, as prolonged use above that amount will shorten your laser’s
service life. To increase the engraving depth, increase the amount of energy per unit area by increasing
laser power, increasing loop count, or slowing down the speed parameter. Engraving too deep, however,
reduces image quality, especially for coated materials.
When working with new materials, remember you should always start on the low end of likely settings. If
the eff ect is not yet strong enough, you can always rerun the design loop several times or rerun it with more
powerful settings until you create the desired eff ect. Avoid using high power settings at very low speeds
when engraving highly fl ammable materials.
Resolution should usually be set to 500 dots per inch. Reducing your image resolution can be helpful in
some cases, reducing fl aming and increasing the energy of the pulse in a way that improves the quality of
the resultant image in some materials such as some plastics.
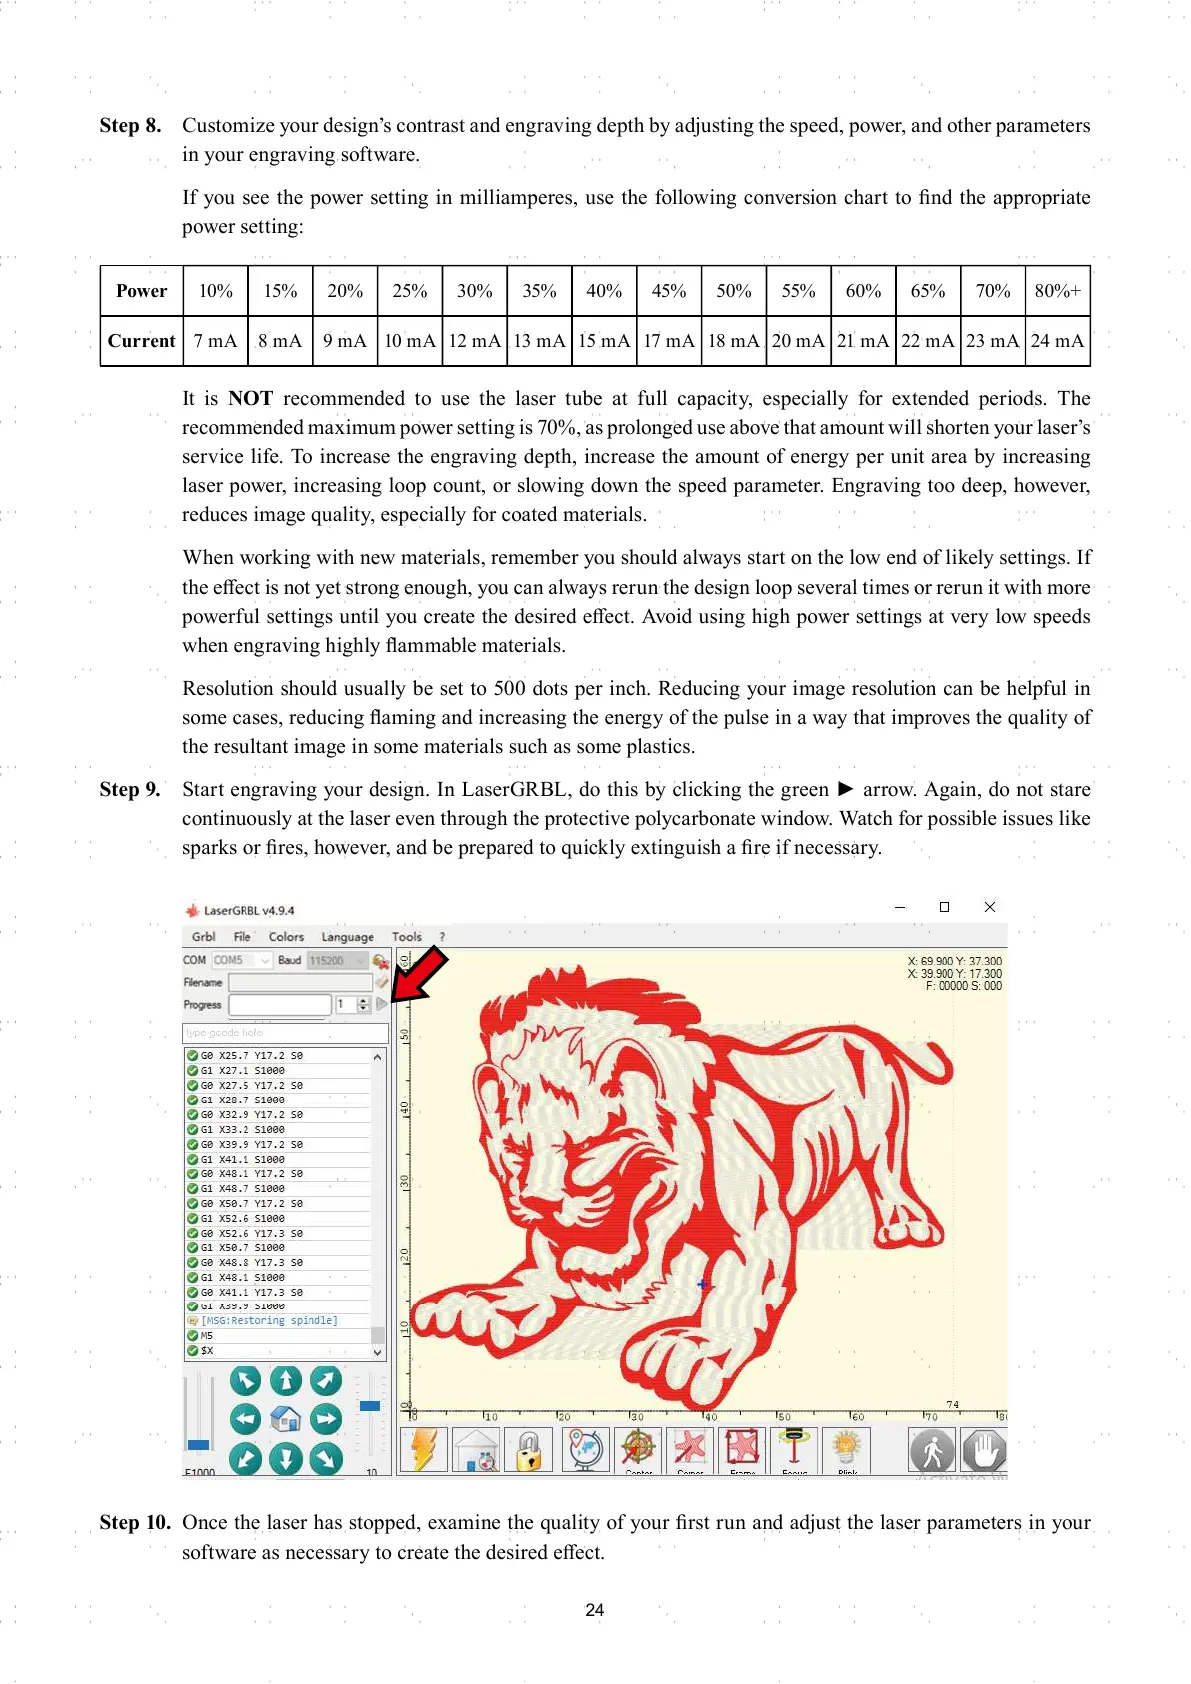
Step 9. Start engraving your design. In LaserGRBL, do this by clicking the green ► arrow. Again, do not stare
continuously at the laser even through the protective polycarbonate window. Watch for possible issues like
sparks or fi res, however, and be prepared to quickly extinguish a fi re if necessary.
Step 10. Once the laser has stopped, examine the quality of your fi rst run and adjust the laser parameters in your
software as necessary to create the desired eff ect.
Power 10% 15% 20% 25% 30% 35% 40% 45% 50% 55% 60% 65% 70% 80%+
Current 7 mA 8 mA 9 mA 10 mA 12 mA 13 mA 15 mA 17 mA 18 mA 20 mA 21 mA 22 mA 23 mA 24 mA