EasyManuals Logo

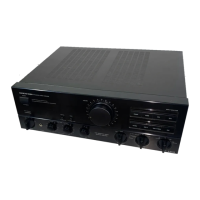
Onkyo A-8500 Instruction Manual

Onkyo A-8500
8 pages
To Next Page IconTo Next Page
To Previous Page IconTo Previous Page
Page #7 background imageLoading...
Page #7 background image
NOTES:
®@
Rotate
the
volume
control
knob
slowly
to
find
the
optimum
volume
setting.
@
Please
refer
to
pages
4
and
5,
“Front
panel
facilities,”
and
adjust
the
sound
quality
to
your
own
satisfaction,
using
the
tone
contro!
knobs.
If
necessary,
you
can
also
use
the
balance
control
knob
[17
and
mode
selector
switch
[4]
for
fine
tuning.
About
the
Variable
Tone
Boosting
System
This
unit
is
designed
to
gradually
reduce
the
effect
of
the
tone
controls
(bass
and
treble)
when
the
volume
exceeds
a
certain
level.
The
variable
boosting
system
gradually
reduces
the
boosting
effect
of
the
bass
[9]
and
treble
controls
when
one
or
both
of
these
controls
is
turned
beyond
(to
the
right
of)
the
center
defeat
position
and
the
volume
control
[5]
is
turned
beyond
the
center
position.
When
the
volume
is
turned
all
the
way
up,
the
frequency
response
will
be
flat
again.
Volume
set-
tings
below
the
center
position
have
no
effect
on
the
tone
controls.
Also,
bass
and
treble
control
settings
below
(to
the
left
of)
the
center
defeat
position
are
not
altered
by
the
volume
|
level.
|
Using
Tape
Decks
Playback:
Three
tape
decks
can
be
connected
to
this
unit
at
once.
If
the
deck
connected
to
the
DAT
jack
is
to
be
heard,
press
the
DAT
input
selector
button
[6].
To
listen
to
the
deck
connected
to
the
TAPE-1/VIDEO
jack,
press
the
TAPE-1/VIDEO
input
selector
button
[6]
.
Inthe
same
way,
press
the
TAPE-2
input
selector
button
[6]
to
listen
to
the
deck
connected
to
the
TAPE-2
jack.
|
som
|
ee
ine
aa
ce
Se
eS
es)
2
aoatl
as
desired
Recording
on
the
Tape
Deck
or
DAT
from
the
Program
Source
(PHONO,
TUNER,
CD-1
or
CD-2).
1.
Setthe
SOURCE
position
of
the
recording
source
selector
switch
.
2.
Select
the
desired
recording
source
with
the
input
selector
buttons
[6]
(PHONO,
TUNER,
CD-1
or
CD-2).
OAT»
TAPE-382
SOURCE
TAPEDAT
A
TAPE2
OUBBING
REC
SELECTOR
:
as
desired
3.
Begin
tape
deck
or
DAT
recording
operations.
4.
Begin
program
source
performance.
Be
careful
not
to
change
the
input
selector
button
while
re-
cording.
@
lf
you
are
using
a
three-head
tape
deck,
setting
the
input
selector
button
to
DAT,
TAPE-1/VIDEO
or
TAPE-2
enables
you
to
monitor
the
recording
conditions.
Tape-to-Tape
Duplicating
When
two
or
three
tape
decks
are
connected
to
this
unit
at
the
same
time,
a
tape
can
be
copied
from
one.deck
to
the
other.
1.
To
copy
a
pre-recorded
tape
from
tape
deck
1
(connected
to
the
rear
panel
DAT
jacks)
to
tape
deck
2
(connected
to
the
TAPE-1/VIDEO
jacks)
or
tape
deck
3
(connected
to
the
TAPE-2).
Place
the
recording
source
selector
switch[13]
in
the
DAT
>
TAPE-1
&
2
position
and
put
tape
deck
1
in
the
playback
mode
and
tape
deck
2
or
3
in
the
recording
mode.
OFF
DAT=
TAPE182
SOURCE
REC
SELECTOR
lf
tape
deck
2
or
3
is
a
3-head
deck,
the
just-recorded
signal
can
be
monitored
by
depressing
the
TAPE-1/VIDEO
or
TAPE-2
input
selector
button
[6].
To
monitor
the
signal
from
tape
deck
1
before
it
has
been
recorded,
press
the
DAT
input
selector
button
[6]
.
Press
one
of
the
other
input
selector
buttons
to
listen
to
the
CD
player,
turntable,
tuner
or
auxiliary
component
while
dubbing
is
taking
place.
2.
To
copy
from
tape
deck
2
(connected
to
the
TAPE-1/VIDEO
jack)
to
tape
deck
1
(connected
to
the
DAT
jack)
and
tape
deck
3
(connected
to
the
TAPE-2
jack).
Place
the
recording
source
selector
switch
[13]
in
the
TAPE-1
®
DAT
&
TAPE-2
position
and
put
tape
deck
1
or
3
in
the
recording
mode
and
tape
deck 2
in
the
playback
mode.
OFF
DAT
=
TAPE-182
SOURCE
TAPEA*DAT
BTAPE2,
DUBSING
REC
SELECTOR
If
tape
deck
1
or
3
is
a
3-head
deck,
the
just-recorded
signal
can
be
monitored
by
pressing
the
DAT
or
TAPE-2
input
selector
button
[6].
Press
one
of
the
other
input
selector
buttons
to
listen
to
the
CD
player,
turntable,
tuner
or
auxiliary
component
while
dubbing
is
taking
place.
@
Dubbing
cannot
be
done
from
tape
deck
2
(connected
to
the
TAPE-2
jacks)
to
tape
decks
1
or
3
(connected
to
the
DAT
or
TAPE-1/VIDEO
jacks).
Using
a
Mixing
Console
or
Graphic
Equalizer
A
mixing
console
or
graphic
equalizer
can
be
connected
to
the
TAPE-2
jack
as
shown
in
the
diagram.
The
input
selector
is
then
set
to
the
TAPE-2
setting.
AUDIO
MIXER
or
A-8700/8500
GRAPHIC
EQUALIZER
INPUT
OUTPUT
To
Equalize
an
Audio
Source
for
Playback
1.
Select
the
desired
listening
source
with
the
input
selector
button
{6}
(PHONO,
TUNER,
CD-1
or
CD-2)
and
set
the
recording
source
selector
switch
to
the
SOURCE
position.
When
using
an
equalizer
on
the
DAT
signal,
set
the
recording
source
selector
swith
to
DAT
®
TAPE-1
&
2.
When
using
an
equalizer
with
the
deck
connected
to
the
TAPE-1/VIDEO
jack,
set
it
to
TAPE-1
®
DAT
&
TAPE-2.
.
Press
the
TAPE-2
input
selector
button
[6].
.
Begin
performance.
When
the
source
direct
switch
is
set
at
TONE,
tone
control,
muting,
mode,
and
balance
functions
can
all
be
adjusted
from
this
unit.
NOTE:
When
recording
something
that
has
been
sent
through
an
equalizer,
use
an
equalizer
which
is
equipped
with
equalizing
ewn
recording
capacity.

Other manuals for Onkyo A-8500

Questions and Answers:

Question and Answer IconNeed help?

Do you have a question about the Onkyo A-8500 and is the answer not in the manual?

Onkyo A-8500 Specifications

General IconGeneral
BrandOnkyo
ModelA-8500
CategoryAmplifier
LanguageEnglish

Related product manuals